

How to Create an AI Short Film

To create an AI short film, write a compact script, convert it into a storyboard and shot list, lock the character and visual rules, generate each scene, add sound, then edit and export the approved shots as one film. Treat every generated clip as raw footage rather than the finished movie.
The walkthrough uses Astorie as the working canvas because it keeps references, prompts, settings, and outputs together. A real Kling 3.0 test demonstrates one scene-generation step, while the complete workflow below explains how that shot fits into a multi-scene short film.
How to Create an AI Short Film Step by Step
Write the script and break it into a practical shot list.
Turn the shot list into a storyboard with framing, action, and transition notes.
Create a character and continuity guide for faces, wardrobe, locations, props, and lighting.
Generate each scene as a short, reviewable clip and keep only the approved takes.
Add voice, music, ambience, and sound effects after the picture sequence is stable.
Edit the shots into one timeline, check continuity and pacing, then export the delivery file.
Write the Script and Shot List
Start with a premise that can be understood in one sentence, then write only the action and dialogue the finished film needs. A short film still requires cause and effect: establish the situation, introduce a change, and show the consequence. Defining that change before generation prevents a collection of attractive clips from becoming a story with no ending.
Story beat | Question to answer | Test example |
Setup | Who is present and where? | A female engineer monitors a steam engine. |
Change | What interrupts the normal situation? | The pressure rises and she notices the problem. |
Resolution | What action completes the beat? | She pulls the lever and the machinery slows. |
Convert the script into a shot list before opening a video model. Give every shot one purpose, one main action, an estimated duration, and a transition. If the camera position, location, time, or story purpose changes, create a new shot instead of overloading one prompt.
Turn the Script into a Storyboard
A storyboard is the visual plan between the script and generation. It can be a set of simple sketches, reference frames, or generated stills; polish matters less than clarity. Use it to decide composition and screen direction before spending credits on motion. Number the panels so every prompt, output, audio cue, and edit note can be traced back to the same shot.
Panel | Framing and action | Continuity and transition |
01 — Setup | Wide shot: engineer and machine share the frame. | Establish wardrobe, workshop, warm copper light, and lever position. |
02 — Problem | Medium shot: gauge rises and the engineer reacts. | Keep her on the same screen side; match the gauge and background machinery. |
03 — Action | Closer shot: hand reaches for the brass lever. | Carry the same sleeve, lever shape, light direction, and movement direction. |
04 — Resolution | Medium close-up: machine slows and she relaxes. | Reduce steam gradually and end on a stable expression for the final cut. |
Export or save the storyboard next to the project. When a generated take changes the planned composition, update the storyboard or reject the take; do not let untracked changes accumulate across the sequence.
Keep Characters Consistent Across Shots
Character consistency is a separate production task, not a sentence added at the end of a prompt. Create a compact continuity sheet before generating the first scene and copy the approved descriptions into every related shot. Use the same reference image or approved character frame whenever the selected model and mode support it.
Continuity field | What to lock | How to check between shots |
Face and hair | Age range, face shape, skin tone, eye color, hairstyle, and defining details. | Compare front and three-quarter views; reject changes in facial structure or hair length. |
Clothing | Garment type, color, material, layers, fasteners, and accessories. | Check sleeves, collars, belts, goggles, and stains at each cut. |
Setting | Room layout, doors, windows, machine placement, and time of day. | Match the horizon, background geometry, and the character’s screen position. |
Props | Shape, scale, color, condition, and which hand uses the object. | Confirm the lever, gauge, and tools do not move or transform without story reason. |
Lighting | Key-light direction, color temperature, contrast, and practical lights. | Compare skin highlights, cast shadows, and the warmth of the workshop. |
Name approved assets consistently, such as Character_A_reference, Workshop_master, and Lever_closeup. If one shot drifts, regenerate that shot from the locked references instead of rewriting every neighboring scene to match the mistake.
Generate Each Scene
Step 1 Choose the aspect ratio
Set the project ratio before generation. Use 16:9 for a landscape film or YouTube delivery and 9:16 for a vertical story. Changing the ratio later can remove important framing or produce mismatched shots.
Step 2 Decide between text and a reference image
Use text-to-video when the model can invent the character and set. Use image-to-video when the opening composition or character appearance must come from an existing image. A start image can improve visual anchoring, but the selected mode must support that input.
Step 3 Add a Video node and choose a model
Add a Video node, choose a current model from Astorie’s video catalog, and check the controls that appear for that model. Astorie currently lists Kling 3.0 alongside other video models, but available inputs and settings vary by model and mode. Do not assume that a control shown for one model applies to another.
Step 4 Enter a prompt and generation settings
Our successful test used Kling 3.0 Pro in Single mode, with a 16:9 ratio and a 10-second duration. The interface estimated 250 credits. The prompt described one continuous action rather than several cuts.
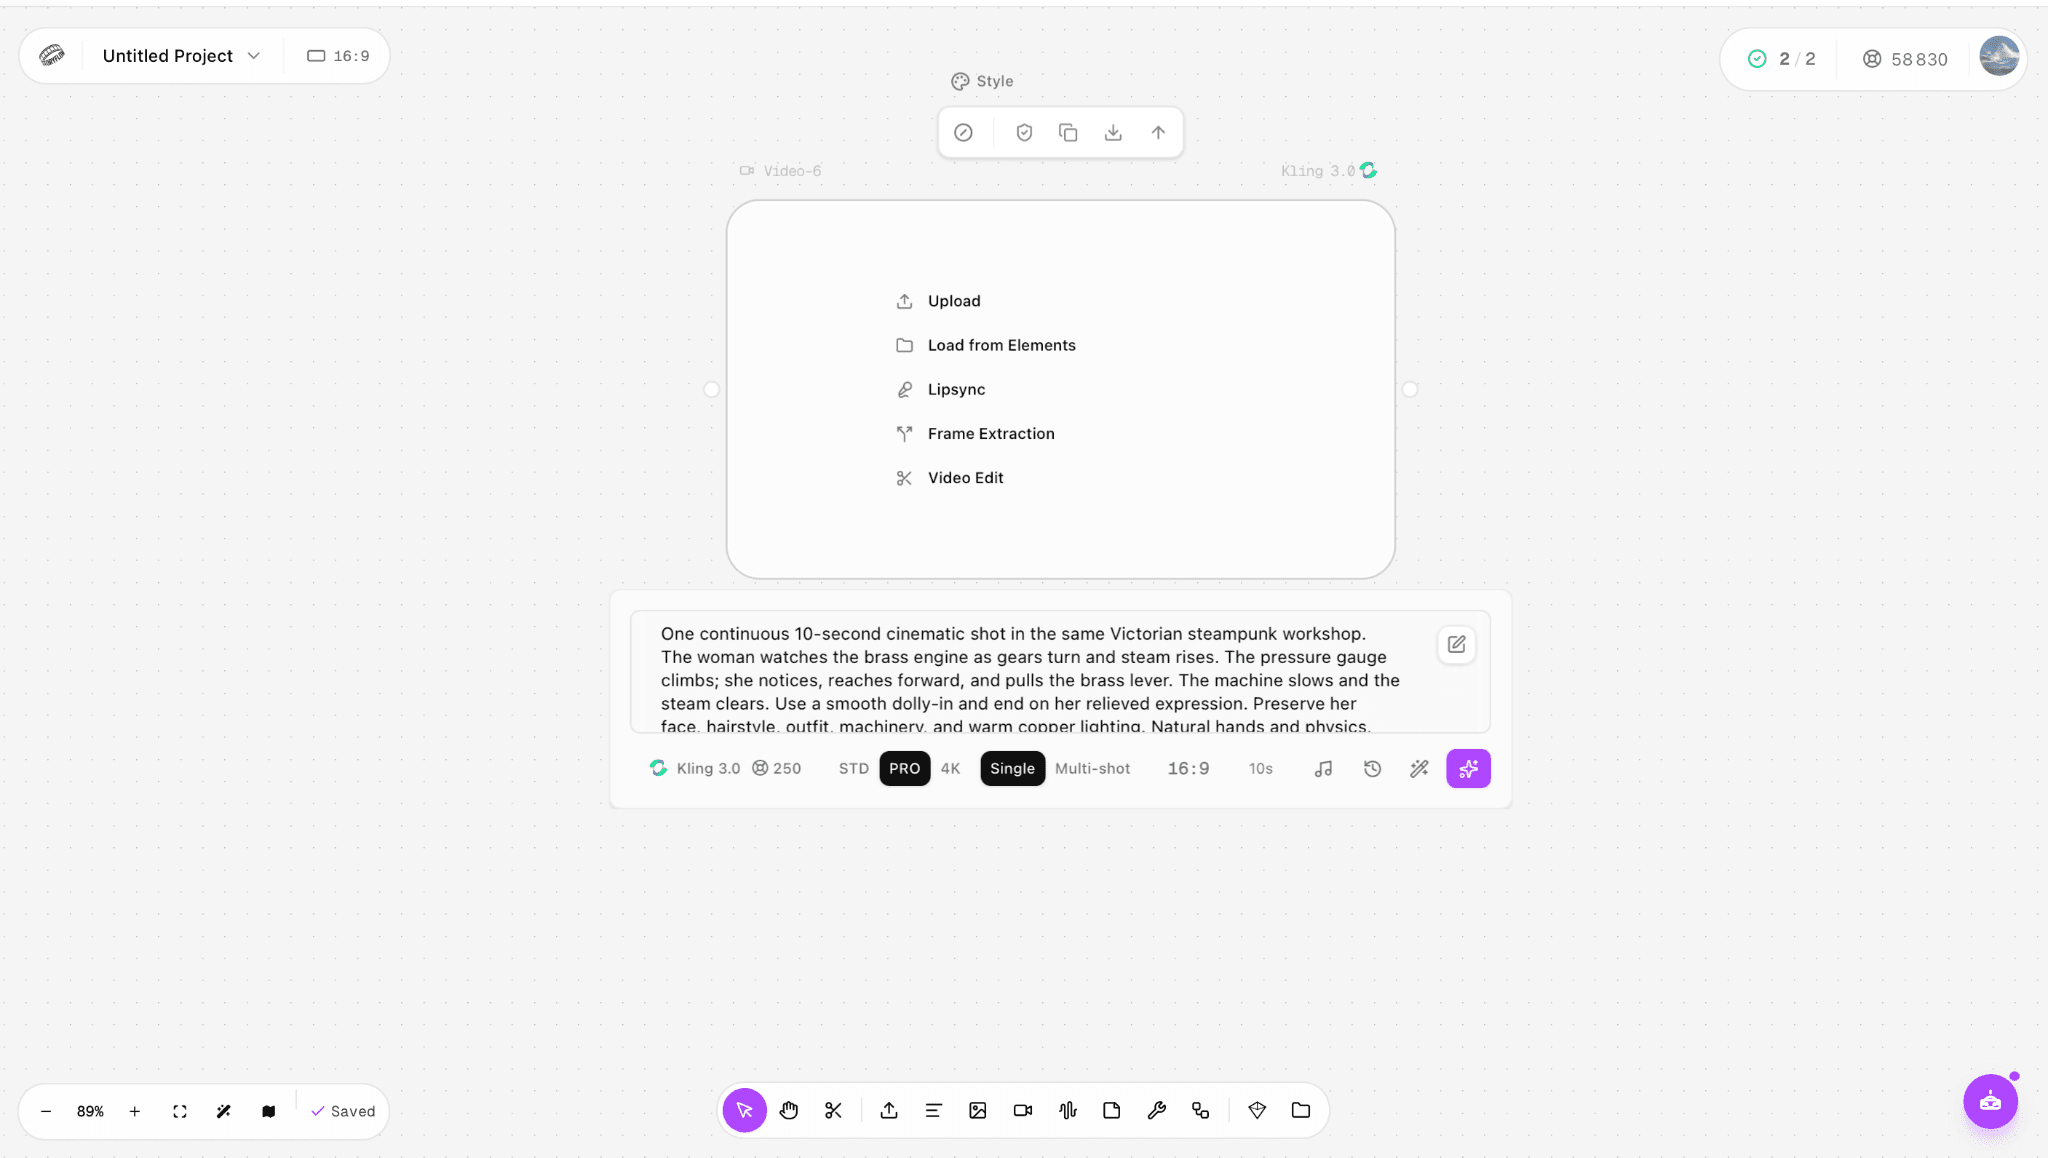
Figure 1. Kling 3.0 setup for the successful 10-second single-shot test, including the prompt, Pro tier, Single mode, 16:9 ratio, duration, and estimated credits.
A prompt you can adapt
One continuous 10-second cinematic shot in the same Victorian steampunk workshop. The woman watches the brass engine as gears turn and steam rises. The pressure gauge climbs; she notices, reaches forward, and pulls the brass lever. The machine slows and the steam clears. Use a smooth dolly-in and end on her relieved expression. Preserve her face, hairstyle, outfit, machinery, and warm copper lighting. Natural hands and physics, stable background, no cuts, text, or logo.
The prompt has five useful controls: a fixed duration, a single location, a visible action, one camera move, and explicit continuity constraints. For a longer project, keep those controls but write one prompt per shot.
Step 5 Generate and watch the entire clip
Watch from the first frame through the final frame. A thumbnail can hide hand errors, stalled action, sudden wardrobe changes, or motion that never reaches the planned resolution.
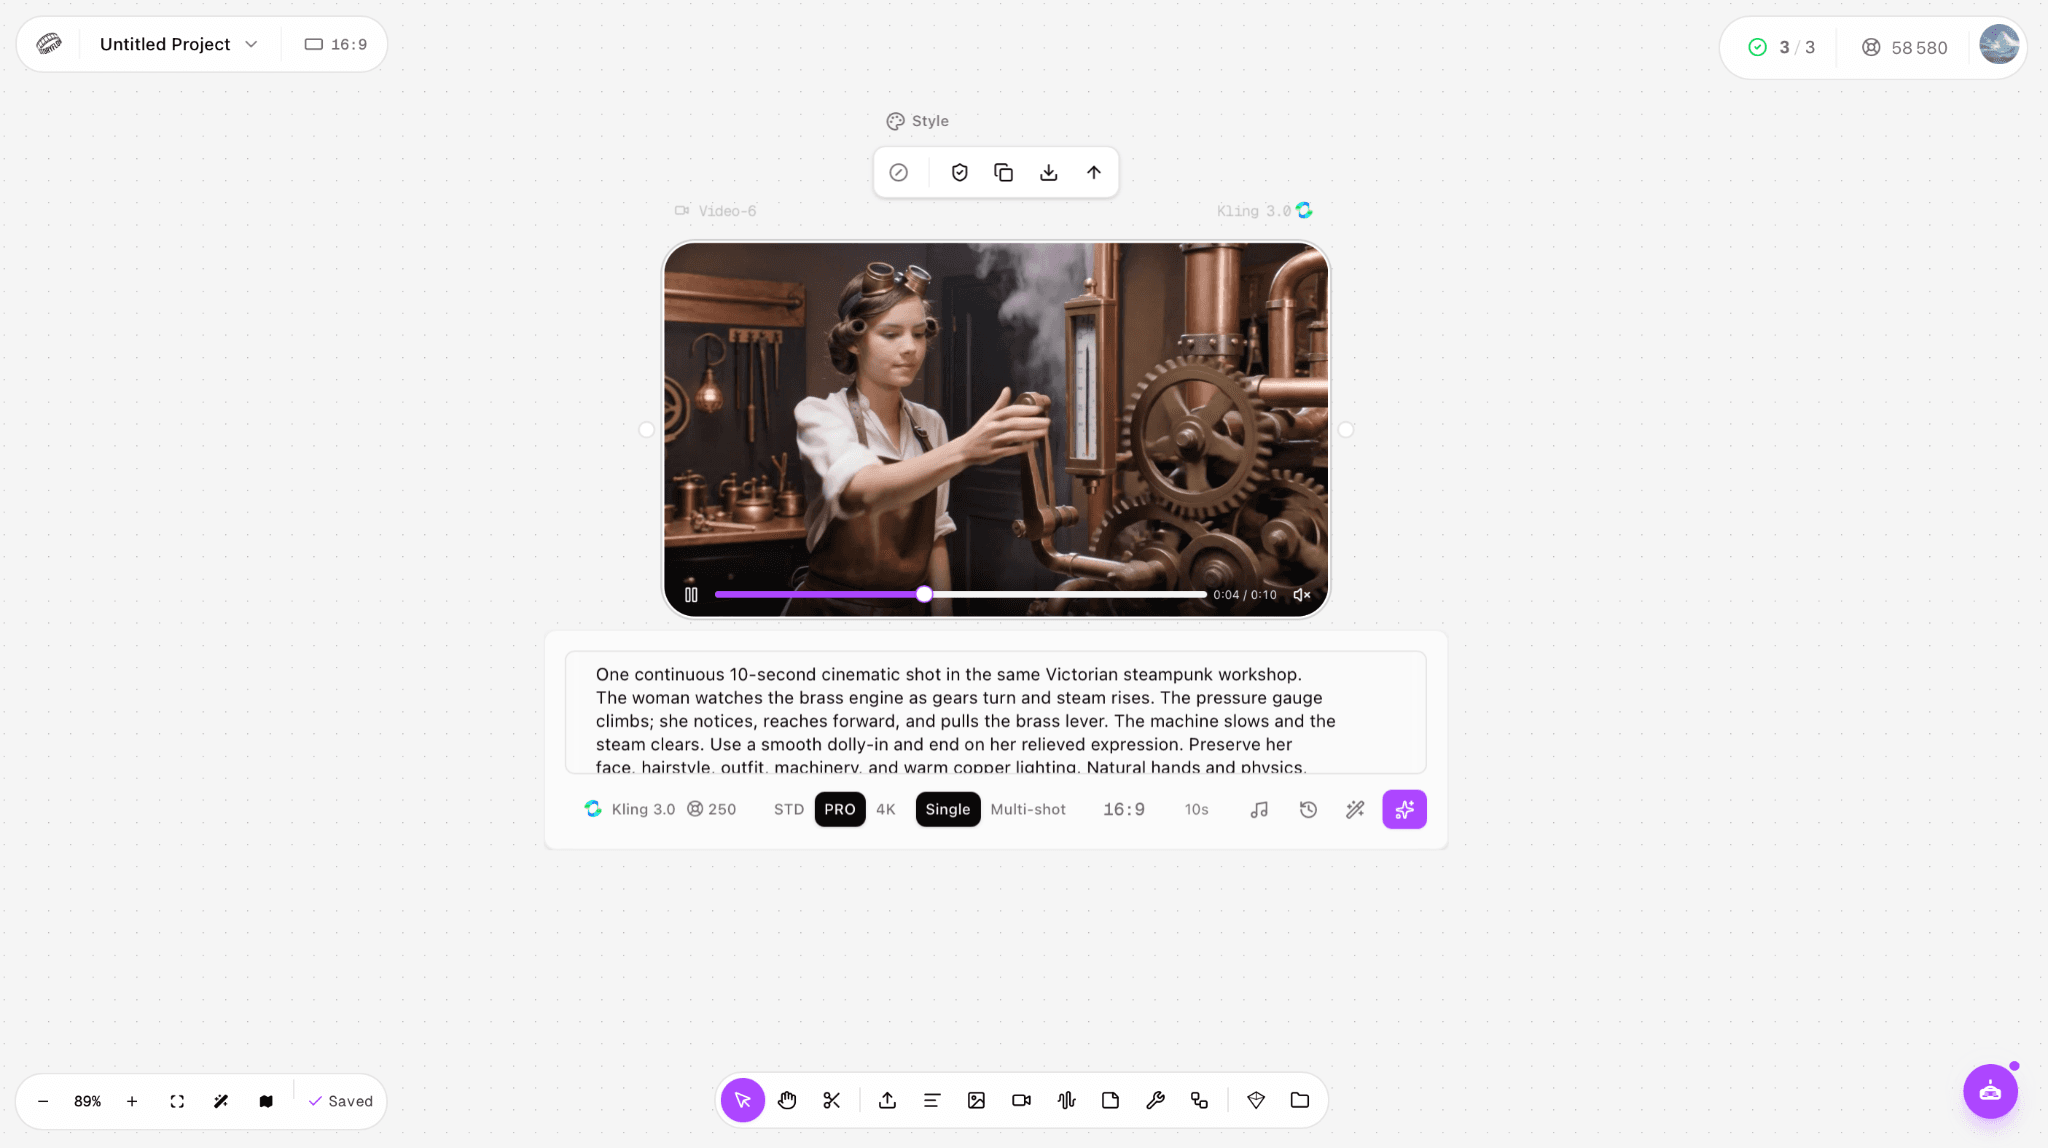
Figure 2. The generated clip at about four seconds, when the character reaches for the control lever.
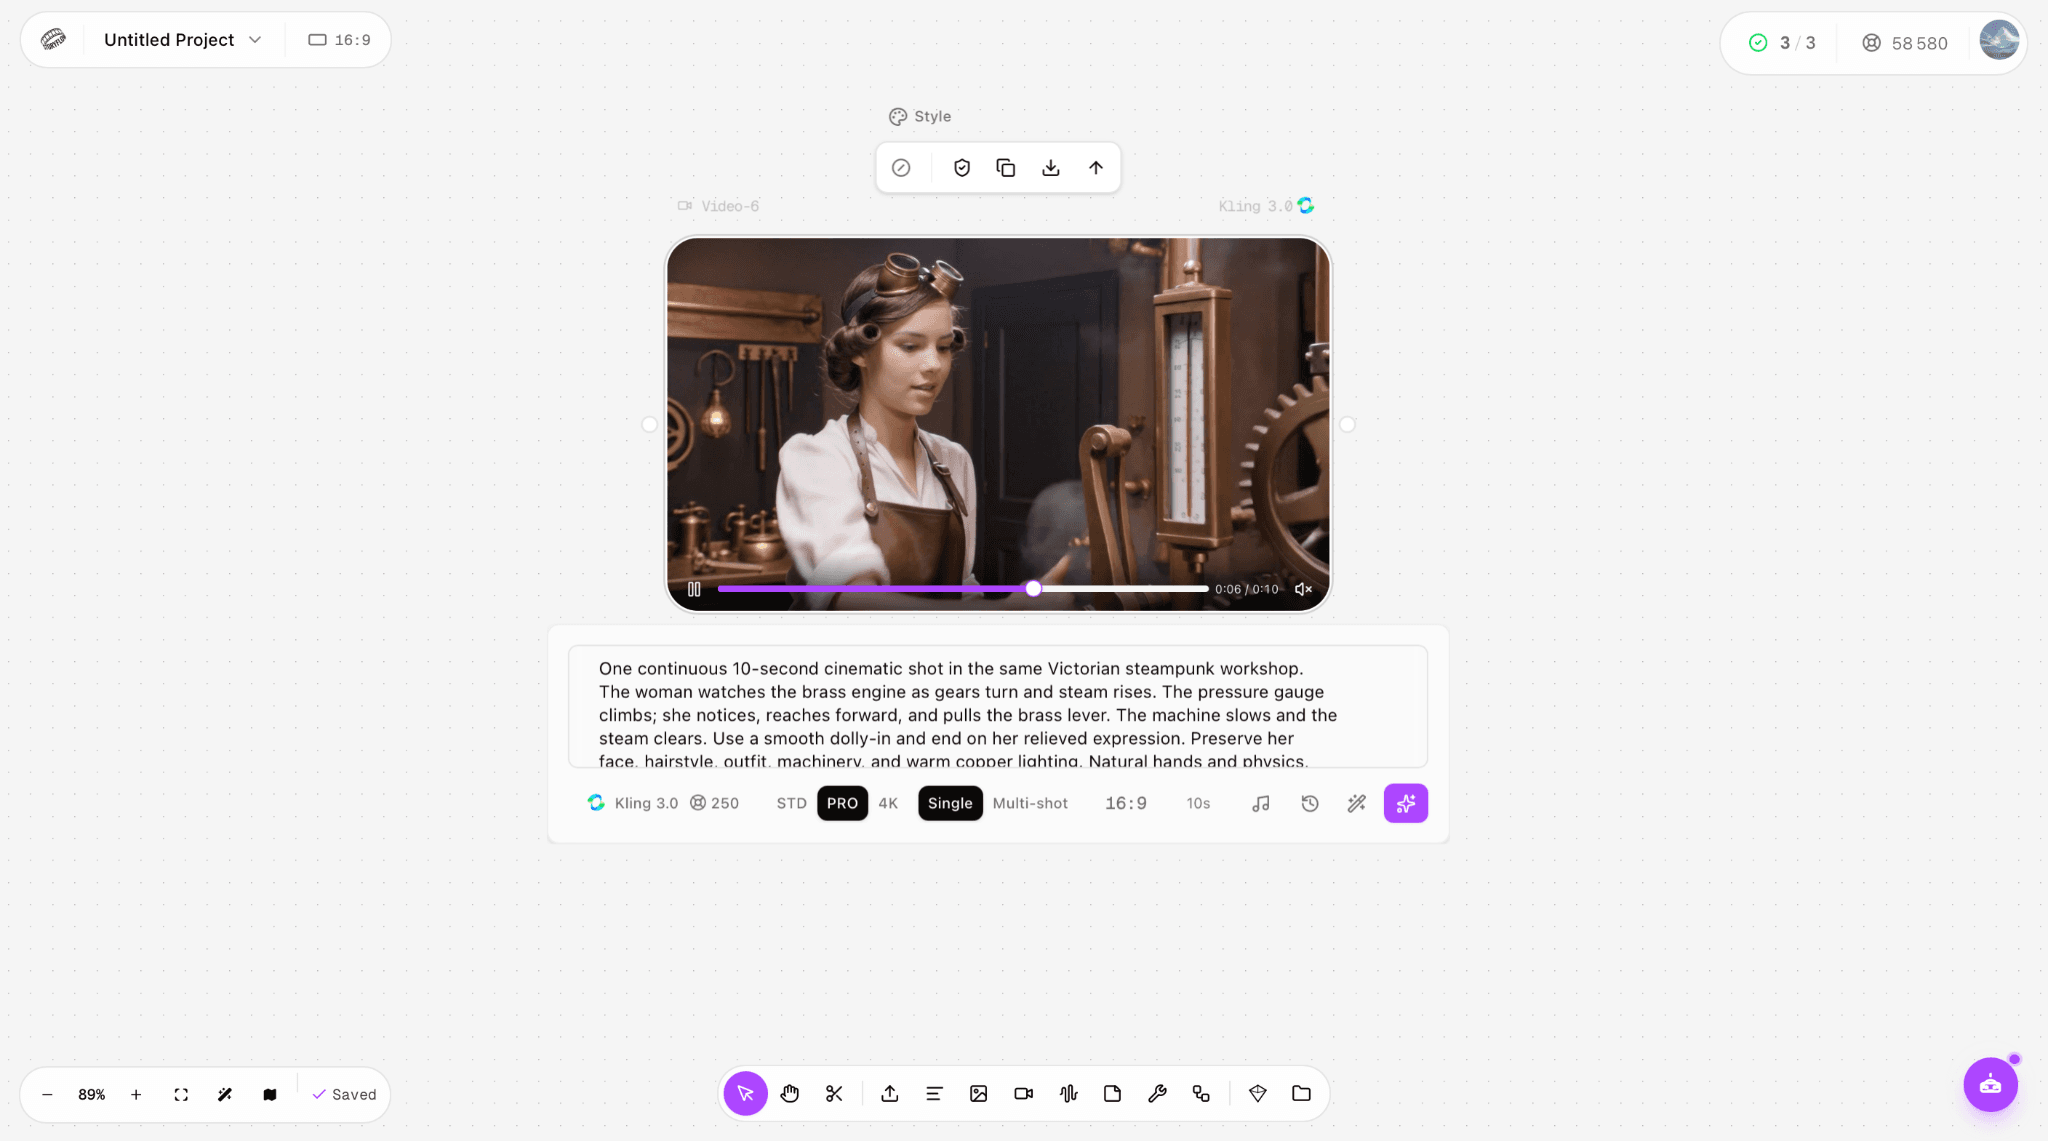
Figure 3. A later frame from the same generation, used to check character and environment continuity across the shot.
Step 6 Save the approved take and test details
Download the original file, label it with its shot number and take, and record its actual properties. Our exported MP4 was 1280 × 720, 24 fps, and 10.04 seconds. The credit balance fell from 58,830 to 58,580, matching the 250-credit estimate shown before generation. These values describe this test only; model costs and output settings can change.
What Happened in Our Kling 3 Test
Item | Observed value |
Host and model | Astorie with Kling 3.0 Pro |
Mode | Single text-to-video |
Requested output | 16:9 and 10 seconds |
Displayed generation cost | 250 credits |
Actual credit change | 250 credits |
Downloaded file | 1280 × 720, 24 fps, 10.04 seconds |
Result | Continuous shot with visible steam, machine motion, and a completed reach toward the lever |
In our test, the clip maintained one character and one workshop throughout the shot. The steam and mechanical movement remained active, and the lever action was readable. The generated woman did not match the earlier source image because the successful run was text-to-video rather than image-to-video. This is an important workflow distinction, not a general judgment about Kling 3.0.
Choose Single or Multi-Shot Generation
Mode | Use it when | Important constraint from our test |
Single | You need one continuous shot or want to use a start image. | Keep the action achievable within one clip. |
Multi-shot | You want the model to divide one generation into several timed scenes. | A connected start or end image triggered an unsupported-input error in our test. |
When we connected a start image while Multi-shot was enabled, the interface returned: “image and image_tail are not supported when multi_shot=true.” Disconnecting the image removes that input conflict. We also received a 512-character limit error for a Multi-shot scene prompt, so keep each scene prompt concise.
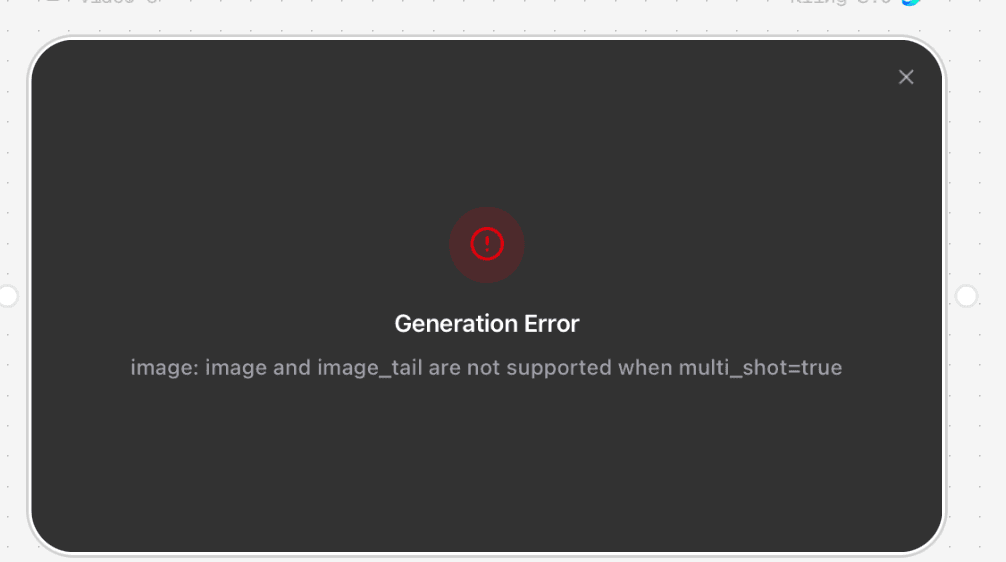
Figure 4. The generation error shown when a start image was connected while Multi-shot was enabled.
Assemble Multiple Shots
Build the film as a sequence of short, reviewable shots. Keep the storyboard and continuity sheet beside the generation nodes, create alternate takes on separate branches, and move only approved outputs into the assembly timeline. Single-shot generation gives you clearer control over replacements; a model’s Multi-shot mode can create internal cuts, but those cuts may be harder to revise independently.
Place shots in story order and trim each one to the action the audience needs to see.
Use an establishing shot, a closer action shot, and a reaction or resolution shot when the story beat needs multiple angles.
Match screen direction and carry one prop or environmental detail across each cut.
Use the final frame of an approved shot as a reference only when the next model and mode support that input.
Regenerate a weak shot instead of hiding a continuity break with excessive transitions.
Add Voice, Music, and Sound Design
Lock the picture sequence before producing final audio so timing changes do not force repeated voice and music edits. Record or generate dialogue and narration line by line, then place ambience, sound effects, and music on separate tracks. The steampunk example could use a low workshop ambience, synchronized gear and steam effects, a brief pressure alarm, and a music cue that resolves when the lever is pulled.
Voice: choose a consistent speaker, pronunciation, pace, and emotional direction; secure consent for any cloned voice.
Sound effects: synchronize visible actions such as gears, steam, alarms, footsteps, and lever movement.
Music: use a licensed or clearly permitted track and reduce its level under speech and important effects.
Mix: remove clipping, keep dialogue intelligible, add short fades, and check the film on headphones and speakers.
Captions: create timed captions when dialogue or narration carries essential information.
Edit and Export the Final Short Film
Create a master timeline at the delivery frame rate, import the approved takes, and arrange them according to the storyboard. Trim dead frames, use straight cuts unless a transition serves the story, and apply color adjustments only after the sequence is stable. Add titles and credits as editable overlays rather than asking a video model to render exact typography.
Before export, watch the complete film once for story and pacing, once for visual continuity, and once with attention only to audio. Export a high-quality master and a separate delivery copy for the target platform. Confirm the final aspect ratio, resolution, frame rate, duration, codec, audio, captions, watermark status, and file size from the exported file—not only from the generation controls.
How to Check an AI Short Film Before Export
Story: the setup, change, and resolution are visible without an explanation.
Character: face, hair, wardrobe, and body proportions do not drift within the shot.
Action: hands contact the intended object and the action reaches a clear endpoint.
Environment: doors, gauges, machinery, and background lines remain stable.
Camera: the requested move is smooth and does not create an accidental zoom or cut.
Common Problems and Fixes
Problem | Likely cause | Fix |
Generation will not start | The selected mode does not support the connected input. | Remove the unsupported input or switch to a compatible mode. |
Prompt limit error | A scene prompt exceeds the mode’s character limit. | Shorten the scene to subject, action, camera, setting, and continuity. |
Character changes | Prompts use different identity or wardrobe descriptions. | Repeat the same continuity language and use a supported reference image. |
Hands or props distort | The action is too complex or hidden. | Simplify the gesture, keep the prop visible, and reduce simultaneous movement. |
The ending feels unfinished | The prompt describes setup but no final state. | State the visible result that should appear in the last seconds. |
Frequently Asked Questions
Can I create an AI short film from one prompt
Yes, for a very short scene. One prompt works best when it contains one character, one location, one camera move, and one completed action. A multi-scene film is easier to revise when each shot has its own prompt and output.
Should I use text to video or image to video
Choose text-to-video when the model may invent the look. Choose image-to-video when the opening composition or character appearance needs a visual anchor. Confirm that the selected model and mode accept the reference input before generating.
How much did this AI short film test cost
The Kling 3.0 Pro test shown here cost 250 Astorie credits for a requested 10-second, 16:9 generation. This is a single observed cost, not a fixed price for every Kling generation.
Why does the exported duration differ slightly from the setting
Video containers and frame counts can produce a small difference between the interface duration and the file duration. Check the downloaded file instead of relying only on the rounded value displayed in the generation controls.
Ready to try it on the canvas?
Open Astorie and fan your prompt across every frontier model in one workflow.