

How to Sync Lips to Audio With AI

To sync lips to audio with AI, provide a clean face video and a separate speech track, run both through a lip-sync model, and review the mouth timing, identity, and final duration before export.
In the Astorie Canvas interface we tested, Kling LipSync A2V required video plus audio. A still portrait could not be connected as the final video input, so a portrait-first project needed one additional step: generate a short, silent base video before lip syncing it to the speech track.
How to Sync Lips to Audio in Five Steps
The dependable current workflow is portrait or footage, clean speech, base video if required, Kling LipSync A2V, and a quality-control pass. Keep the shot short and front-facing until you know the input pair works.
Step 1 Prepare a Front-Facing Portrait or Video
Use one clearly visible speaker facing the camera. Choose even lighting, a neutral or closed mouth at the start, no hands crossing the face, and enough resolution around the lips and jaw. If you already have a clean talking-head video, skip the base-video generation in Step 3.
For this test, we generated a head-and-shoulders presenter with GPT Image 2.5 Flare at 16:9. The first result took about 30 seconds and used 15 credits.
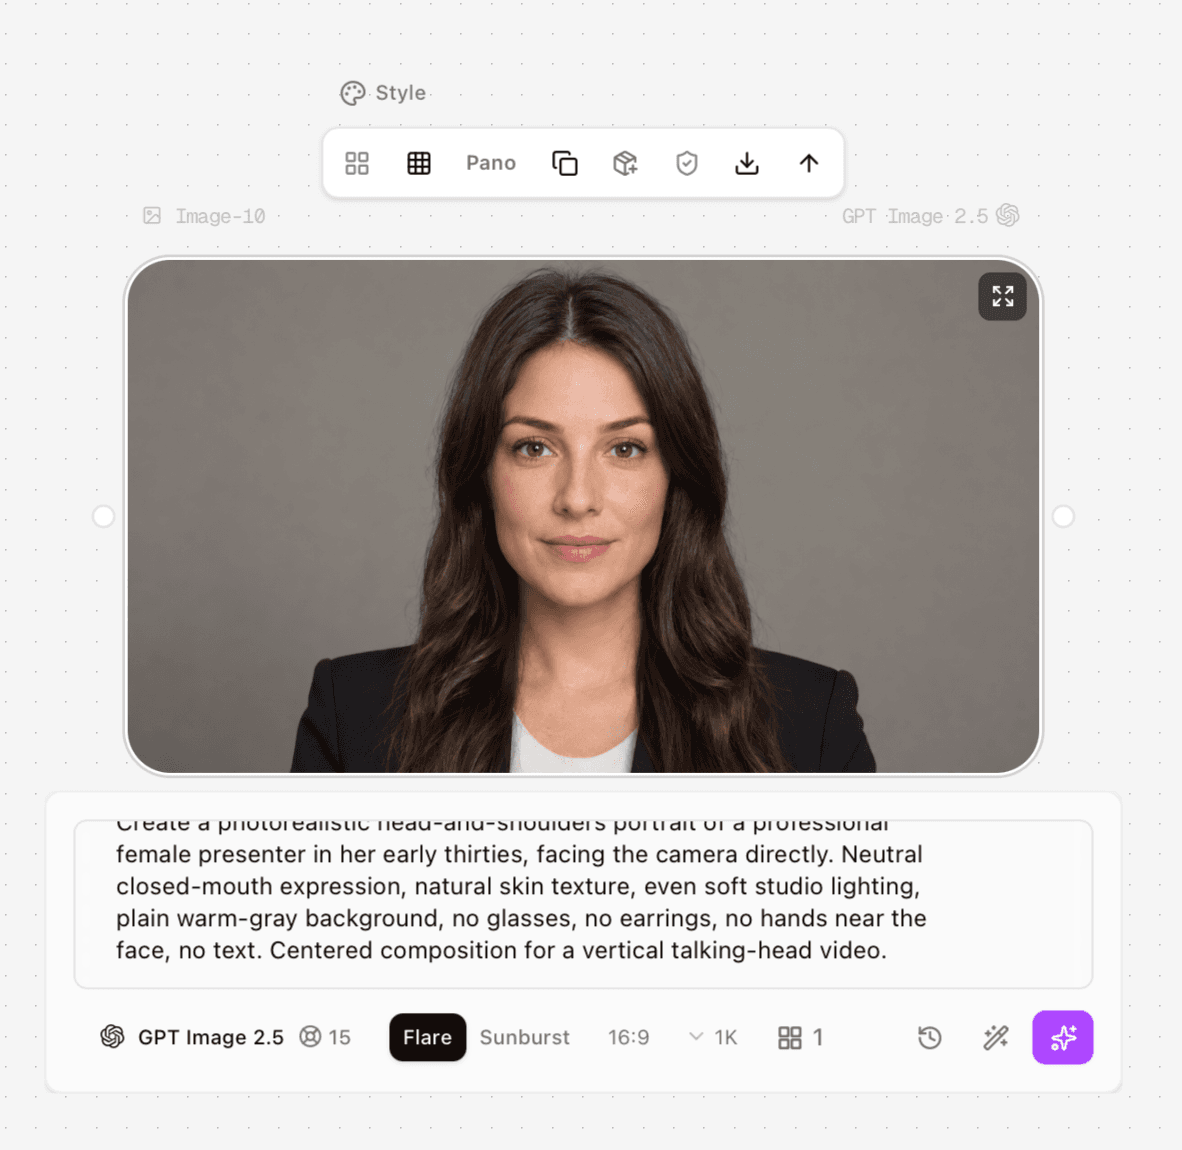
Figure 1. The first generated presenter image used as the visual source for the lip-sync test.
Step 2 Generate or Upload Clean Speech
Create a single-speaker track without music, overlapping voices, or strong room noise. Keep the delivery natural and avoid packing too many words into a short clip. We used ElevenLabs TTS Eleven v3 with the Aria voice, Stability 0.5, Style 0.0, and Speed 0.9. The generated speech was about eight seconds and used 10 credits.
Test script:
Welcome to Morrow. In this short demo, I'll show you how one portrait and one audio track become a natural talking-head video.
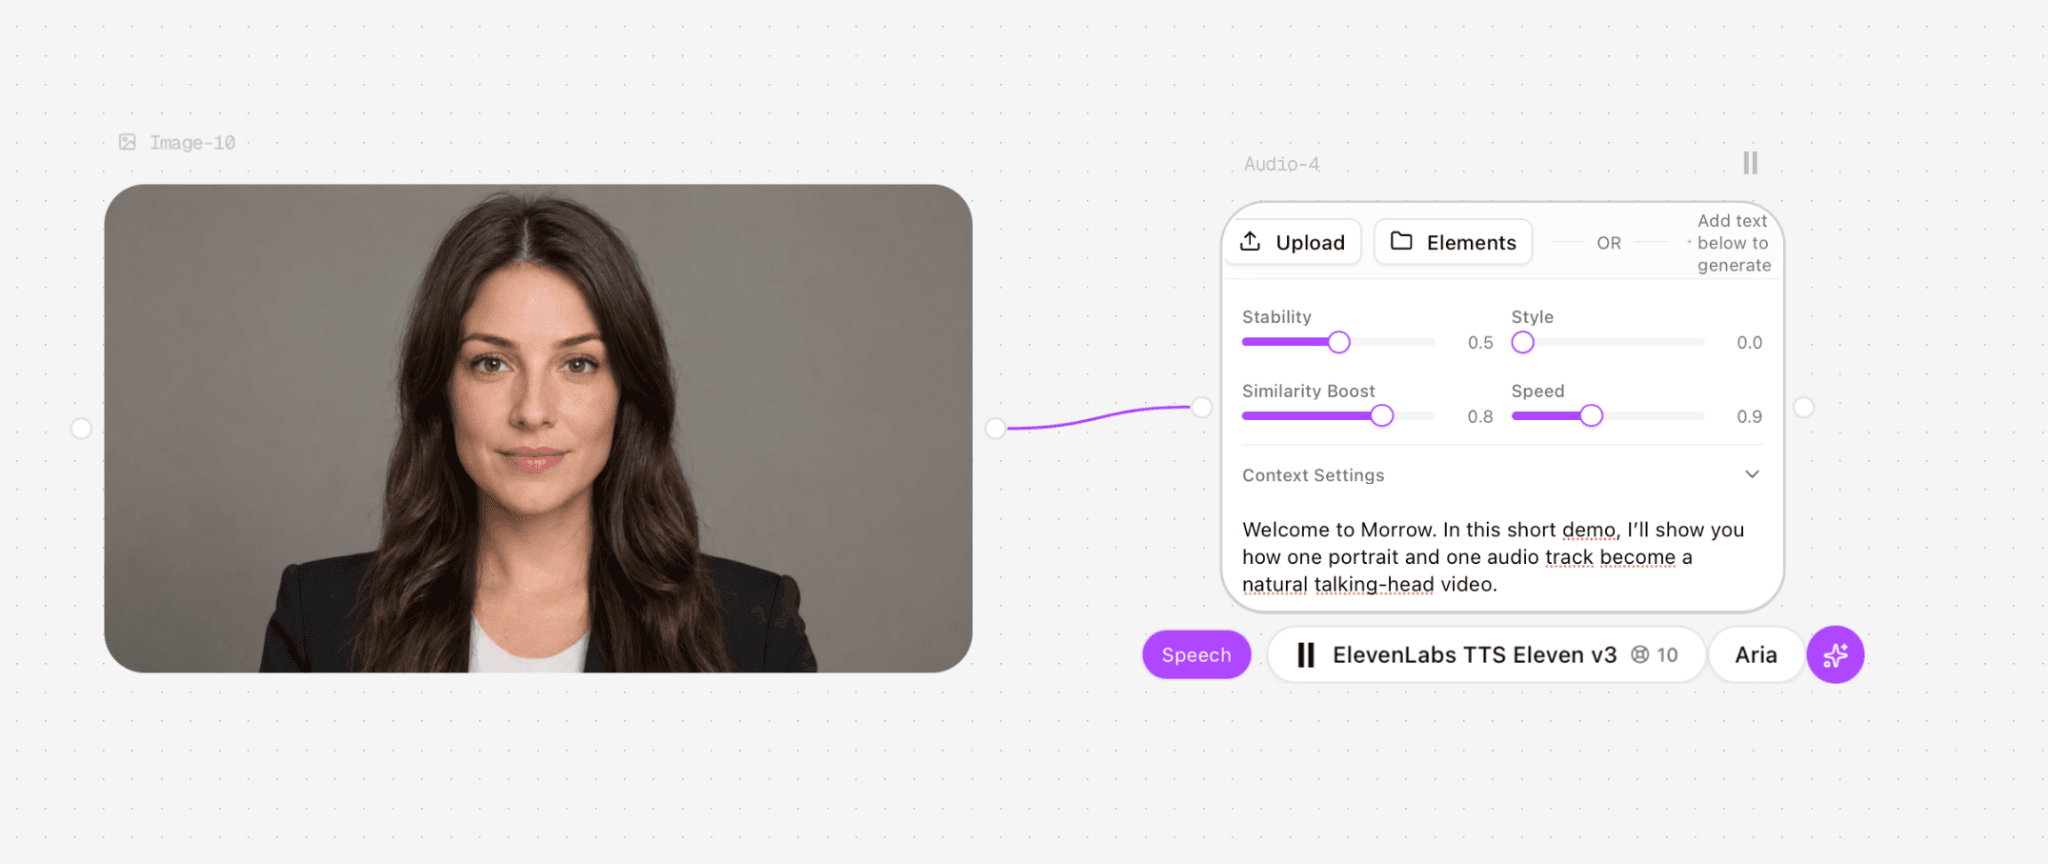
Figure 2. The presenter connected to the ElevenLabs speech node with the test script and voice settings visible.
Step 3 Create a Short Base Video When Starting From a Portrait
The current Kling LipSync A2V node asks for an Input Video, not only a still image. We therefore converted the portrait into a 10-second silent base clip with Kling 3.0 Pro. The prompt kept motion deliberately small so the later lip-sync pass would not have to fight camera movement or a changing pose.
Base-video prompt:
Locked camera. The professional female presenter faces the camera with natural blinking, subtle breathing, and minimal head movement. Her mouth remains closed and relaxed because she is not speaking yet. Keep her identity, facial features, hairstyle, clothing, lighting, and background unchanged. No camera movement, no hand gestures, no scene change, and no text.
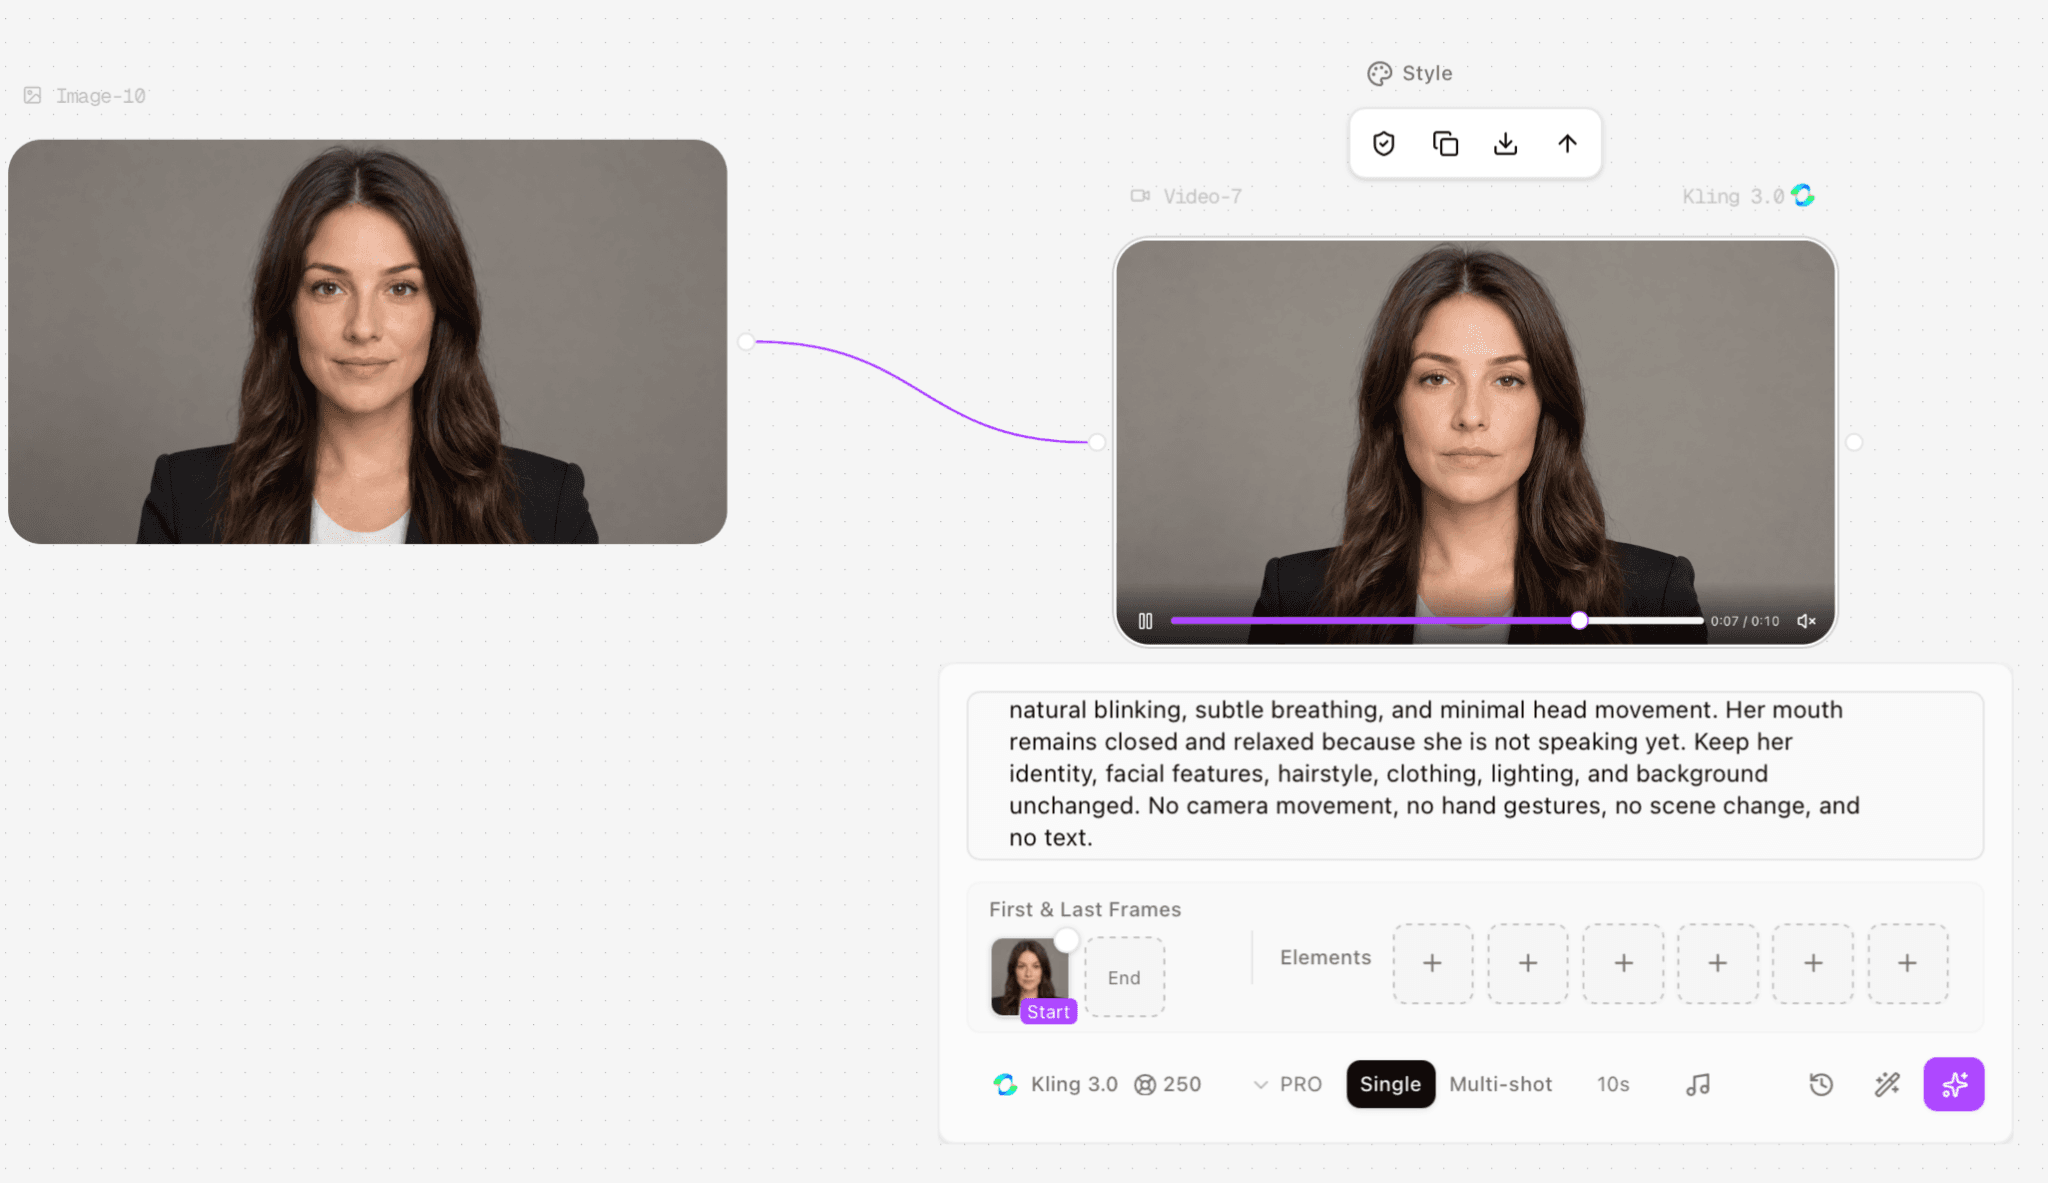
Figure 3. The 10-second Kling 3.0 base video retained the portrait identity and added blinking and subtle head motion.
Step 4 Connect the Video and Audio to Kling LipSync A2V
Add a Tool node and select Kling LipSync A2V. Connect the finished video as Input Video, then start the second connection from the Audio node and attach it to the lip-sync tool. The node is ready only when the bottom panel identifies both the video thumbnail and the audio node.
If the canvas draws an audio line but still says Audio Not connected, delete that line and reconnect by starting the drag from the Audio node. In our test, connection direction mattered even though the line looked attached.
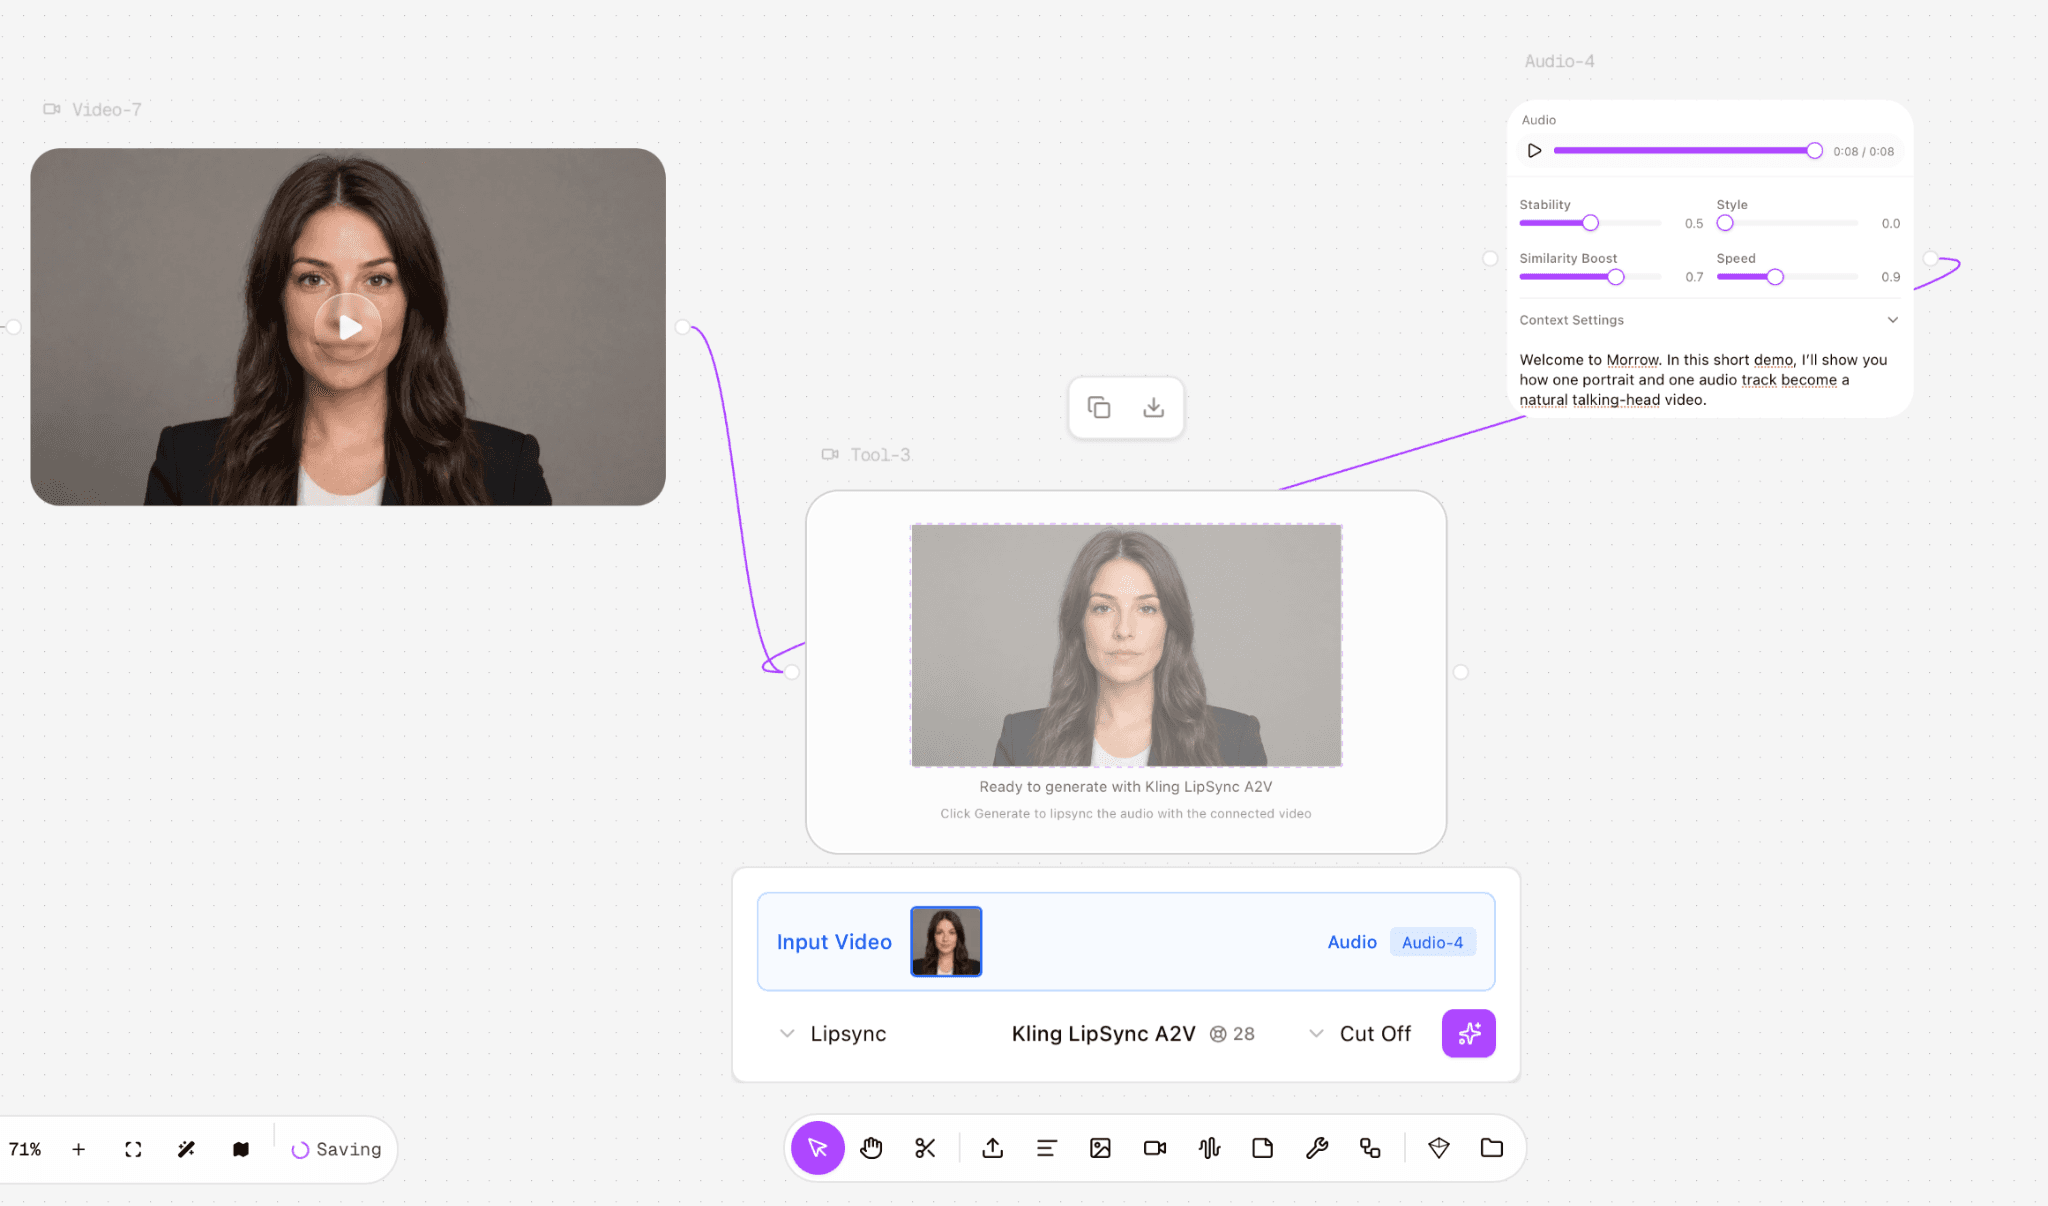
Figure 4. Kling LipSync A2V recognized both the base video and Audio-4 before generation.
Step 5 Generate and Review the Whole Clip
Generate once, then watch the result with sound from beginning to end. Check the first consonant, wide vowel shapes, long pauses, the last spoken word, blinking, head motion, and whether the face changes between frames. A technically completed render is not automatically natural enough to publish.
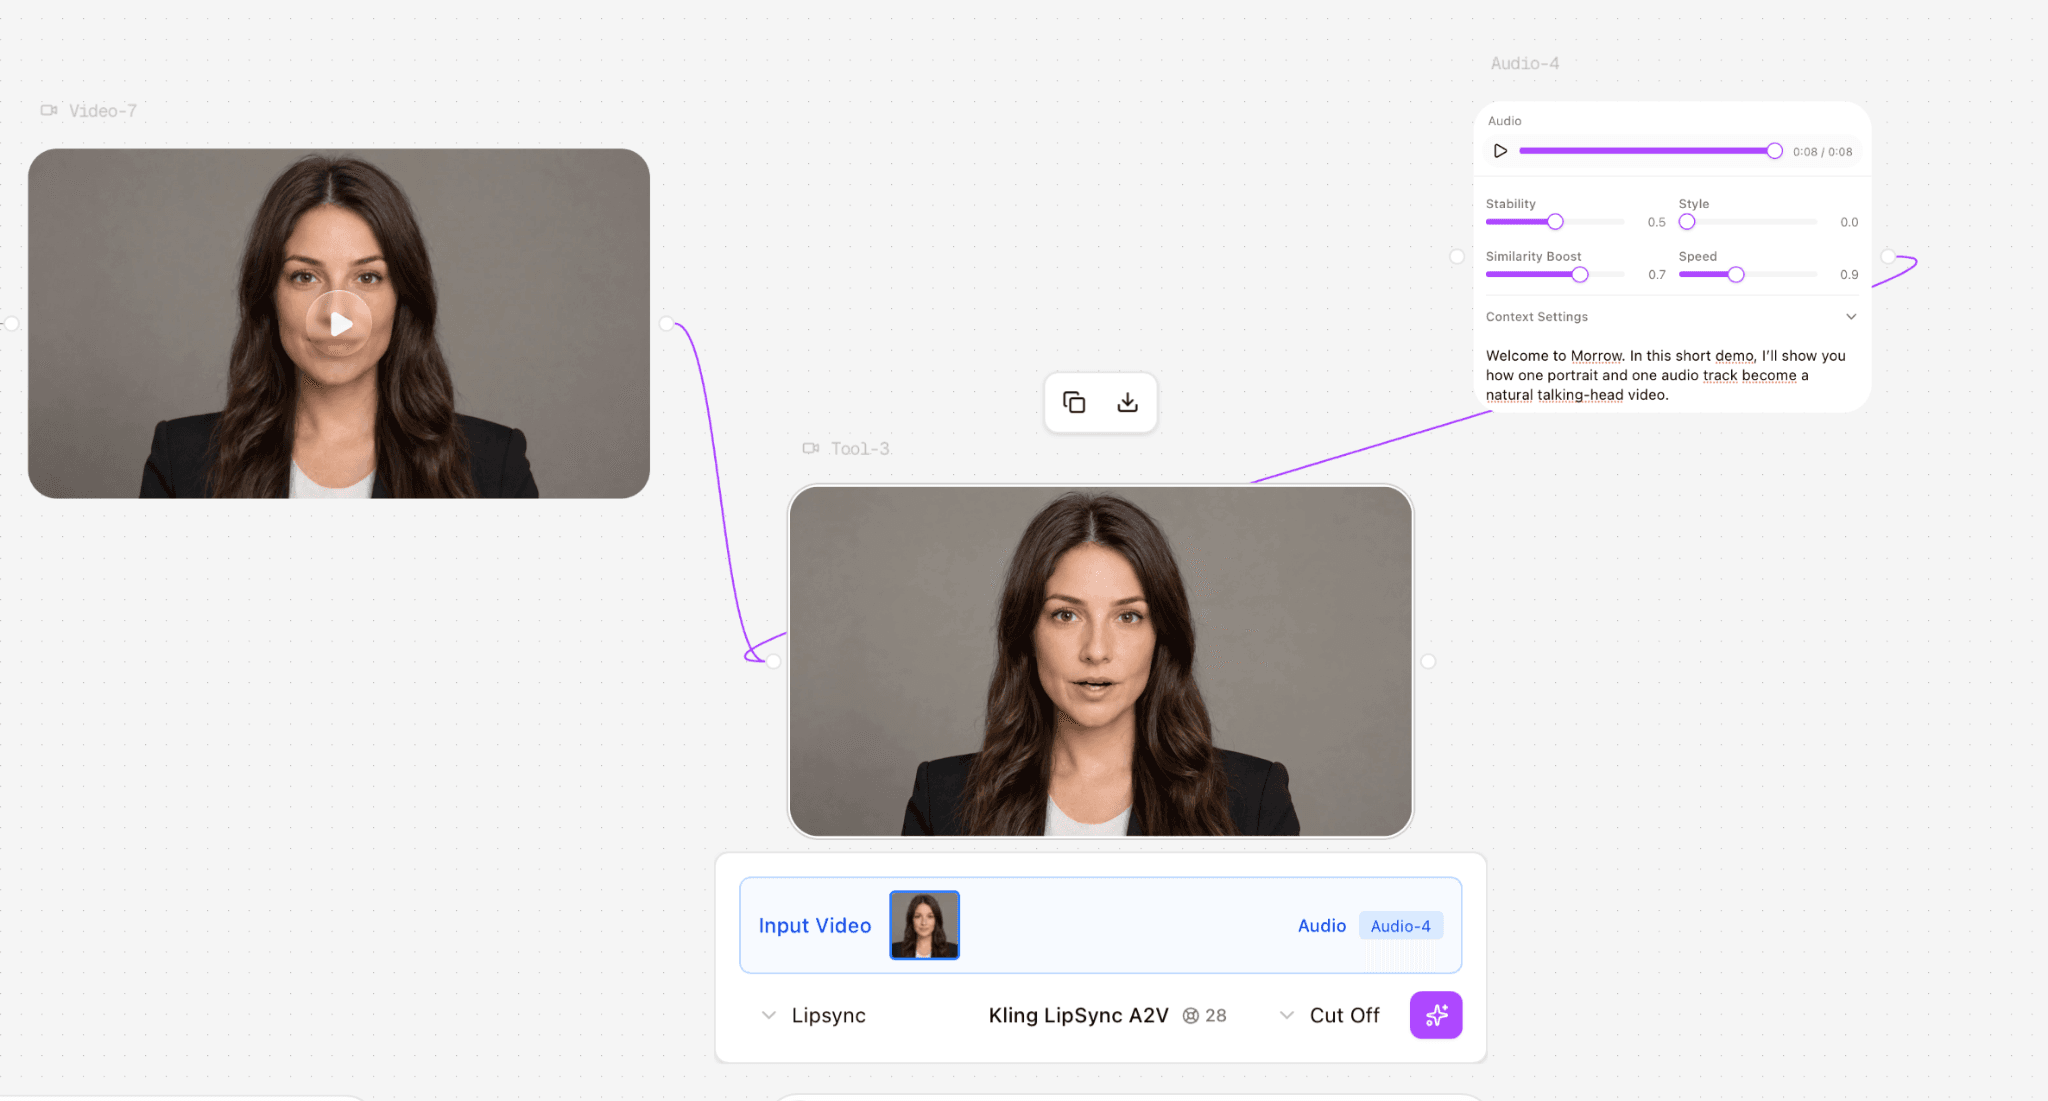
Figure 5. The completed Kling LipSync A2V result preserved the presenter and background while animating the mouth to Audio-4.
What Happened in Our Test
The workflow completed on the first generation at each stage, but the final lip motion was not fully natural. The presenter identity, background, blinking, and light head sway remained stable; the mouth moved too quickly in places and some openings were wider than the speech required.
Stage | Setting and cost | Observed result |
Portrait | GPT Image 2.5 Flare; 16:9; 15 credits | About 30 seconds; clean first result |
Speech | ElevenLabs TTS Eleven v3; Aria; 10 credits | About 8 seconds of single-speaker audio |
Base video | Kling 3.0 Pro; Single; 10 seconds; 250 credits | About 5 minutes; natural blinking and gentle movement |
Lip sync | Kling LipSync A2V; Cut Off; 28 credits | About 5 minutes; first result completed |
Final file | 1920 x 1072; 30 fps; AAC 44.1 kHz stereo | 9.97 seconds; no visible watermark |
Timing | Speech ended near 8.43 seconds | About 1.47 seconds of silence remained at the end |
Quality | Close-up talking head | Stable identity and blinking; mouth speed and opening amplitude felt unnatural |
The full portrait-to-lip-sync workflow used 303 credits in this test. If you already have a suitable video and audio track, you can skip the 15-credit portrait, 10-credit TTS, and 250-credit base-video stages; the tested lip-sync operation itself displayed 28 credits.
The selected Cut Off option did not trim the result to the spoken eight seconds. The exported file remained almost ten seconds long, so check the tail and trim silence manually when delivery timing matters.
Choose the Right Starting Point
Starting material | Recommended route | What you gain | What you give up or when to switch |
Existing face video and replacement audio | Video and audio directly to Kling LipSync A2V | Lowest tested workflow cost and no separate motion-generation stage | Source head motion is fixed; switch clips if the face turns away or is obscured |
Still portrait and audio | Portrait to short base video, then A2V | Blinking and subtle motion before lip sync | Much higher credit and time cost; use a direct talking-photo model if available and verified |
Full-body presenter with gestures | Use a presenter-animation route designed for body motion | Torso and gesture movement rather than only a close-up face | More motion can introduce drift; keep A2V for tight, controlled talking heads |
How to Make AI Lip Sync Look More Natural
Use one front-facing speaker and keep the mouth, jaw, and eyes unobstructed.
Write for speech, not for a page. Short clauses and natural pauses reduce rushed mouth motion.
Slow the TTS voice before rerunning the expensive video stage when the first mouth movement feels too fast.
Keep the base clip steady. Blinking and breathing help; camera moves and strong head turns make synchronization harder.
Match source-video length to speech length as closely as possible, then trim the exported tail in an editor.
Review consonant closures and wide vowels at normal speed and frame by frame. Pay particular attention to the beginning and end of each sentence.
Use only voices and likenesses you own or have permission to use, and disclose synthetic media where required.
Troubleshooting
Problem | Likely cause | What to do |
Portrait will not connect | Kling LipSync A2V currently expects a video input | Generate a short base video first or use an already recorded face video |
Audio line appears but status stays disconnected | The edge was created from the tool toward the audio node | Delete it and start the connection from the Audio node; confirm the node name appears in the Audio field |
Mouth moves too fast | Speech pace is high or too many words are compressed into the clip | Slow the TTS speed, shorten the script, or add natural punctuation and pauses |
Mouth opens too widely | The model is exaggerating phoneme shapes | Try a calmer voice delivery, a shorter line, or a source clip with smaller head motion |
Identity changes | The source is low quality or the base video moves too much | Use a sharper front-facing source and regenerate a steadier base clip |
Silence remains at the end | Cut Off did not strictly match the spoken duration | Trim the exported clip manually and verify the final frame before publishing |
Frequently Asked Questions
Can I sync lips to audio from a single photo?
Yes, but the exact path depends on the model. In our current Kling LipSync A2V test, the tool required a video, so we first animated the portrait into a short base clip.
What makes a good lip-sync source?
Use one well-lit, front-facing speaker with a clear mouth and minimal obstruction. A stable close-up is easier than a side profile, group shot, or fast-moving clip.
Why does AI lip sync look unnatural?
Common causes include rushed speech, exaggerated mouth shapes, source head turns, poor mouth detail, and a mismatch between audio and video duration.
Does Cut Off automatically remove extra silence?
Not reliably in our test. The exported file was 9.97 seconds even though the spoken audio ended around 8.43 seconds, leaving about 1.47 seconds of silence.
How long did Kling LipSync A2V take?
Our first 10-second test took about five minutes. This is one observed run, not a guaranteed processing time.
Did the output have a watermark?
We found no visible watermark in the downloaded test file. Export conditions can change, so verify each final file before publishing.
Final Takeaway
The current tested route can turn a clean talking-head video and speech track into a synchronized clip without manual frame-by-frame animation. The important operational detail is the input type: Kling LipSync A2V needs video plus audio in the Canvas we tested. Build a short, steady base video when starting from a portrait, then budget time for a final trim and a human review of mouth speed and shape.
Sources and verification
Product names, public workflow descriptions, and model routing were checked on the publication date. Performance, timing, credit use, and quality observations below come from the documented Astorie tests in this article.
Ready to try it on the canvas?
Open Astorie and fan your prompt across every frontier model in one workflow.