

How to Edit & Transform Photos With AI Without Starting Over
Quick Answer
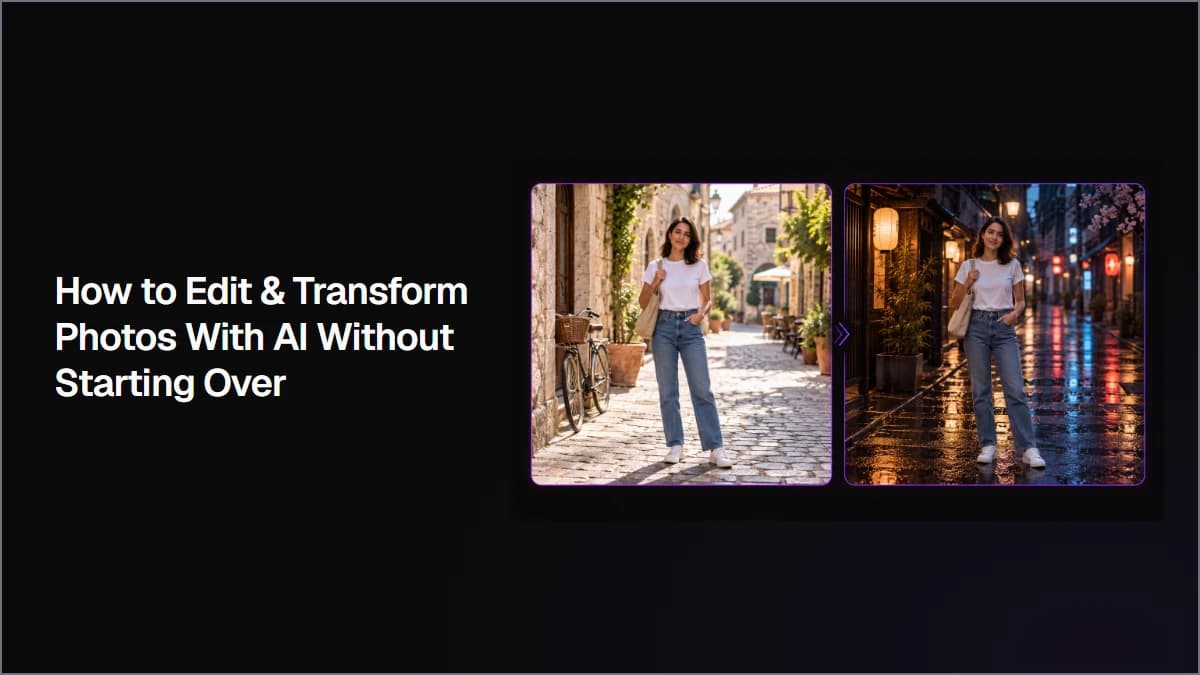
To edit and transform a photo with AI, upload your existing image and describe what you want to change. For a simple edit, start with a direct natural-language prompt. Tell the model what to change, where the target is, and which parts of the image should stay the same.
For more control, add editing tools to the workflow. A mask can define a specific area, background removal can isolate a subject before a major scene change, and relighting can change the mood without replacing the scene. Start simple, then add a tool only when the edit needs a different type of control.
What to Prepare Before Editing a Photo With AI
Start with the highest-quality source image you have. You should also know what you want to change and what you want to protect.
For my tests, I used a 16:9 travel photo of a woman standing on a cobblestone street. The scene also included a bicycle, pedestrians, plants, storefronts, and stone buildings. Having several separate objects made it easier to test both broad and precise edits.
Before you start, prepare:
- Source image: The photo you want to edit.
- Edit target: The object, person, background, color, or lighting you want to change.
- Elements to preserve: Details that should remain untouched.
- Reference image: Optional, if you need to match a specific appearance.
- Output format: Your target aspect ratio and image size.
A useful way to plan the edit is to separate the request into two parts: what can change and what cannot.
How to Edit and Transform Photos With AI Step by Step
You do not need to build a complex workflow for every photo. I found that direct AI editing already handled many clear instructions well.
The tools became more useful when I needed a different type of control, such as defining a region or separating a person from the environment.
Step 1: Start With a Direct Natural-Language Edit
Connect your source image to an Image Edit model and describe the change.
I used Nano Banana 2 for both my source image and editing tests. My first edit was simple: I changed the woman's white T-shirt into a dark forest green leather jacket while asking the model to preserve everything else.
The result was already strong. Her face, pose, jeans, shoulder bag, bicycle, and surrounding street stayed visually consistent.
I then tried a smaller target. The bicycle basket contained a beige bag, while the woman also carried a beige shoulder bag. I asked the model to replace only the bag inside the bicycle basket with flowers.
My prompt was:
Replace only the beige canvas bag inside the bicycle basket with a bouquet of fresh yellow tulips. Keep the bicycle basket, bicycle, the woman's beige shoulder bag, all plants, pedestrians, buildings, street signs, lighting, camera angle, and composition unchanged. Do not modify or remove the woman's shoulder bag.
The model understood which bag I meant and preserved the bicycle handlebar. However, part of the original bag strap remained after the edit.
That result was good enough to establish an important starting point: if the target is easy to identify with words, try a direct edit first.
Step 2: Use a Mask When Words Cannot Define the Area Precisely
A mask gives you another way to define the target. Instead of relying only on a phrase such as "the bag inside the bicycle basket," you manually select the pixels the model should work on.
In Astorie, I connected the original photo to Tool Node → Mask Editor and painted over the bag inside the bicycle basket. I then sent the result into Image Edit with a much simpler instruction:
Replace the selected object with a bouquet of fresh yellow tulips naturally placed inside the bicycle basket. Keep the basket and surrounding image unchanged. Photorealistic.
This test also revealed the downside of manual control. My mask accidentally covered part of the bicycle handlebar. The generated result removed that part of the handlebar along with the bag.
The direct prompt had actually preserved the handlebar better, even though it left part of the old bag strap behind.
direct edit
mask edit
So a mask is not automatically more precise. It gives you more control over the editing area, but the quality of that control depends on how accurately you draw the mask.
Use a mask when the target is difficult to describe or sits close to similar objects. If a text prompt already identifies the object clearly, the extra step may not be necessary.
Step 3: Remove the Background Before a Major Scene Change
Small object edits are one task. Rebuilding the environment around a person is another.
For my next test, I transformed the original European daytime street into a rainy Japanese side street at night. I wanted to keep the same woman, pose, clothing, and bag.
I first tried a direct edit on the complete image. The transformation worked. The European buildings were replaced by Japanese storefronts, illuminated signs, and wet streets.
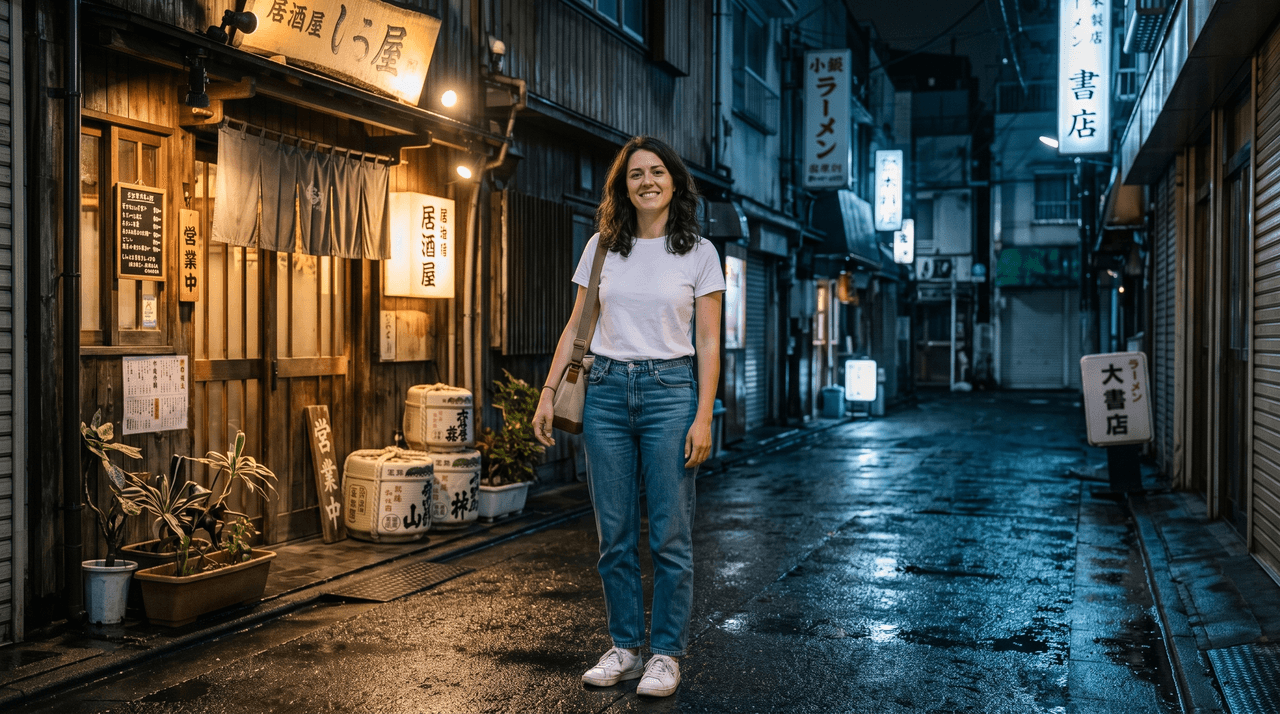
The result looked convincing, but the woman still carried some of the brighter exposure of the original daytime photograph.
I then tried a different workflow:
Original Image → Background Removal → Image Edit
Background Removal isolated the woman with her clothing, shoes, and shoulder bag intact.
I placed that isolated subject into the same type of rainy Japanese night scene. I also asked the edit to adapt the lighting and shadows to the new environment.
The difference was subtle but useful. In my result, the woman's face, hair, and white T-shirt picked up a darker exposure that fit the night scene better. The balance between the warm storefront lights and cool blue ambient light also felt more natural.
This does not mean you need to remove the background every time you change a scene. The direct edit was already good.
The extra step made more sense because the environment changed dramatically from daylight to night while the original person still needed to remain recognizable.
Step 4: Relight a Photo Without Rebuilding the Scene
Sometimes the content of a photo is already right. You may like the person, background, objects, and composition but want different lighting.
In that case, rebuilding the scene through a general Image Edit can be unnecessary.
Connect the existing image to Image Relighting and describe the new lighting instead. For example:
Transform the soft afternoon daylight into warm golden-hour lighting. Add low-angle sunlight from the left, gentle warm highlights on the woman's face and hair, and longer natural shadows across the cobblestone street. Preserve the woman, clothing, bicycle, pedestrians, buildings, street signs, camera angle, and composition.
The goal here is different from a scene transformation. You are not asking AI to turn Europe into Tokyo or replace an object. You are keeping the scene and changing how light interacts with it.
This is especially useful when the image already has the right content. If nothing needs replacing, there is little reason to ask the model to rebuild the whole photograph.
Step 5: Finish the Image Only If It Needs It
Once the main edit is complete, inspect the image before adding more processing.
If the composition no longer fits your final use, you can crop it to the required aspect ratio. If the final image is too small or has lost useful detail after editing, an upscale can be added at the end.
Neither step needs to be part of every workflow. Extra processing should solve a visible problem, not simply make the workflow longer.
Which AI Photo Editing Workflow Should You Use?
Different tools control different parts of an edit.
Editing goal | Start with |
Change an obvious object, color, or clothing | Direct Image Edit |
Select a small or ambiguous area yourself | Mask Editor |
Preserve a subject during a major environment change | Background Removal → Image Edit |
Keep the content but change the lighting | Image Relighting |
Change final framing or output resolution | Crop or Upscale |
The practical rule is simple: start with a prompt. Add a tool only when the edit needs a different kind of control.
How to Write Better AI Photo Editing Prompts
A useful editing prompt can be built from three parts:
Change + Target + Preserve
Start by saying exactly what should change:
Replace the beige canvas bag with yellow tulips.
Then identify the target if the image contains similar objects:
...the beige canvas bag inside the bicycle basket...
Finally, name the important elements that should remain unchanged:
Keep the bicycle, woman, shoulder bag, background, lighting, and composition unchanged.
You do not need to describe every pixel in the photograph. Focus preservation instructions on details that matter or could be confused with the target.
It also helps to avoid stacking too many unrelated transformations into one request. If the edit involves several independent changes, handling the important ones separately can make the result easier to inspect.
What to Check After an AI Photo Edit
Do not judge the result only by whether the new object or background looks good.
Check the parts you did not ask AI to change. Look closely at faces, hands, clothing, text, small objects, and edges around the edited area. Compare the framing and perspective with the original when those details matter.
Lighting deserves the same attention. After a large background change, ask whether the subject and environment appear to share the same light source, color temperature, and shadow direction.
Small errors are easy to overlook. In my bag replacement test, one method left part of the original strap behind. The masked version created a different problem by removing part of the bicycle handlebar.
A visually impressive result still needs a final QA pass.
When Should You Edit a Photo Instead of Regenerating It?
Edit when most of the original image already works.
You may want to preserve a person's face, pose, camera angle, composition, or a specific moment that would be difficult to reproduce exactly. AI editing lets you change selected parts while building on those existing decisions.
Regeneration makes more sense when most of the image needs to be redesigned. If the subject, setting, composition, camera angle, and overall concept all need to change, starting with a new generation may be simpler than repeatedly transforming the old one.
A useful question is:
Do I want to change something in this photo, or do I want a different photo?
If most of the original should survive, start with editing.
FAQ on Edit & Transform Photos
Can AI edit only one part of a photo?
Yes. If the target is easy to identify, a natural-language prompt may be enough. For areas that are difficult to describe, a mask can provide explicit spatial guidance.
Does a mask guarantee a more precise AI edit?
No. A mask gives you control over the selected region, but the selection itself must be accurate. In my test, accidentally masking part of a bicycle handlebar caused that part to disappear during the edit.
How do I change a photo background without changing the person?
You can first try a direct background edit. If preserving the original subject is especially important, remove the background first and use the isolated subject in the new scene.
In my test, both approaches worked, but isolating the subject first produced more natural lighting when moving a person from a daytime European street into a Japanese night scene.
Why does a person look pasted onto an AI background?
The subject and background may not share the same lighting. Look for differences in exposure, light direction, color temperature, shadows, and reflections.
If the composition is already correct, relighting can help integrate the subject without requiring another major scene transformation.
Can AI edit text inside a photo?
AI can modify visible text, but important text still needs careful review. Names, signs, labels, prices, and other exact wording should be checked character by character before the image is published.
Does AI photo editing reduce image quality?
It can, especially after repeated transformations. Avoid adding unnecessary generations to the workflow. If the final result needs more resolution, upscale the finished image rather than automatically upscaling every intermediate version.
Ready to try it on the canvas?
Open Astorie and fan your prompt across every frontier model in one workflow.