

How to Extract Frames From a Video

To extract frames from a video, first decide whether you need one still, evenly spaced samples, or every decoded frame. Use a player or frame-selection tool for a handful of images; use FFmpeg when you need a repeatable batch with predictable filenames and no display-resolution limit.
If the clip is already on an Astorie canvas, keep the source node, prompt, settings, and output together. You can open Frame Extraction to choose a hero still, or export the original clip and run the FFmpeg commands below. The screenshots in this guide come from a completed Kling 3.0 test: a 1280 × 720 MP4 at 24 fps with an actual duration of 10.04 seconds. They document the source and inspection points; they are not presented as a new extraction benchmark.
How to Extract Frames From a Video: The Short Answer
Choose the output you need. Pick one exact frame, a fixed interval, or every decoded frame.
Work from the original file. Do not use a screen recording or a player screenshot when image quality matters.
Inspect the source. Record its dimensions, duration, and frame rate before choosing an extraction rate.
Run the matching command. Save lossless PNG files first when the frames will be edited; use JPEG or WebP when delivery size matters more.
Review the sequence. Check focus, motion blur, duplicate frames, color, numbering, and the first and last timestamps.
Choose the Right Extraction Method
Goal | Use this method | What you gain | Main trade-off |
One thumbnail or hero still | Exact timestamp | Fast output and one small file | The requested time can land between visually useful frames |
Contact sheet or review samples | Fixed interval, such as 1 frame per second | A manageable overview of the clip | Short actions can fall between samples |
Animation, computer vision, or archival sequence | Every decoded frame | Complete temporal coverage | Hundreds or thousands of files |
A few hand-picked frames while generating | Frame-selection tool or player step-through | No command line for small jobs | Manual work does not scale |
Switch to FFmpeg when manual capture becomes the bottleneck: it preserves the source dimensions unless you add a scale filter, numbers files consistently, and can repeat the same rule across many clips. Stay with manual selection when you only need one or two visually judged moments and do not need an auditable batch.
Prepare the Source Video Before Extraction
Use the downloaded master, not a preview embedded in a browser. Create an empty output folder, then inspect the first video stream with ffprobe:
mkdir -p frames |
Frame rate and duration tell you how large the result may become. A constant-frame-rate clip produces roughly duration × frame rate images when every frame is exported. The 10.04-second, 24 fps test clip used here would therefore produce about 241 images. Treat that as an estimate until you count the actual files, especially for variable-frame-rate video.
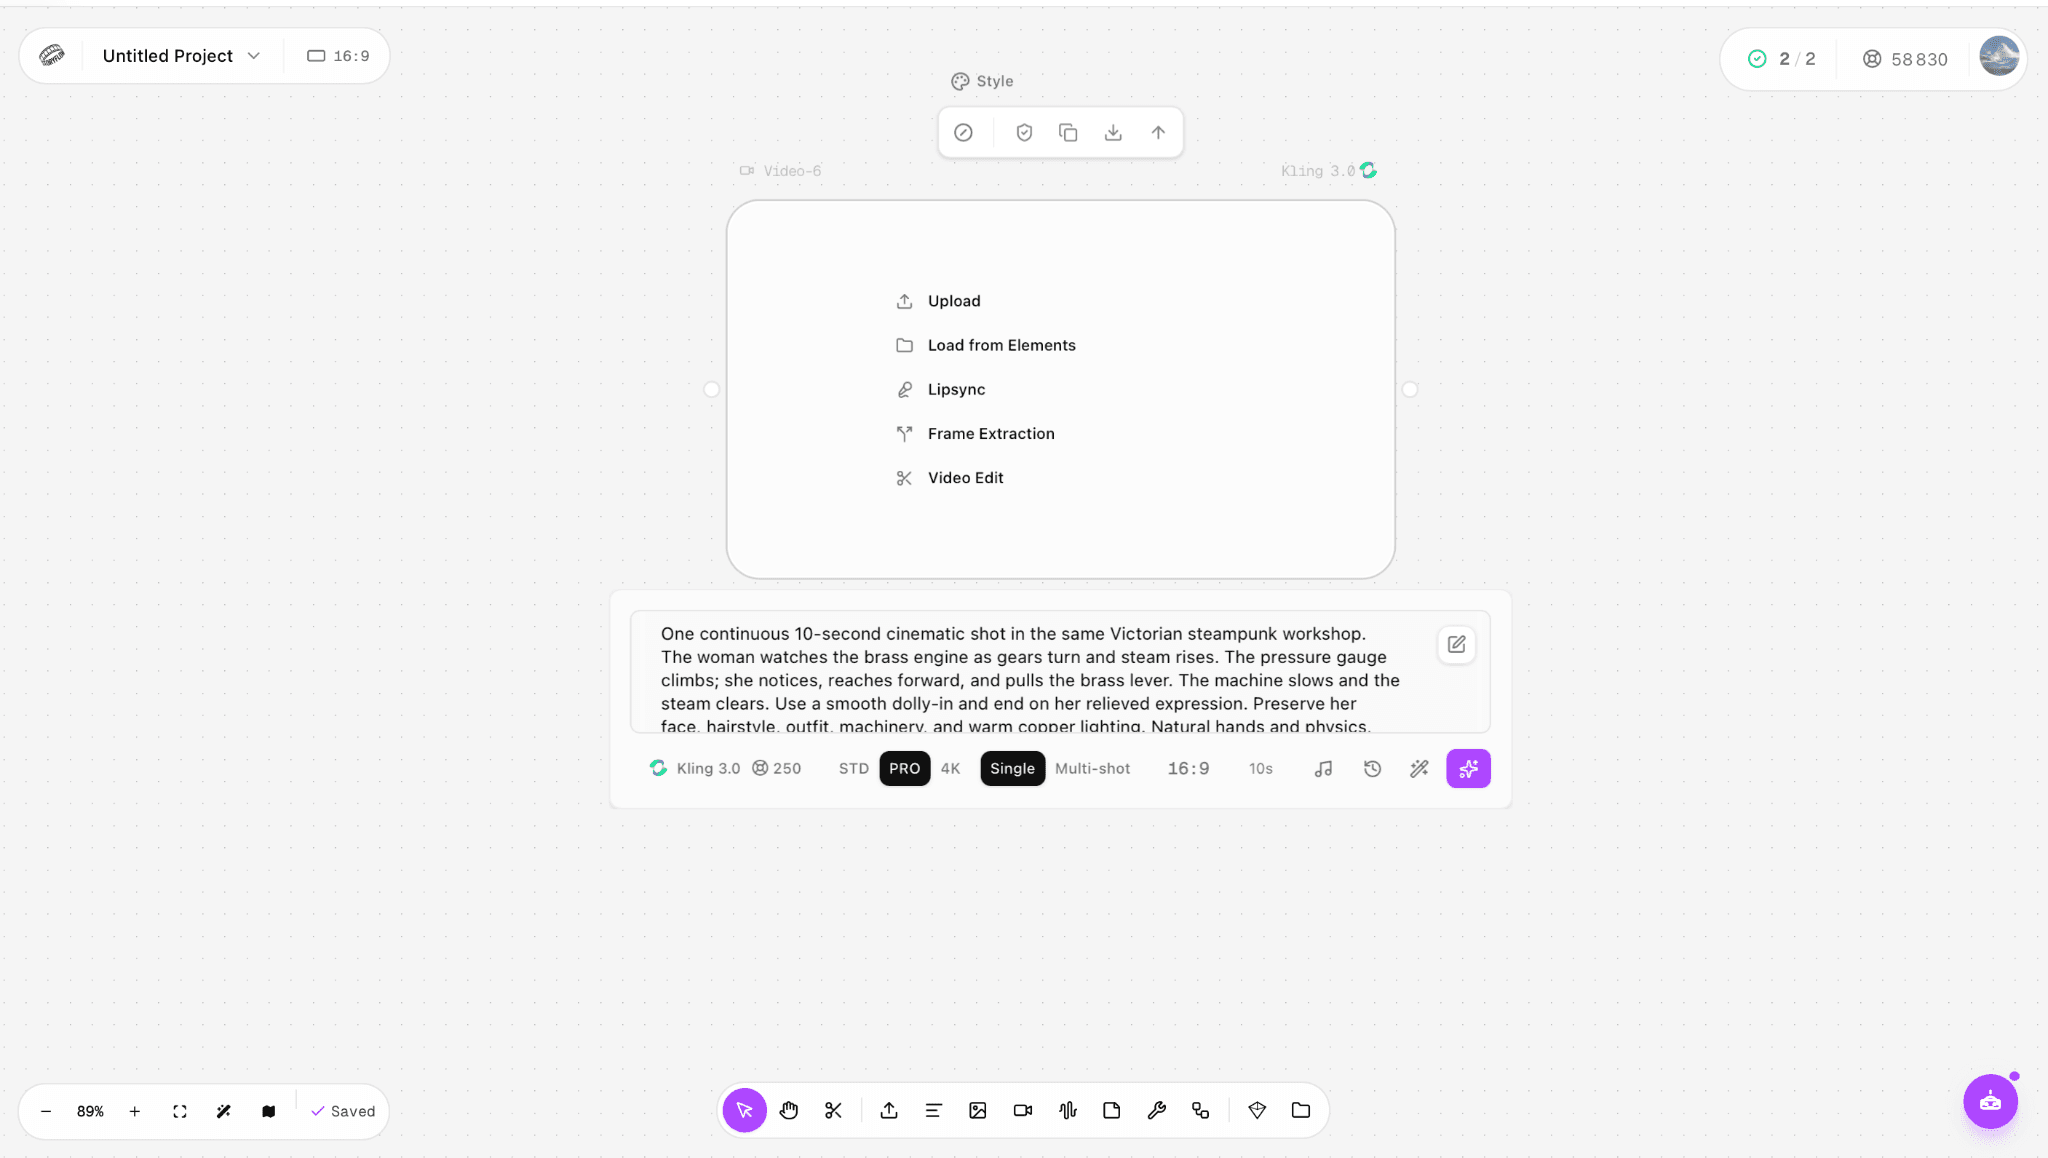
Figure 1. The completed Kling 3.0 source node on the Astorie canvas. The actions menu includes Frame Extraction; the node also records the prompt, 16:9 ratio, 10-second setting, and 250-credit estimate from the earlier generation test.
Method 1: Extract One Frame at an Exact Time
Use a timestamp when you know the moment you want. Placing -ss after the input asks FFmpeg to decode up to the requested time before writing one image:
ffmpeg -i input.mp4 -ss 00:00:04.000 -frames:v 1 frame-04s.png |
PNG is the safer default for a frame that will be retouched, used as a reference image, or inspected closely. For a lightweight preview, change the extension to .jpg and add -q:v 2. If the visual action crosses the four-second mark, also sample a few nearby times instead of assuming that the round timestamp is the sharpest frame.
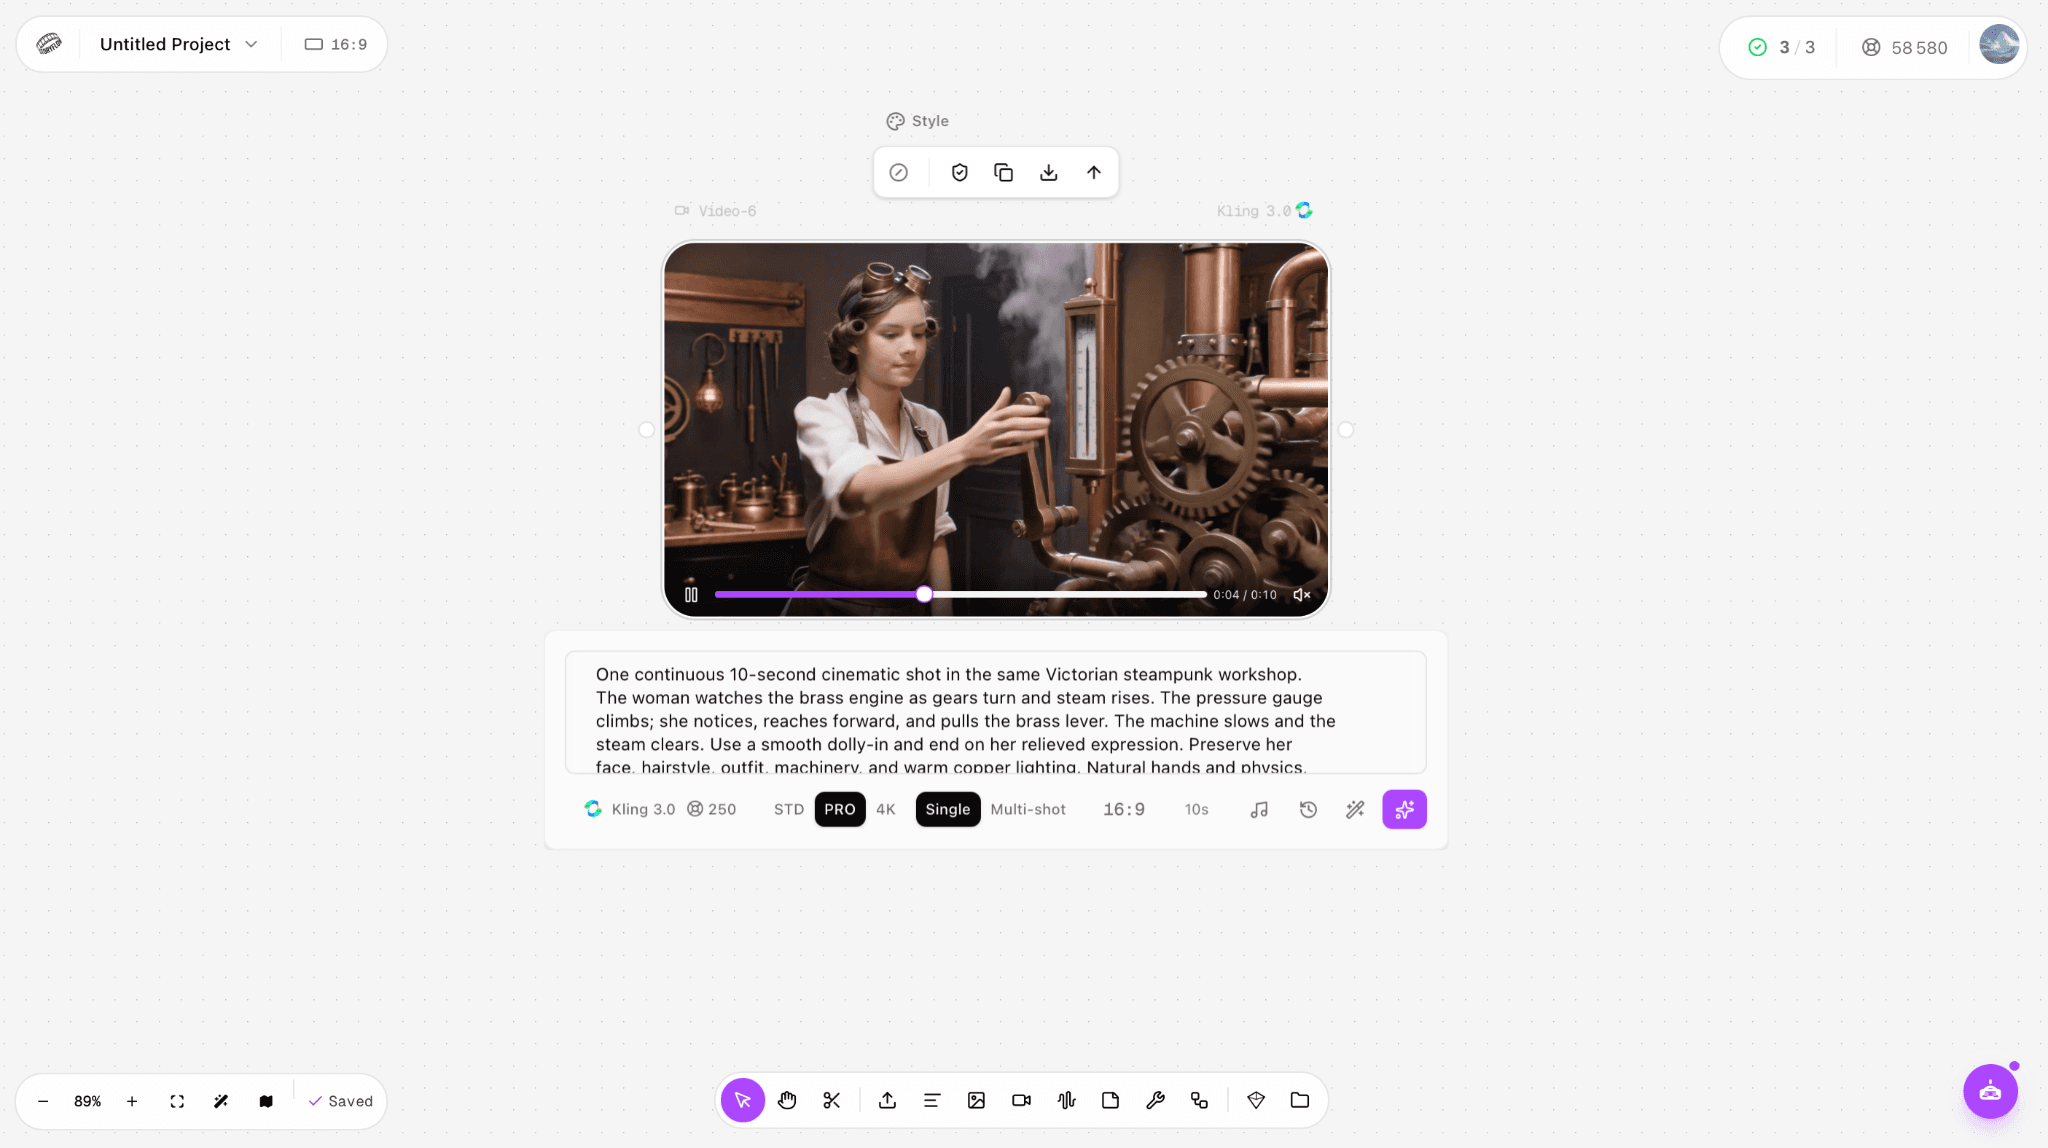
Figure 2. The same source clip scrubbed to about 00:04. This is a useful candidate point because the hand reaches the lever, but the final extracted image should still be checked for motion blur.
Method 2: Extract Frames at a Fixed Interval
Use the fps video filter when you want a contact sheet, review samples, training examples, or a small set of candidate stills. One frame per second is a sensible first pass for a short clip:
ffmpeg -i input.mp4 -vf "fps=1" frames/frame_%04d.png |
For one frame every two seconds, use fps=1/2. For a 30 fps sequence, use fps=30. The fps filter converts the output to the requested constant rate by dropping or duplicating frames as needed; it does not reveal extra detail that was absent from the source. Zero padding in frame_%04d.png keeps file names in chronological order.
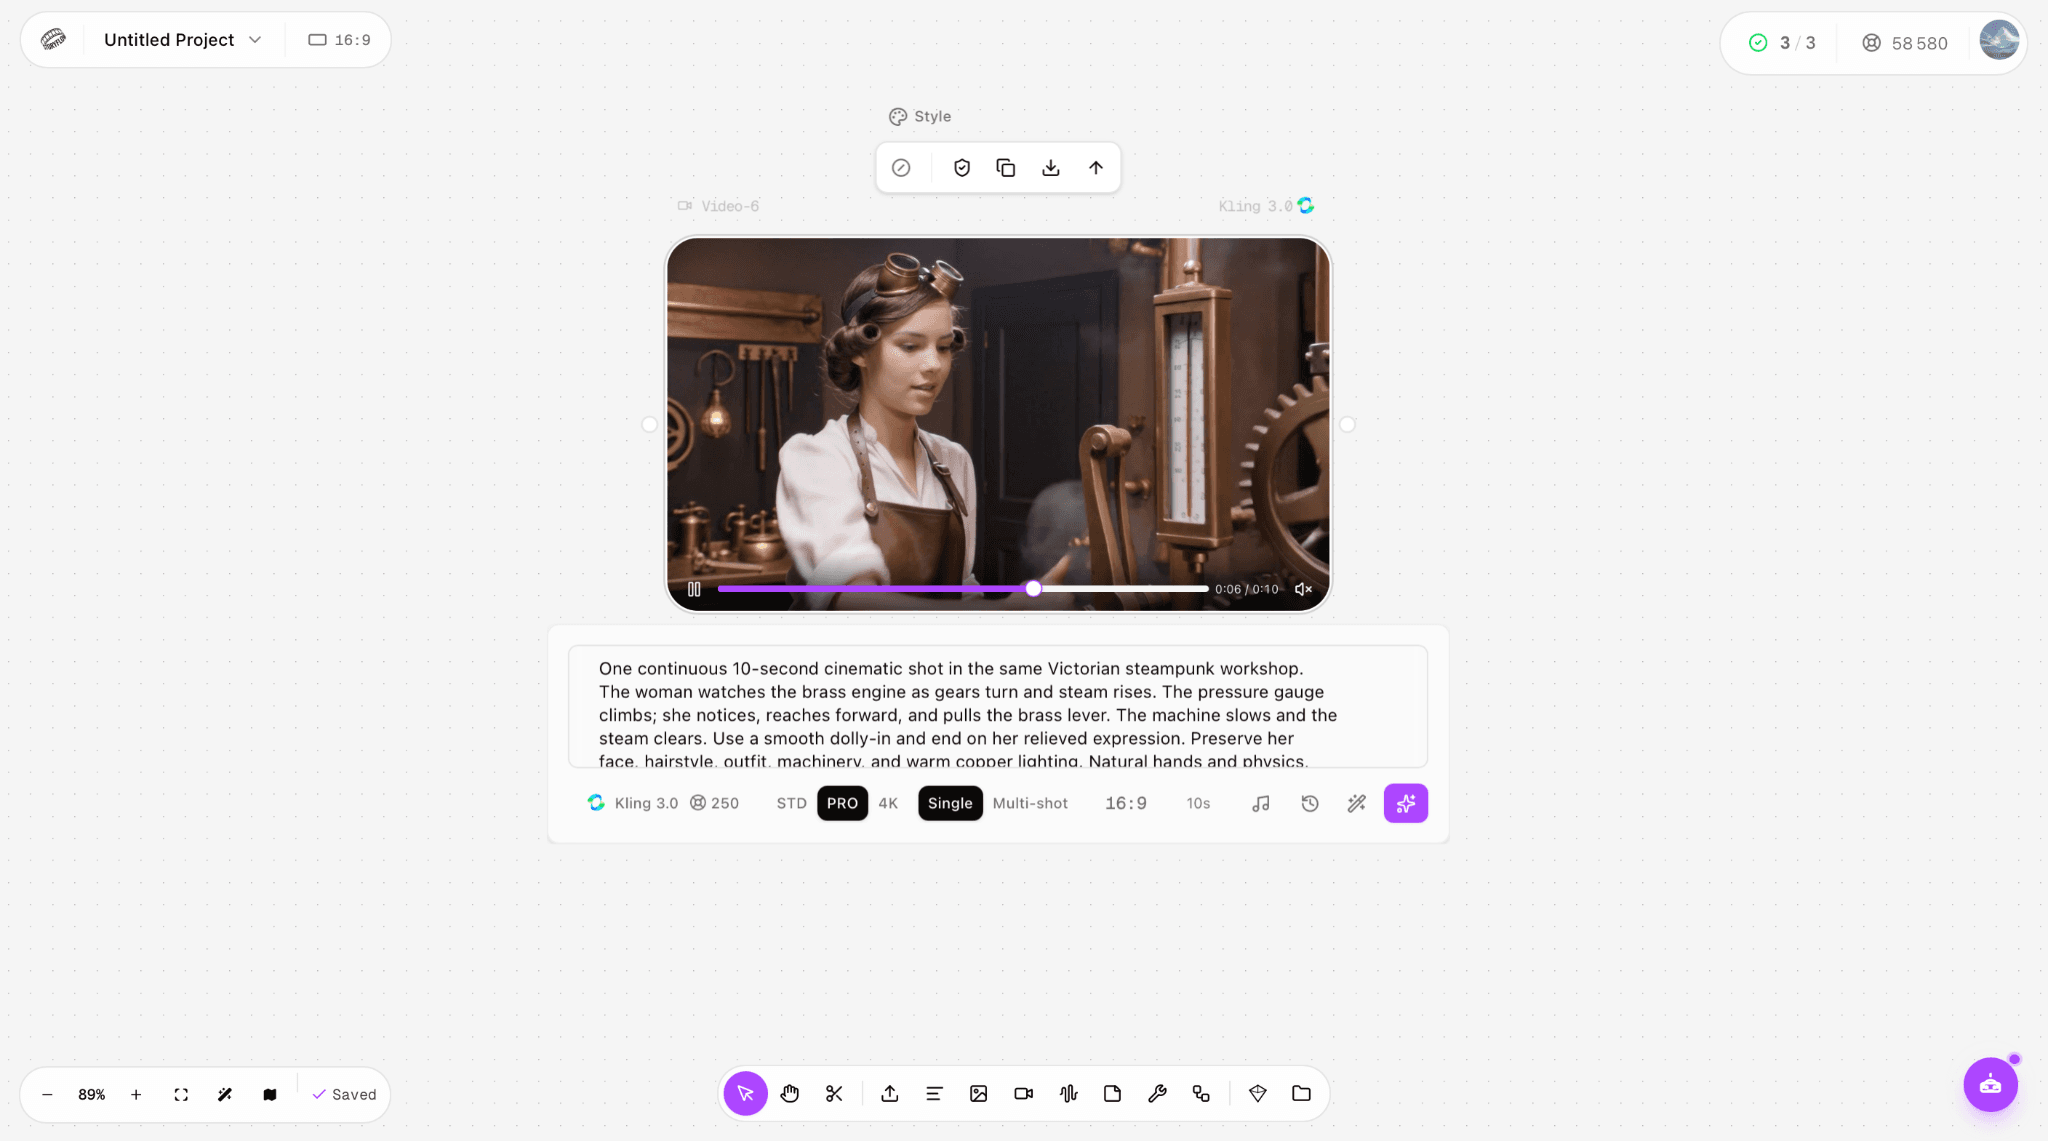
Figure 3. A second inspection point at about 00:06 from the same clip. Comparing timed candidates is more reliable than choosing a still from the thumbnail alone.
Method 3: Extract Every Decoded Frame
Export every frame when downstream work depends on the complete sequence. For current FFmpeg builds, passthrough mode avoids forcing the output to an unrelated constant rate:
ffmpeg -i input.mp4 -fps_mode passthrough frames/frame_%06d.png |
A six-digit pattern is useful for long sequences. If an older FFmpeg build does not recognize -fps_mode, its legacy equivalent is -vsync 0. This job can consume substantial storage, so trim the input first when you only need a short range:
ffmpeg -i input.mp4 -ss 00:00:03 -to 00:00:05 -fps_mode passthrough frames/frame_%06d.png |
Use exact timestamps as selection boundaries, then verify the first and last output images. Compressed video is organized around keyframes, while the pictures you want may sit between them; the extraction process must decode the relevant section rather than simply copy an encoded packet.
ASTORIE HOW-TO • EDITORIAL FINAL
Choose PNG, JPEG, or WebP
Format | Choose it when | What you gain | What you give up |
PNG | Editing, compositing, reference images, or pixel inspection | Lossless stills and predictable quality | Larger files |
JPEG | Contact sheets, review, or ordinary photographs | Small files and broad compatibility | Lossy compression; no transparency |
WebP | Web delivery or a browser image sequence | Smaller payloads with modern browser support | Some production tools still prefer PNG or JPEG |
Keep a PNG master when the still will be edited more than once. Create delivery copies from that master instead of repeatedly recompressing a JPEG. File format does not increase the source resolution: a 1280 × 720 video frame remains 1280 × 720 unless you deliberately scale or upscale it.
Name, Count, and Check the Output
Names: Use zero-padded numbers such as frame_0001.png so file browsers and scripts preserve order.
Count: Compare the number of files with the requested sampling rule; do not assume duration × fps is exact for variable-frame-rate input.
Dimensions: Confirm that the output matches the source unless a resize was intentional.
Visual quality: Open frames around fast motion and look for blur, warped details, interlacing, or repeated pictures.
Color: Compare a frame with the source in a color-managed viewer before approving it for print or brand work.
Reuse: When a still becomes the reference for another generation, save the chosen timestamp and source filename beside it.
Common Problems and Fixes
Problem | Likely cause | Fix |
The folder fills with thousands of files | You exported every frame from a long clip | Trim the time range or use fps=1, fps=1/2, or another interval |
Several images look identical | The requested output rate exceeds useful source changes | Lower the sampling rate; do not manufacture extra visual information |
The still is soft | The chosen moment contains motion blur | Sample nearby timestamps and choose the cleanest source frame |
The image is smaller than expected | A preview or scaled command was used | Return to the downloaded original and remove unintended scale options |
Files sort as 1, 10, 100, 2 | The sequence was not zero padded | Use %04d or %06d in the output pattern |
A time-based frame is slightly unexpected | The requested timestamp lies between frames or the source is variable-rate | Inspect adjacent timestamps and use the decoded frame that best matches the action |
Frequently Asked Questions
How do I extract a single frame from an MP4 video?
Run ffmpeg -i input.mp4 -ss 00:00:04.000 -frames:v 1 frame.png, replacing the timestamp with the moment you need. Use the original MP4 and inspect nearby frames if the chosen one contains motion blur.
How do I extract one frame every second?
Use ffmpeg -i input.mp4 -vf "fps=1" frames/frame_%04d.png. Change fps=1 to fps=1/2 for one image every two seconds or to another rate that matches the review task.
Does extracting a frame reduce its quality?
Decoding the video does not add detail beyond the compressed source. PNG avoids another lossy still-image encode, while JPEG trades some image data for smaller files. A screen capture may also be limited by the display or player window, so direct extraction is preferable.
Can I extract frames without installing FFmpeg?
Yes. A desktop player or browser-based extractor can save individual stills. Use a local-processing tool when the video is confidential, and verify whether the service uploads files before using it. FFmpeg remains the stronger choice for batches and repeatable commands.
Can an extracted frame start the next AI video shot?
Yes, if the next model and mode accept a start image. Use a sharp frame with stable anatomy and minimal motion blur, then keep the character and scene descriptions consistent. The extracted still anchors the opening image; it does not guarantee that identity will remain unchanged for the whole new clip.
Ready to try it on the canvas?
Open Astorie and fan your prompt across every frontier model in one workflow.