
AI Character Design: How to Build a Reusable Character
Learn how to design an AI character that stays recognizable across new poses, angles, and scenes using one master design, targeted references, and real reuse tests.
Key takeaways
A reusable AI character needs one approved master design that defines the visual identity before you create more poses or scenes.
More reference images are not automatically better; the reference that matches the next shot can be more useful than a complete character sheet.
Separate fixed character traits such as face, hair, clothing, and signature accessories from variables such as pose, camera, environment, and lighting.
Test character consistency with a real downstream task instead of building a large reference library before you know what the project needs.
A character is ready to reuse when the next creative task no longer requires you to redesign it from scratch.
Quick Answer
A good AI character is not finished when you generate one attractive image. It becomes reusable when you can move the same design into a new pose, angle, or scene without rebuilding the character from scratch.
In my test, I designed an original bicycle courier named Mara. I chose one master design, created targeted reference views, and tested the character in new scenes.
The most useful finding was that more references were not automatically better. A cropped back view preserved Mara better than feeding the model the full three-view character sheet for a rear-angle shot.
The practical workflow was:
Concept → master character → targeted references → consistency test → reusable character
The goal is not to build the largest reference library. It is to give the model the visual information that matters for the next shot.
What Makes an AI Character Reusable?
An AI-generated character can look polished and still be difficult to reuse.
The first image may have the right face, clothes, and mood. Then the jaw changes in a side view. The bag changes shape in another scene. New accessories appear when the pose changes.
That character looks finished, but it is not yet a reliable reusable asset.
For this workflow, I used three practical criteria:
- The identity is defined. You know which visual traits make the character recognizable.
- Missing visual information is covered. You have references for details the original image does not show but the next task may need.
- The character survives reuse. You can move it into another shot without redesigning it.
I think of that state as canvas-ready.
It does not mean every character needs a full turnaround sheet, expression board, or custom training workflow.
The standard depends on what you want to create next.
A social avatar may only need a strong face reference and a few expressions. A recurring video character may need full-body, side, and rear information.
The practical goal is simple: the next creative task should not require you to invent the character again.
Start With a Character You Can Actually Recognize
Before worrying about consistency, decide what makes the character distinct.
For my test, I created Mara, a bicycle courier in a near-future coastal city. Her original concept included cropped dark hair, a burnt-orange weatherproof jacket, charcoal cargo pants, silver utility clips, and a compact messenger bag.
I first generated three visual directions in Astorie with Nano Banana 2:
- Minimal Urban Utility
- Retro-futuristic Streetwear
- Functional Indie-game Protagonist
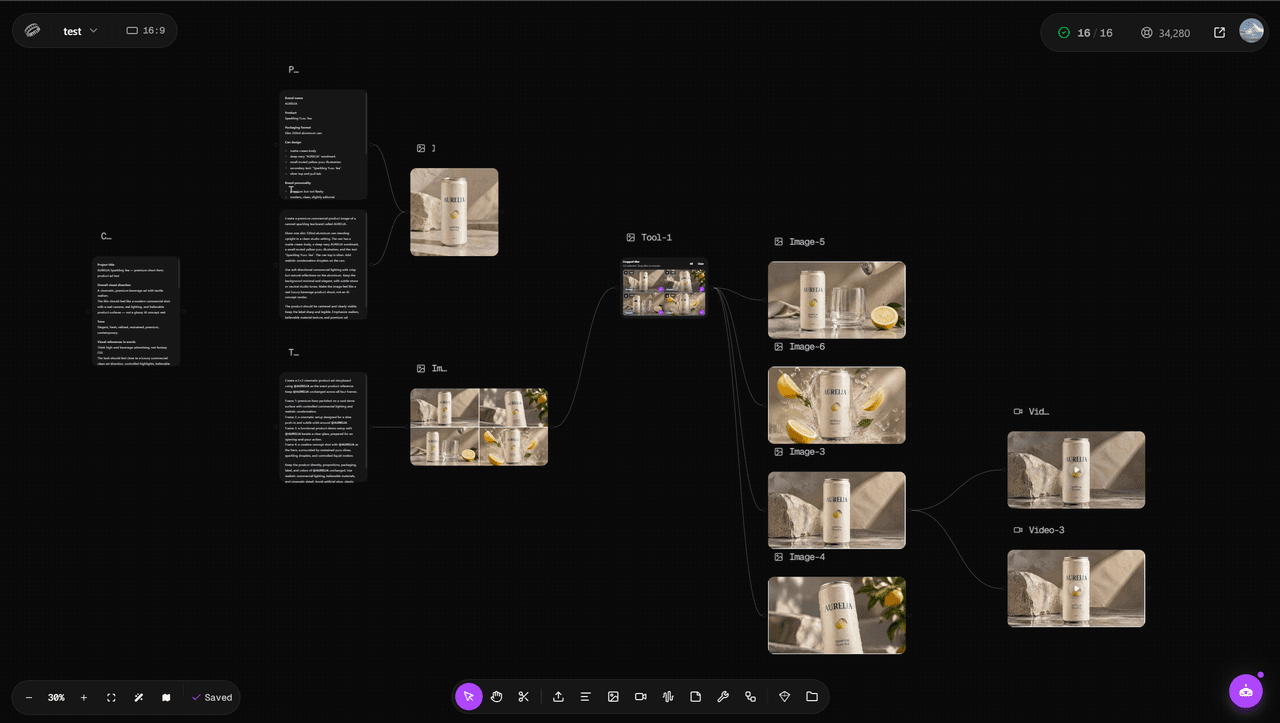
The Minimal Urban Utility version was clean and easy to read, but it also felt more generic.
The Functional Indie-game Protagonist had more personality. It also introduced more patches, straps, bag details, and small accessories.
That created an important tradeoff.
More detail made the character more expressive, but it also created more things that could change later.
This does not mean simple characters are always more consistent. My test did not prove that.
The better lesson is to know which details are doing real work.
For Mara, the burnt-orange jacket, cropped hair, charcoal pants, messenger bag, and a few metal utility details were enough to establish a recognizable visual identity.
The extra badges were not essential.
Design for recognition before decoration
When comparing early concepts, ask:
- Can I recognize the character from the silhouette?
- Is there a clear color structure?
- Which features make this person different from a generic character?
- Are small details adding personality or only adding complexity?
- Would the design still make sense from another angle?
The goal is not to choose the most elaborate concept.
It is to choose a design worth repeating.
Lock One Master Design Before You Expand the Character
Once you choose a direction, stop exploring.
Exploration asks the model to invent. Consistency asks it to preserve.
I refined Mara into a simpler master design. I kept the orange jacket, short dark hair, charcoal pants, messenger bag, silver clips, and dark shoes. I removed most decorative patches and redundant straps.
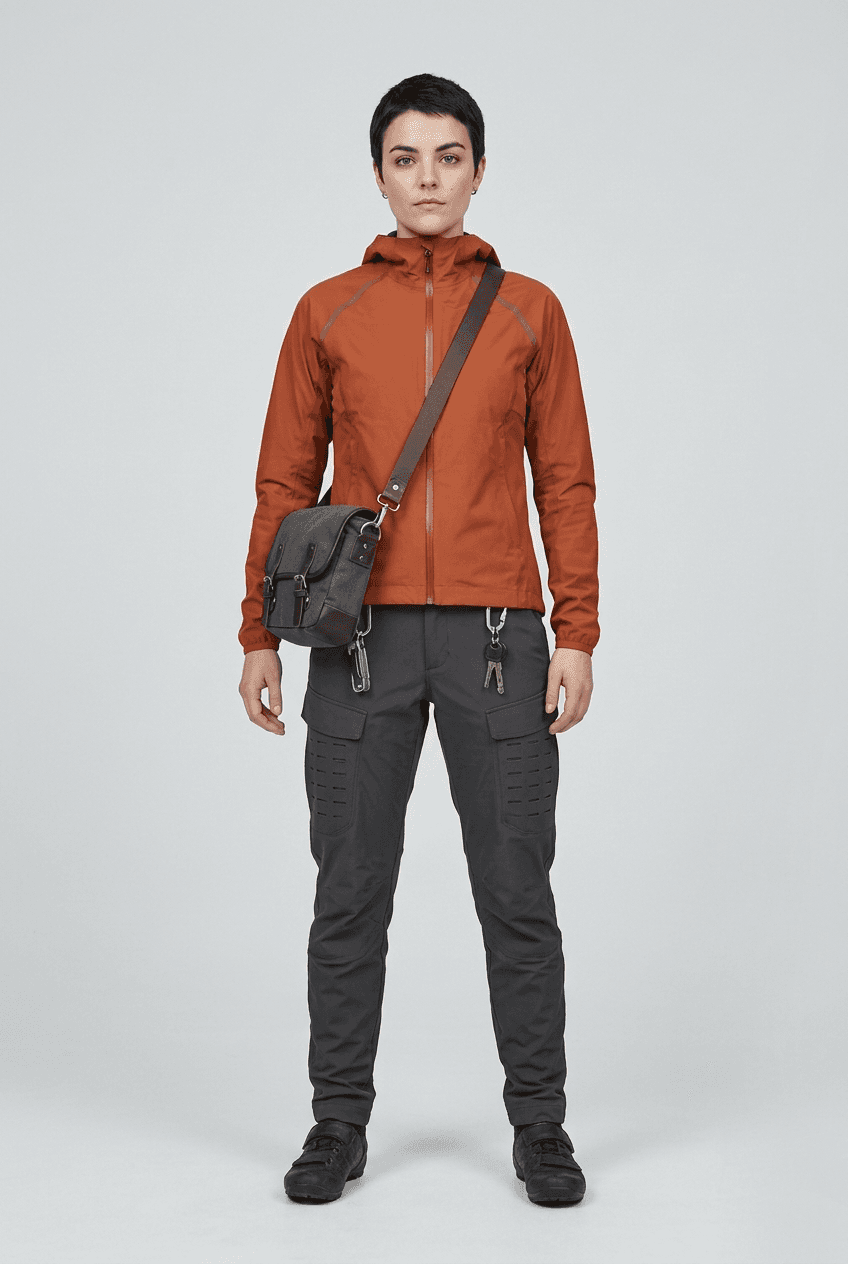
Useful labels on the image:
- cropped dark hair
- burnt-orange jacket
- gray-brown messenger bag
- charcoal cargo pants
- limited silver utility details
This image became the master reference.
A master image gives you one approved version of the character. When a later result looks wrong, you have something concrete to compare it against.
You can check:
- facial structure
- body proportions
- hairstyle
- jacket construction
- bag shape
- clothing colors
- recurring accessories
Without a master reference, every new generation can slowly redefine the design.
Build Only the References Your Next Workflow Needs
After locking the master design, I generated a reference sheet with a front view, side profile, and back view.
The sheet looked strong. Mara's body proportions, jacket, pants, hairstyle, bag, and overall clothing structure remained consistent.
At first, it seemed like an obvious improvement.
Then I tested it.
I asked the model to create the same target shot: Mara mounting a bicycle from a three-quarter rear angle.
I changed only the visual reference.
Master image only
The result was strong.
Mara remained recognizable. The orange jacket, bag, pants, and proportions stayed close to the approved design.
Full three-view sheet
The result was worse.
The messenger bag changed. Some clothing details drifted. The character identity also felt weaker.
Cropped relevant back view
I then cropped the sheet and used only the back view that matched the requested camera angle.
The result improved again.
Master Only vs Full Three-View Sheet vs Relevant Cropped Back View
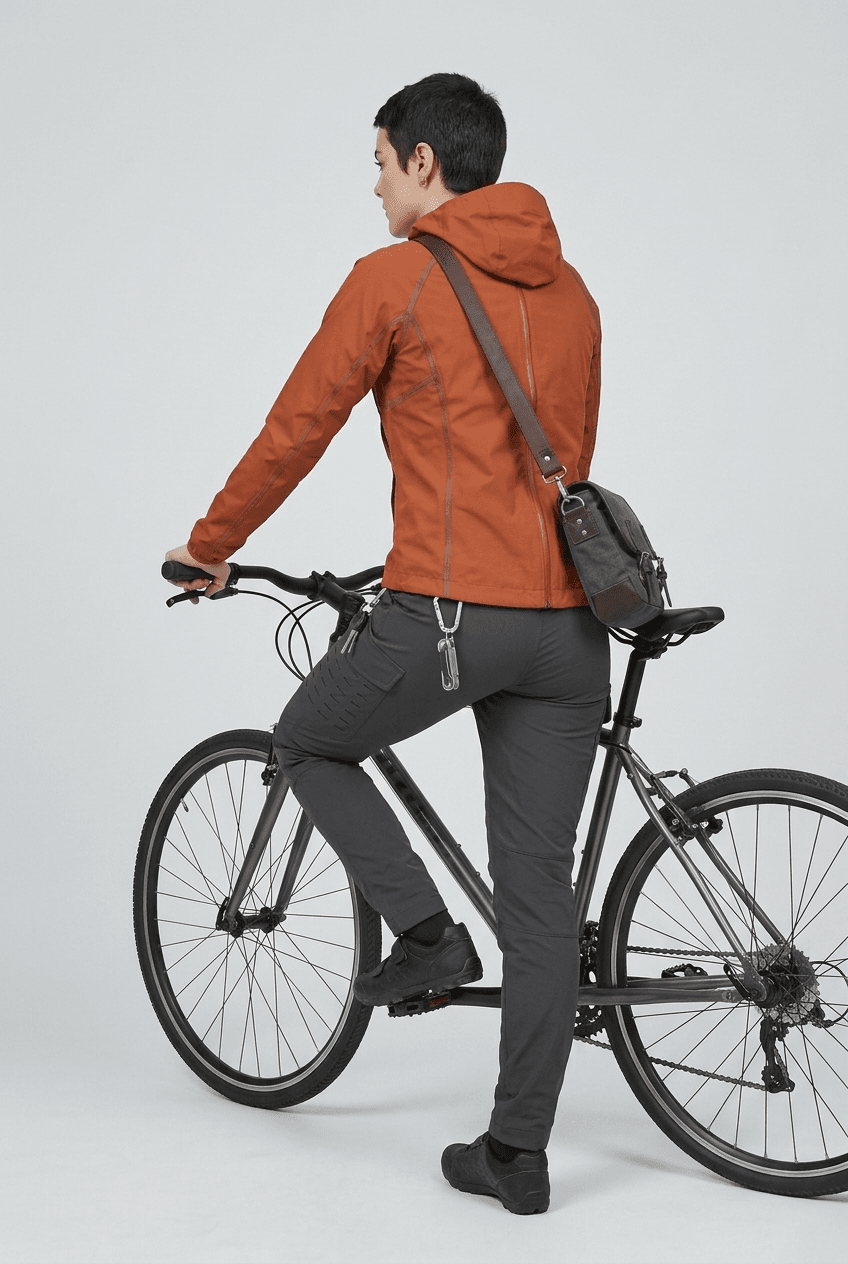
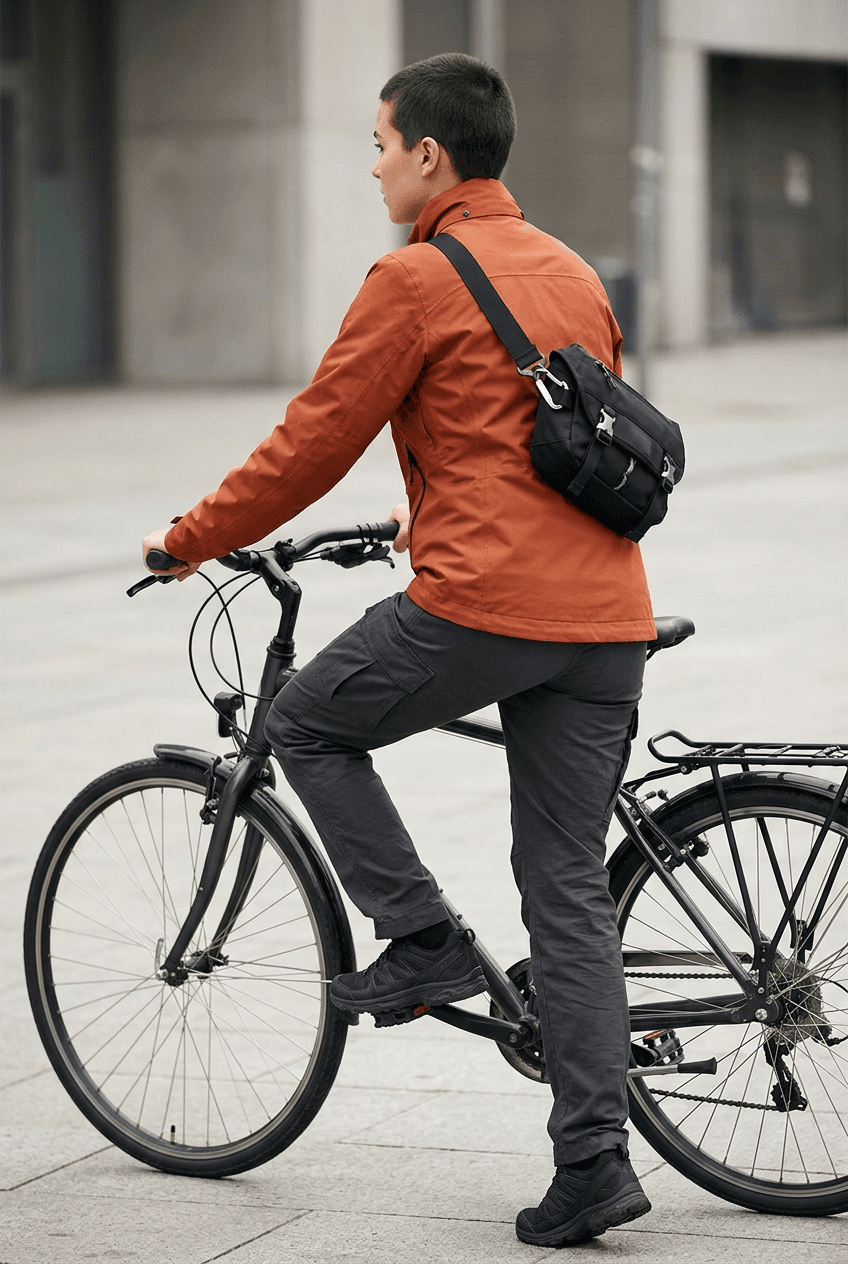
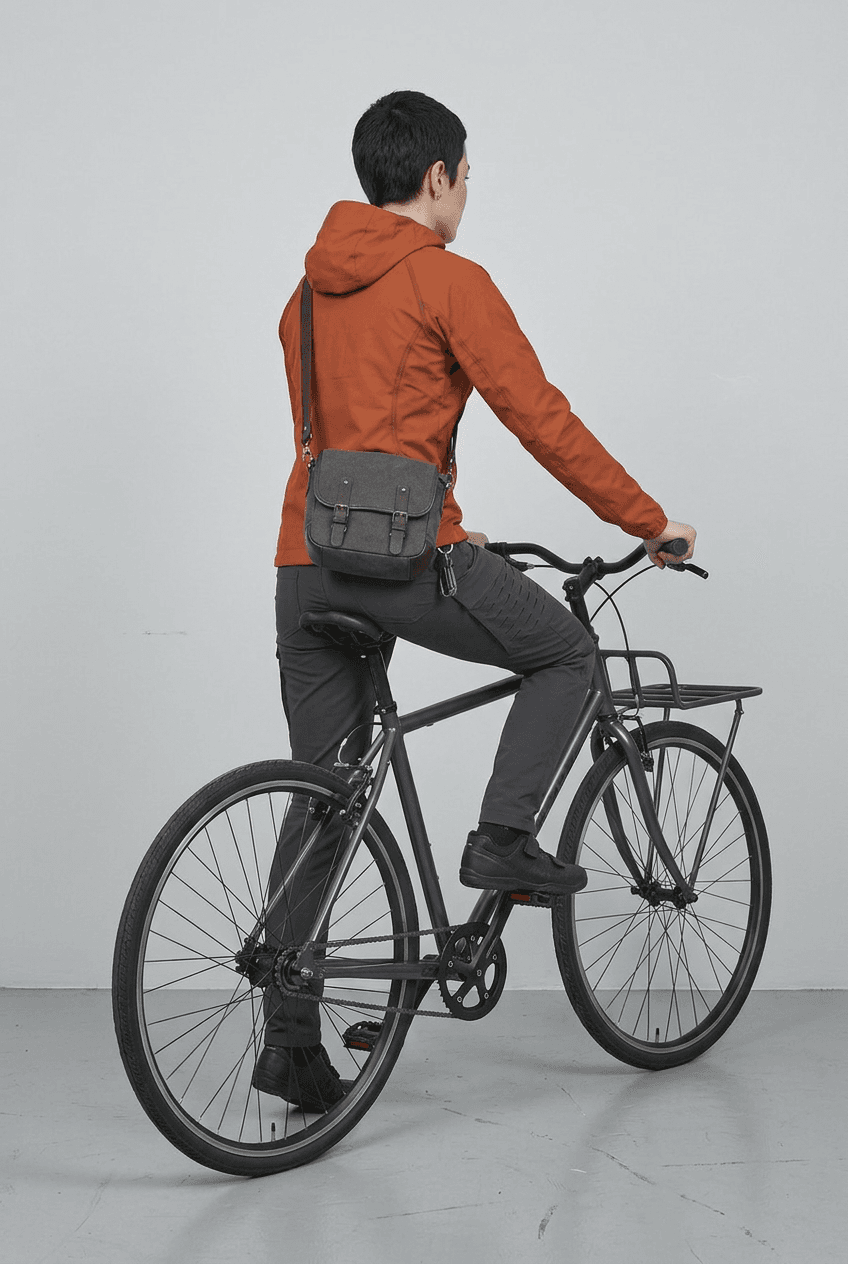
Recommended labels:
Input | Result |
Master image only | Strong character retention |
Full three-view sheet | More bag and clothing drift |
Relevant cropped back view | Better match to the requested angle |
Reference relevance mattered more than reference count in this test.
A human immediately understands a character sheet as several views of the same person. An image model may not use the composite image in exactly the same way.
A full sheet contains more information, but each character is also smaller. Multiple poses and angles share the same image.
For my workflow, the most useful approach was not to feed every reference into every generation.
It was to choose the reference that answered the current shot.
A front portrait is useful for a front-facing close-up.
A profile reference helps when the face turns sideways.
A back view becomes useful when the shot exposes clothing, hair, or bag details that the master image never showed.
Use a reference when it answers something the model would otherwise have to guess.
Separate Character Identity From What Changes in the Shot
References are only part of the workflow.
The prompt also needs to communicate one basic distinction:
What defines the character, and what is allowed to change?
I tested this with Mara in a coastal street scene.
For the first image, I used a short natural-language prompt. I asked for Mara delivering a package in a busy coastal city while keeping the same orange jacket, pants, bag, hairstyle, and overall appearance.
The result worked.
Mara remained recognizable, and the scene had strong visual storytelling.
For the second image, I used a more structured prompt. I separated the character identity from the action, camera, environment, and lighting.
That version also worked.
Simple Prompt vs Structured Prompt


The useful result was not that the structured prompt "won."
It did not.
The simple prompt did not fail.
The structured version was not better simply because it was longer.
What matters is making the boundary clear between two types of information:
KEEP FIXED
Face, hair, proportions, core clothing, and signature accessories.
CHANGE
Pose, action, camera, environment, and lighting.
A compact version can be enough:
KEEP FIXED: Mara's facial identity, cropped dark hair, body proportions, burnt-orange jacket, charcoal cargo pants, messenger bag, and silver utility clips.
CHANGE: Show Mara walking beside her bicycle on a coastal street.
SHOT: Full-body three-quarter view.
SCENE: Late-afternoon light outside small waterfront shops.
The point is not to use these exact labels every time.
The point is to know which information defines the character and which information belongs only to the current shot.
Test the Character in a Real Use Case
You do not need to build a large consistency benchmark before using an AI character.
Test something that resembles the work you actually plan to make.
During my Mara workflow, I tried several downstream situations:
- walking toward the camera
- mounting a bicycle
- appearing from the rear
- moving through a coastal street
- interacting with a bicycle and delivery context
The goal was not pixel-perfect duplication.
I wanted to know whether I could continue creating without stopping to redesign Mara.
Across the tests, her haircut, orange jacket, dark pants, messenger bag, and overall identity remained recognizable.
That was enough for this workflow.
Match the test to the work
If you are creating social portraits, test a new expression.
If you are creating comics, test an angle or panel you will actually need.
If you are moving into video, test a full-body pose or a camera angle that reveals parts of the character the master image does not show.
If you are building a campaign, test a different environment or lighting setup.
Consistency only matters in relation to the creative task you are trying to complete.
A Practical Reusable Character Checklist
Before moving into storyboard, video, or another creative task, check whether the character is prepared enough to reuse.
Your AI character is likely ready if:
- You have one approved master design.
- The character has clear visual identity anchors.
- You know which details are essential and which are optional.
- You know which features should stay fixed.
- You know which parts are allowed to change.
- You have references for important angles or details that the master image does not show.
- You can choose references based on the shot instead of using every reference at once.
- The character has survived at least one real reuse test.
- You can start the next creative task without redesigning the character.
If you can move forward without rebuilding the character, the asset is ready.
This is the point where I would consider the character canvas-ready.
Notice that the checklist is about reuse, not perfection.
What Happens After the Character Is Ready to Reuse?
Once the design is stable enough for your workflow, you can stop spending time on character setup and start using it.
The same character asset can support:
- image series
- storyboards
- AI video
- comics
- brand mascots
- marketing visuals
- game concept development
In my Mara test, Astorie was useful because I could keep the work inside one visual workflow. I generated the early concepts, cropped useful references, tested new views, and reused the same character in later scenes.
The important shift was not from "bad image" to "better image."
It was from generating a character to working with a character that already existed.
That is the point where AI character design becomes a reusable creative workflow
FAQ
How do I make an AI character reusable?
Start with one approved master character. Identify the visual traits that define the design, then add only the reference views your next task needs.
Finally, test the character in a real pose, angle, or scene before building more assets.
Do I need a full character sheet for every AI character?
No.
A full sheet can be useful when your next task needs several angles. It is not a universal requirement.
Start with one strong master reference and add views when the workflow actually needs them.
How many reference images are enough?
There is no fixed number.
Use enough visual information to cover the parts of the character your next task needs.
In my test, a relevant cropped view sometimes worked better than a complete three-view sheet.
Should I use one master image or multiple references?
Start with the most relevant reference.
More references are not automatically better. For Mara's rear bicycle shot, the full reference sheet produced more drift than either the master image or a cropped back view.
How do I keep an AI character consistent?
Start with one approved design and identify the visual features that define the character.
Then use references that match the shot you are trying to create. When needed, separate fixed character traits from variable scene instructions in the prompt.
How do I know when the character is consistent enough?
Ask whether you can complete your next creative task without redesigning the character.
You do not need perfect consistency across every possible pose and scene before you start creating.
Do I need to train a LoRA for a reusable AI character?
Not necessarily.
For the workflow I tested here, I was able to reuse Mara with a master image and task-specific references without training a LoRA.
More advanced training may be worth exploring when reference-based workflows no longer provide the level of consistency your project requires.
Related reading
Best AI Video Models for Product Ads in 2026
Which AI video models fit product ad workflows on Astorie.
Best AI Image Models for Brand Visuals
Brand consistency across image models on Astorie's canvas.
How to Create an AI Voiceover Video on Astorie
Audio narration plus video generation workflow on Astorie.
Ready to try it on the canvas?
Open Astorie and fan your prompt across every frontier model in one workflow.