
AI Influencer Production Workflow: Build Once, Reuse Across Content Drops
Learn how to build a reusable AI influencer production workflow by separating identity assets, production structure, and content variables, then reusing the same pipeline across multiple content drops.
Key takeaways
Separate the workflow into identity assets, production structure, and content variables so each type of change stays easy to control.
Build the character identity once, then reuse approved canonical references instead of redefining the influencer in every prompt.
Reuse one approved hero image across static posts, reels, and talking videos whenever possible instead of regenerating every asset from scratch.
Keep scene, outfit, script, and motion modular so a new content drop only requires targeted input changes.
A workflow becomes reusable when the next content set can be produced without rebuilding the identity layer or production graph.
Creating one good AI influencer image is easy. The harder part is producing the next post, outfit, reel, and talking video without rebuilding the character or workflow from scratch.
In this project, I built a reusable production pipeline for a fictional lifestyle influencer named Mara Vale, then duplicated it to create a second café-themed content drop with the same identity assets and node structure.
Quick Answer
A practical way to build a repeatable AI influencer workflow is to separate the system into three layers:
Identity Assets define who the influencer is. These include the master character and canonical reference images.
Production Template defines how the content is made. This includes the image, video, script, voice, and lip-sync path.
Content Variables define what changes in each drop. These include the scene, outfit, script, activity, mood, and motion.
In my workflow, I used GPT Image 2.5 for image generation, Seedance 2.5 for video generation, ElevenLabs TTS Eleven v3 for voice, and Astorie's Grid Crop and Lipsync tool nodes.
For the second content drop, I kept the identity assets, models, and node structure unchanged. I only updated the scene, outfit, script, and a few motion details.
Build identity once. Reuse the production structure. Change the content inputs.
What You Need Before You Start
Before generating anything, separate the character details into two categories.
The first category is identity. These traits should remain recognizable across future posts:
- face structure
- hairstyle
- age impression
- body proportions
- signature facial details
- overall visual personality
The second category is content. These details are allowed to change:
- outfit
- location
- activity
- expression
- lighting
- script
- camera movement
This distinction becomes the foundation of the workflow.
If the café changes, that is content variation. If Mara suddenly has a different face, that is an identity failure.
For this project, I also decided on the main output formats before building the canvas:
- master character: 3:4
- reference sheet: 3:2
- static post: 1:1
- lifestyle reel: 9:16, 6 seconds
- talking video: 9:16, about 8 seconds
How to Build a Reusable AI Influencer Workflow
Step 1: Build the Character Identity System Once
I started with a Text Node containing Mara’s identity rules.
Instead of writing a long character biography, I focused on visual traits that would matter later: face shape, eyes, hair, body proportions, signature beauty mark, overall styling, and default appearance.
From those rules, I generated one clean master character with GPT Image 2.5.
The first image was deliberately simple. Mara appeared against a clean background with a clear view of her face and body. The goal was not to create social content yet. It was to approve one identity anchor.
Once the image looked right, I saved it as a reusable Element.
Next, I used that approved master to generate a 3×2 reference sheet with several useful views. I then connected the sheet to a Grid Crop tool node and separated the panels into individual images.
The strongest views became reusable canonical references, including front, three-quarter, profile, and full-body images.
The final identity layer was simple:
Identity Rules → Master Character → Reference Sheet → Grid Crop → Canonical References
Once the identity system was ready, I stopped editing it.
From this point on, the article is no longer about character creation. The identity layer simply becomes reusable infrastructure for content production.
Step 2: Create the First Content Drop From Reusable Inputs
The next group on the canvas was for actual content production.
For the first drop, I used a gallery visit as the theme.
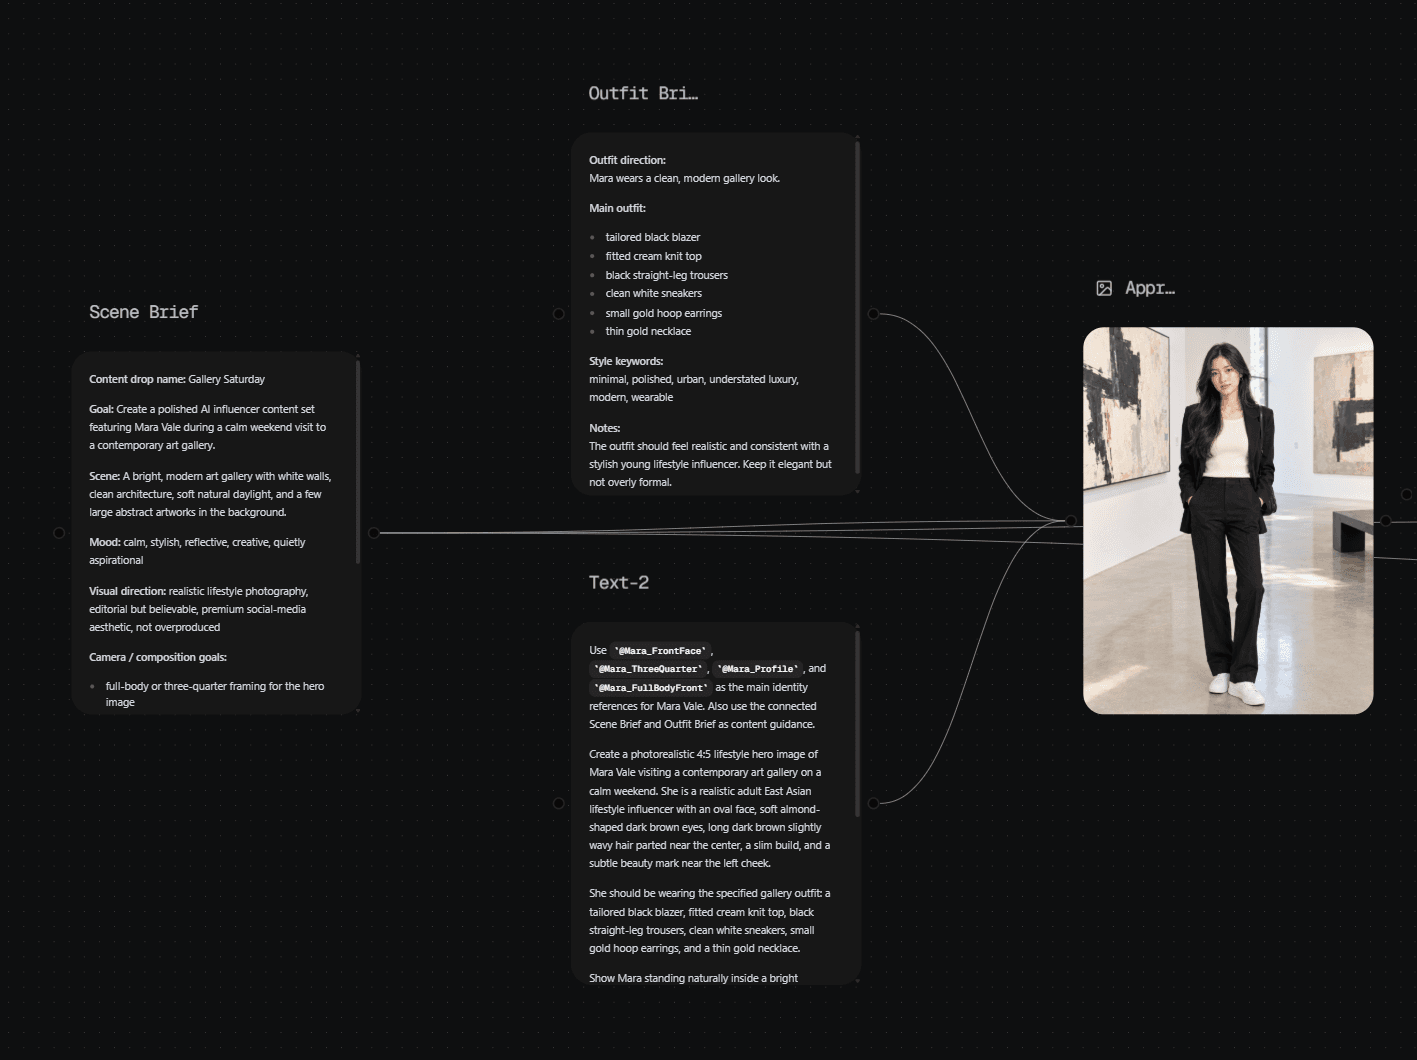
Instead of putting the full concept into one large prompt, I separated the new content into two Text Nodes:
Scene Brief controlled the environment, lighting, mood, and composition.
Outfit Brief controlled the clothing and styling for this specific drop.
Those two content inputs were combined with Mara’s canonical references to generate the first hero image.
Generate one approved hero image
I used GPT Image 2.5 sunburst to create a 3:4 lifestyle image of Mara in the gallery.
The prompt did not need to redefine the character from scratch. The reference images handled identity. The Scene Brief handled the location and atmosphere. The Outfit Brief handled clothing.
The generation prompt only had one job: produce a strong lifestyle hero image that could support several downstream outputs.
Before continuing, I checked:
- whether Mara still looked like the approved character
- whether her hair and proportions remained recognizable
- whether the requested outfit was correct
- whether the gallery environment made sense
- whether there were obvious hand, clothing, or accessory errors
Only after that image passed this check did I continue.
This approval point matters because downstream assets inherit problems from upstream images. If the hero image is wrong, every later branch becomes harder to control.
Step 3: Turn One Approved Image Into Multiple Content Formats
The approved hero image became the source for the rest of the first content drop.
I did not independently regenerate every asset from the original character references. Wherever possible, I reused the approved image.
Create the square social post
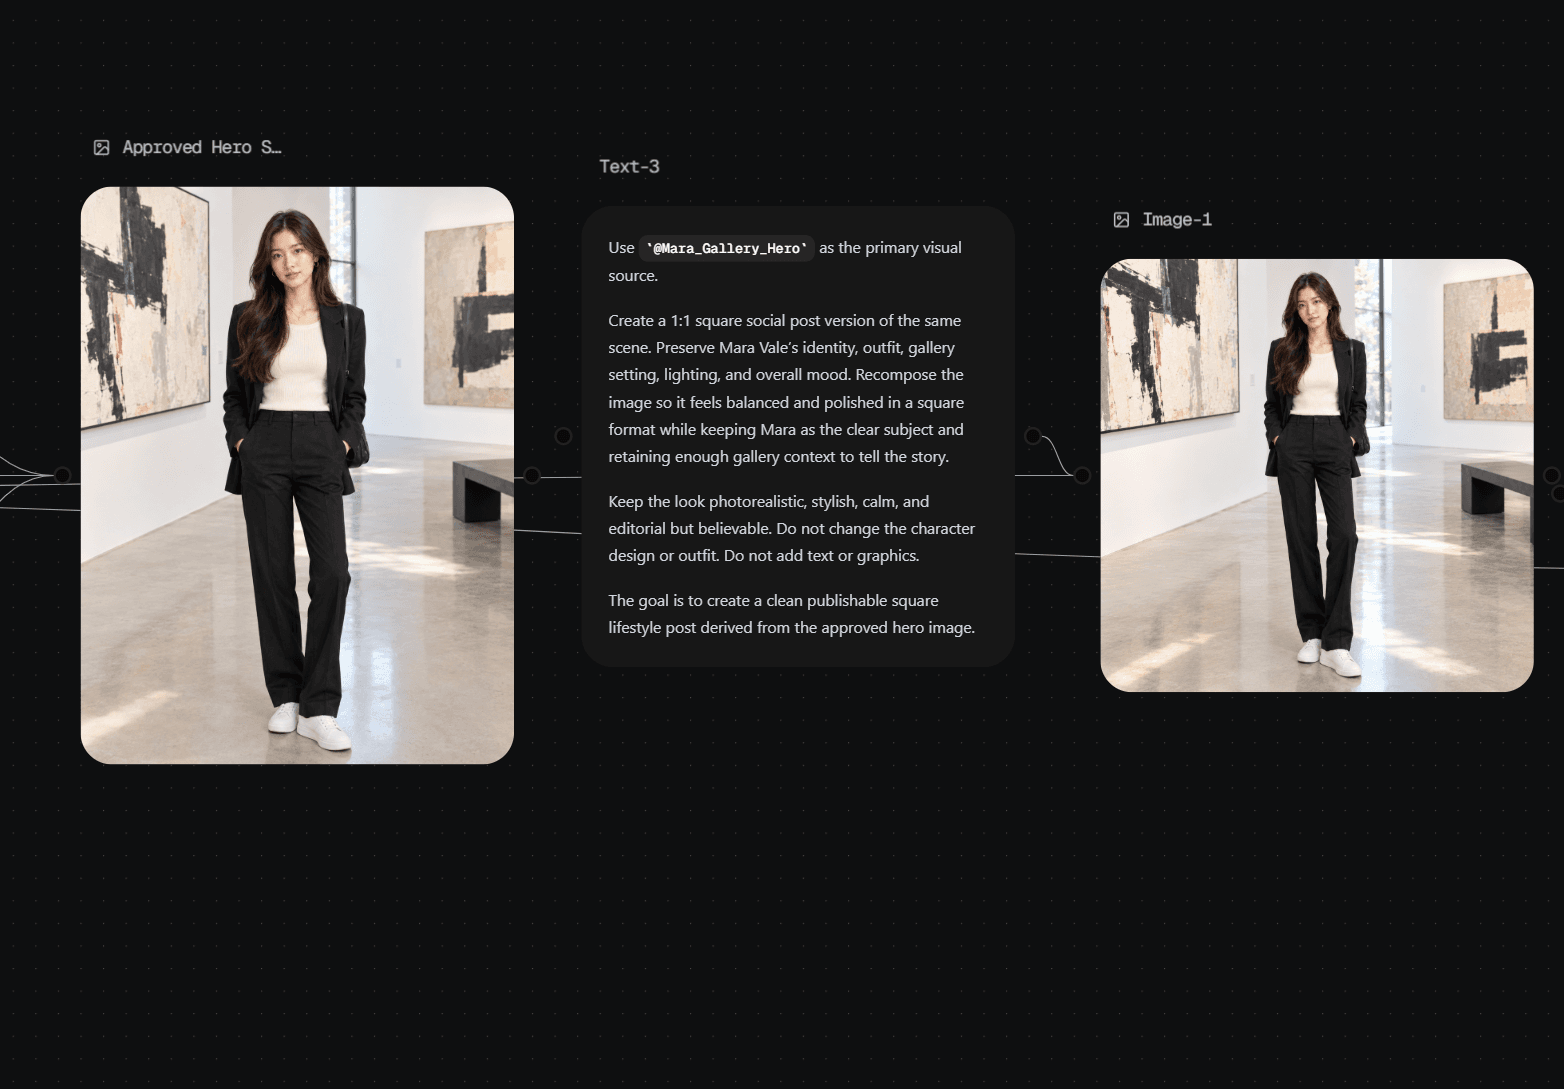
For the static post, I generated a 1:1 version from the approved hero image.
The prompt asked GPT Image 2.5 sunburst to preserve Mara's identity, outfit, gallery setting, lighting, and overall mood while recomposing the scene for a square frame.
The production rule here is simple:
If an upstream image is already correct, adapt it before rebuilding it from scratch.
A completely new generation creates another opportunity for the face, clothing, or composition to drift.
Create the lifestyle reel
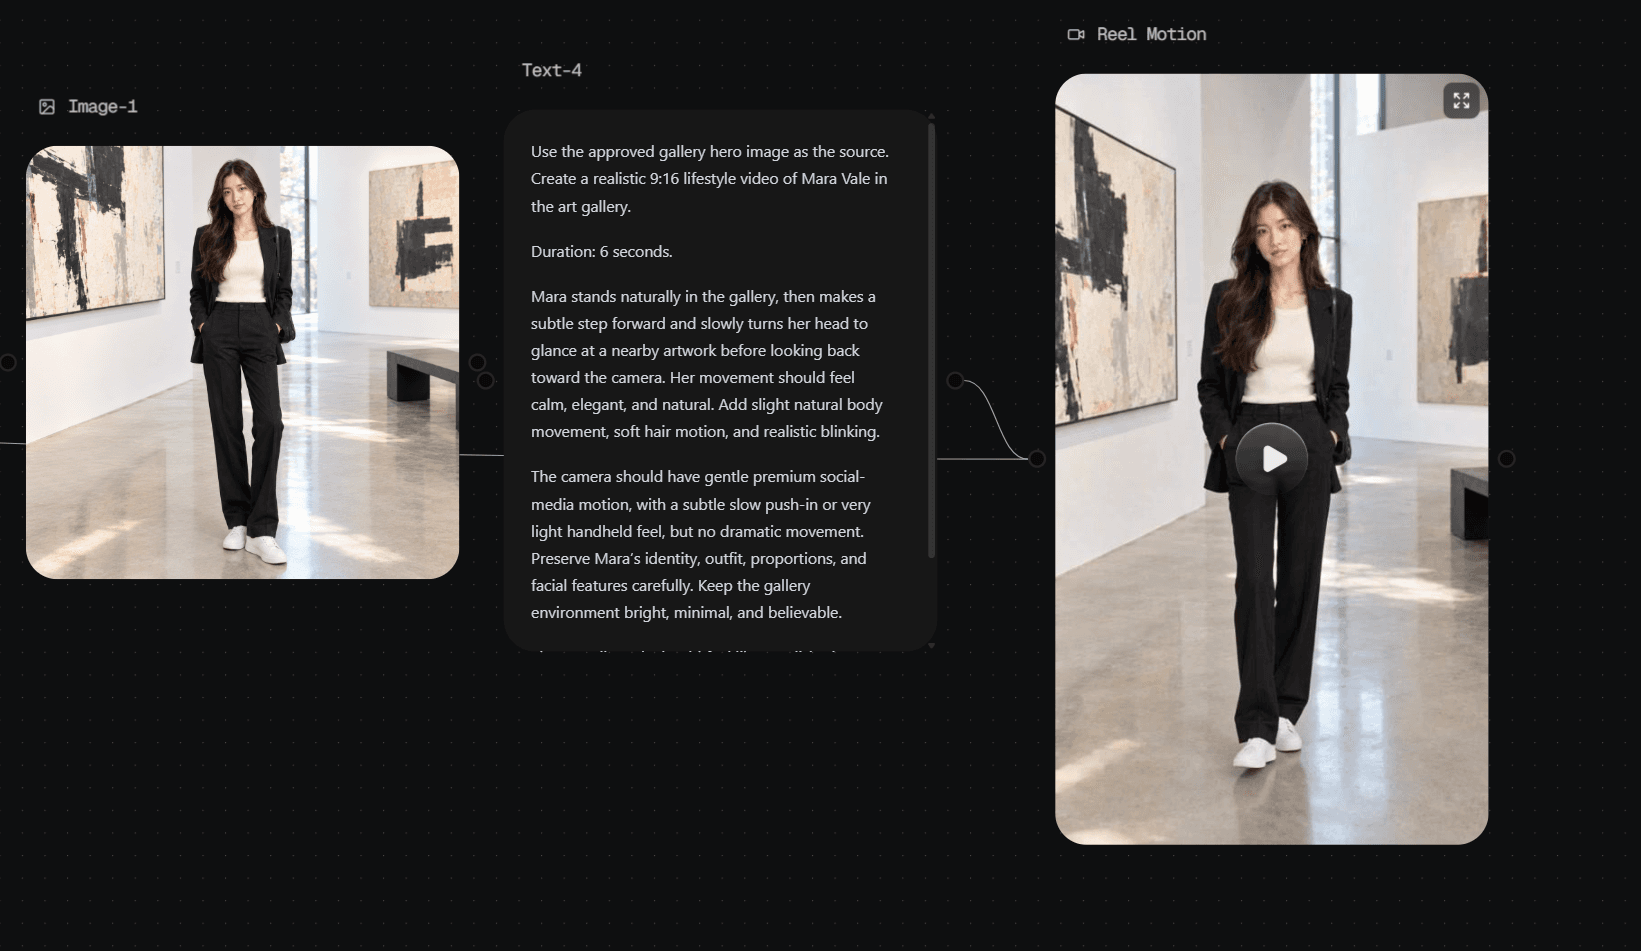
I then used the approved content image as the source for a Seedance 2.5 video.
The reel used a 9:16 frame and a 6-second duration.
I kept the motion prompt focused: subtle body movement, a natural turn, realistic blinking, soft hair motion, and restrained camera movement.
The video prompt was not responsible for recreating Mara. It was responsible for animating an image that had already passed visual QA.
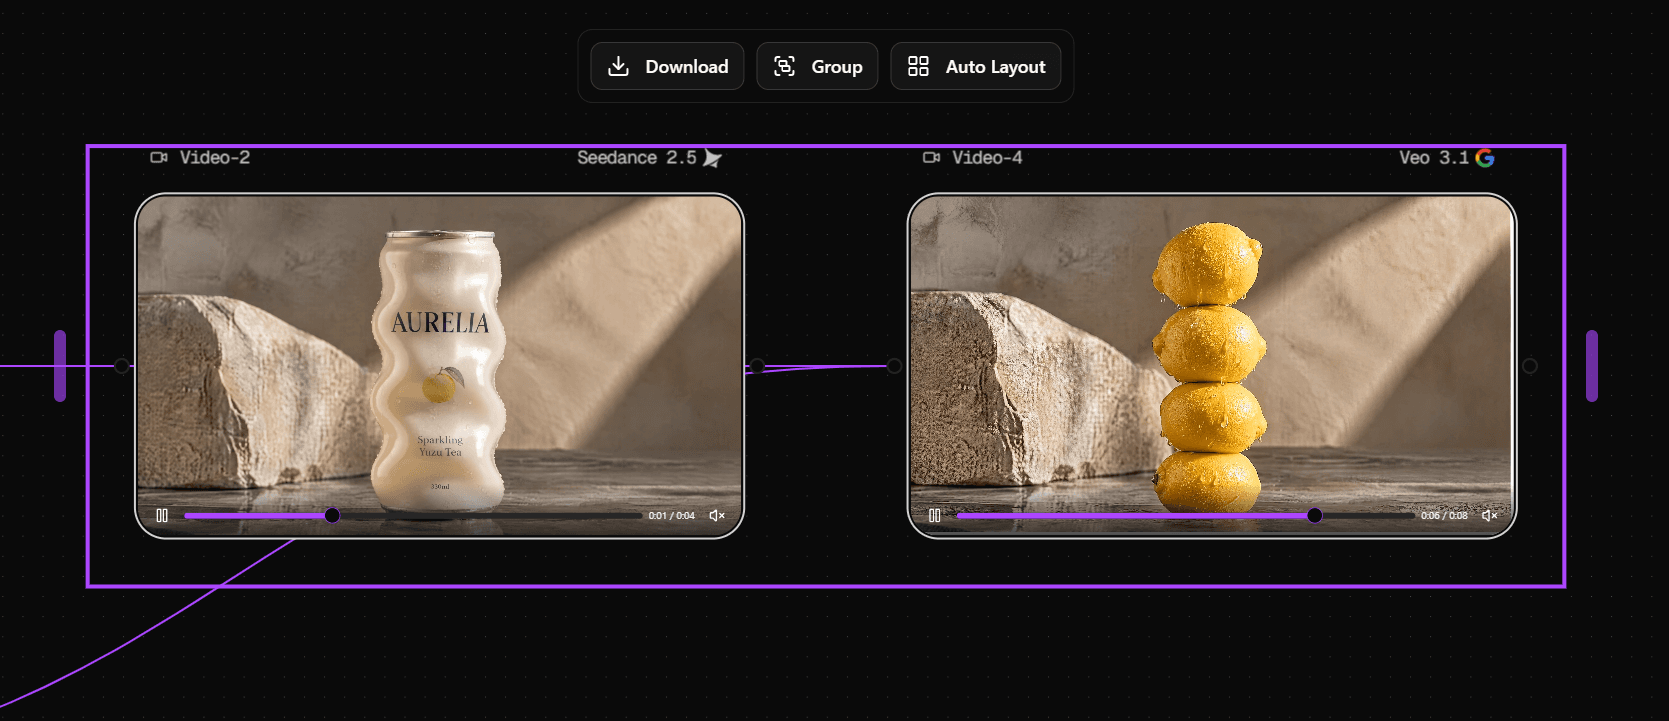
I did not compare several video models here.
I already had a video path that worked for this project. Adding extra branches would not have resolved a production decision, so I kept the workflow focused on completing the content drop.
Generate the talking video without a separate portrait
I could have inserted another image-generation stage and created a dedicated talking portrait.
I skipped it.
Instead, I wrote the Seedance 2.5 video prompt so the output would already work as a talking shot.
I asked for a closer framing, stable face visibility, natural blinking, small head movement, and subtle posture shifts.
The talking video used 9:16 and ran for about 8 seconds, matching the short voiceover.
This removed an unnecessary generation step from the pipeline.
Do not add a node just because the canvas can support one. Add it when it solves a production problem.
Step 4: Generate the Voice and Match the Lip Movement
The visual clip and spoken audio stayed separate until the final stage.
I wrote the dialogue in its own Text Node, then connected it to an Audio Node using ElevenLabs TTS Eleven v3.
The script was intentionally short. Mara was not delivering a long narration. The goal was a brief lifestyle-style comment that would fit naturally into a social video.
I kept the voice direction simple: warm, calm, conversational, and not overly commercial.
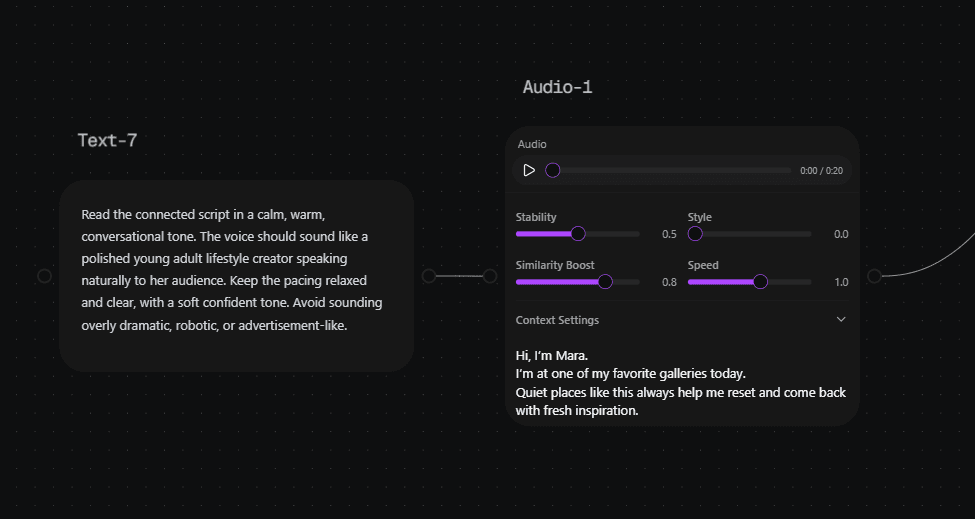
Keeping the audio separate made the workflow easier to revise.
If the script changed later, I could regenerate the audio without rebuilding the character image or the video branch.
Finish with Lipsync
I connected the generated audio and talking video to the Lipsync tool node as the final stage of the branch.
The final talking-content path was:
Script → ElevenLabs TTS → Audio
plus
Approved visual → Seedance 2.5 → Talking video
then
Talking video + Audio → Lipsync → Final talking post
At this point, Group B produced a complete content set without changing the original identity system.
Step 5: Duplicate the Workflow and Build the Second Content Drop
This was the most important part of the project.
The first content drop showed that the canvas could produce the required assets.
The second content drop tested whether the same production structure could be reused.
For Group C, I duplicated the existing production group.
I did not create a new identity system.
I did not create new reference images.
I did not change the image, video, or voice models.
I did not rebuild the node structure.
Instead, I changed only the content inputs.
Replace the gallery with a café
The first Scene Brief described a modern gallery.
For the second drop, I replaced it with a warm neighborhood café.
Change the outfit
The gallery Outfit Brief used a polished gallery look.
For the café drop, I changed it to a more relaxed Sunday outfit.
Mara's canonical identity references stayed unchanged.
Replace the script
The gallery talking script became a short Sunday coffee script.
The voice setup remained the same.
Adjust scene-specific motion
A few downstream prompts still contained content-specific details.
Instead of rebuilding the video nodes, I changed only those lines.
For example, the café reel used movement suited to the new environment rather than repeating the gallery action.
That was enough to generate a new outfit, café setting, static image, and reels from the existing production structure.
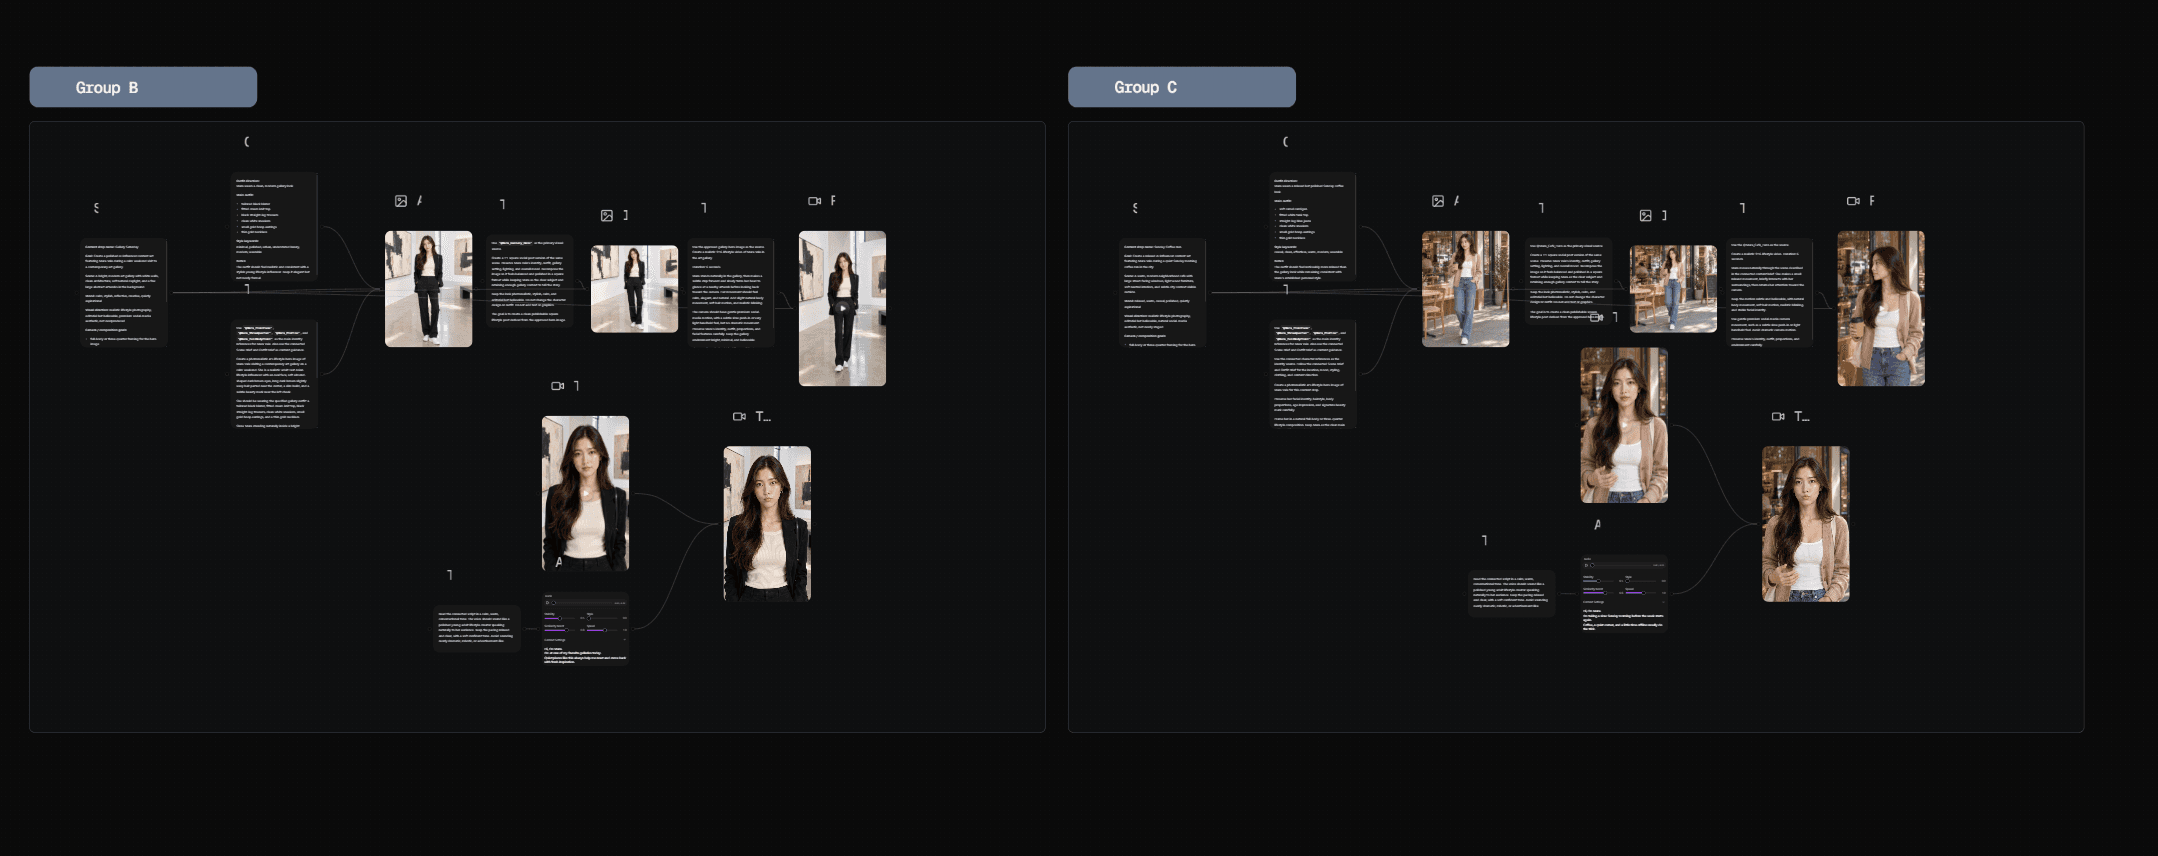
The comparison looked like this:
Production element | Group B — Gallery | Group C — Café |
Identity references | Same | Same |
Image-generation path | Same | Same |
Video-generation path | Same | Same |
Voice setup | Same | Same |
Lipsync stage | Same | Same |
Canvas structure | Same | Same |
Scene | Gallery | Café |
Outfit | Gallery look | Sunday look |
Script | Gallery copy | Coffee copy |
Motion | Gallery-specific | Café-specific |
This second run supported a more useful definition of repeatability:
A workflow is not really repeatable just because the first canvas looks organized. It becomes reusable when the next content set can be produced without rebuilding the identity layer or production graph.
Check the Second Content Drop, Not Just the Canvas
Reusing the same nodes is only one part of the test. The second output still needs visual QA.
For the Gallery → Café comparison, the most useful checks are:
QA check | Gallery drop | Café drop |
Facial identity | Matched canonical references | Matched canonical references |
Hair | Long dark hair preserved | Long dark hair preserved |
Body proportions | Consistent with full-body reference | Consistent with full-body reference |
Character reference set | Canonical Mara Elements | Same Elements |
Voice setup | ElevenLabs Eleven v3 | Same setup |
Node structure | Group B production flow | Same production flow |
Outfit | Gallery-specific look | Sunday café look |
Scene | Contemporary gallery | Neighborhood café |
The second café drop kept Mara's facial identity, hair, and body proportions consistent with the canonical references. I still checked these details manually rather than assuming that reusing the same references would guarantee the same result.
The fact that the same references and nodes were reused shows that the production structure could be reused. It does not automatically mean every generated visual detail will stay perfect.
What Actually Needs to Change Between AI Influencer Posts?
After running both drops, the fixed and variable parts were much easier to see.
Keep fixed | Change per content drop |
Character references | Scene |
Master identity | Outfit |
Canvas structure | Script |
Image-generation path | Activity |
Video-generation path | Motion details |
Voice setup | Mood |
Lipsync stage | Content-specific copy |
This is why I would not try to solve the entire workflow with one giant "perfect prompt."
A large prompt mixes identity, clothing, environment, movement, and output instructions in one place. It may work once, but it becomes harder to update safely.
A modular workflow makes each type of change visible.
Common AI Influencer Workflow Problems and Fixes
The Character Starts Looking Different
When the character begins to drift, avoid solving the problem by adding longer and longer face descriptions to every prompt.
Return to the canonical references.
The master and cropped reference Elements should remain the identity source. Scene and outfit prompts should not be responsible for redefining the character.
If one downstream result looks wrong, fix that node rather than rebuilding the entire identity system.
A Good Still Image Turns Into an Unstable Reel
Video adds motion, which creates more opportunities for visible errors.
For my reels, I avoided stacking several movements into one short clip.
One main action, small supporting movement, and restrained camera behavior were easier to control than asking Mara to walk, turn, gesture, interact with an object, and move through the environment in six seconds.
Keep the motion instruction focused on what the shot actually needs.
The Talking Video Feels Overanimated
A talking clip does not need cinematic movement.
Large gestures and strong camera motion can make the face harder to control before lip sync.
For this workflow, I kept Mara facing the camera with small head movement, blinking, and minor posture changes.
The visual clip mainly needed to provide a stable base for the voice.
Every New Post Still Requires Too Much Editing
Look at what you had to change for the second drop.
If you need to recreate the character, rebuild the nodes, reconnect the graph, and rewrite every prompt, the template is still too fragile.
If most of the structure survives and only the scene, outfit, script, and content-specific motion need updates, much more of the production logic is reusable.
How to Scale the Workflow Without Losing Control
Once the basic template works, scaling should mean adding controlled variations, not making the canvas larger for its own sake.
First, keep the canonical identity Elements separate from individual content groups. This prevents a local scene edit from turning into an accidental character redesign.
Second, save a clean production template after removing any test-only or unused nodes. The reusable version should contain only the path you actually want to repeat.
Third, keep Scene Brief, Outfit Brief, Script, and Motion instructions modular. If one content variable changes, you should be able to identify exactly which input needs editing.
Fourth, add new nodes only when a new production requirement justifies them. A more complex product placement, multi-person scene, different framing strategy, or longer dialogue may require a structural change. The Gallery → Café test does not prove that the same graph will cover every future scenario unchanged.
Finally, keep a QA gate before export. Check:
- facial identity
- hair and body proportions
- outfit accuracy
- environment
- hands and accessories
- reel motion
- mouth sync
- final aspect ratio
Consistency and correctness are not the same thing.
A necklace, clothing detail, or facial feature can remain consistent across several outputs and still be wrong. Final QA still matters.
FAQ
Do I need to create a new AI influencer for every post?
No.
Once you have an approved identity layer, reuse those references across later content drops. The scene, outfit, and activity can change without rebuilding the character from scratch.
Do I need a separate workflow for every location?
Not necessarily.
In my Gallery → Café test, the same production structure handled both locations. I changed the scene instructions and content-specific prompt details while keeping the identity and production path in place.
More complex content may still require additional nodes or a different branch.
Do I need a separate talking portrait before generating a talking video?
Not in every workflow.
I skipped that step in this project. Instead, I described the closer framing and subtle speaking behavior directly in the Seedance 2.5 video prompt.
That removed one generation stage without changing the final production goal.
Should every image use the same outfit?
No.
Outfit is a content variable, not an identity rule.
Keeping those concepts separate allows the character to appear in different content drops without treating every wardrobe change as a new identity.
What should I save as reusable identity assets?
At minimum, keep one approved master character and a small set of useful canonical references.
For Mara, I kept front, three-quarter, profile, and full-body views as the core set.
What changed in the second content drop?
For the café version, I mainly changed:
- scene
- outfit
- script
- scene-specific motion
The identity assets, production structure, model choices, voice setup, and Lipsync path stayed in place.
Build the System, Not Just the Character
A reusable AI influencer workflow is not just a character-consistency setup. It also needs a production structure that survives the next content request.
In this project, the second café drop showed that I could reuse the same identity layer and production graph while changing the creative inputs.
That is a more useful test than simply finishing one organized canvas:
the character stayed upstream, the production logic stayed in place, and the next content idea became a set of targeted edits rather than a new project from scratch.
Related reading
Best AI Video Models for Product Ads in 2026
Which AI video models fit product ad workflows on Astorie.
Best AI Image Models for Brand Visuals
Brand consistency across image models on Astorie's canvas.
How to Create an AI Voiceover Video on Astorie
Audio narration plus video generation workflow on Astorie.
Ready to try it on the canvas?
Open Astorie and fan your prompt across every frontier model in one workflow.