

How to Create AI UGC Product Videos from a Script
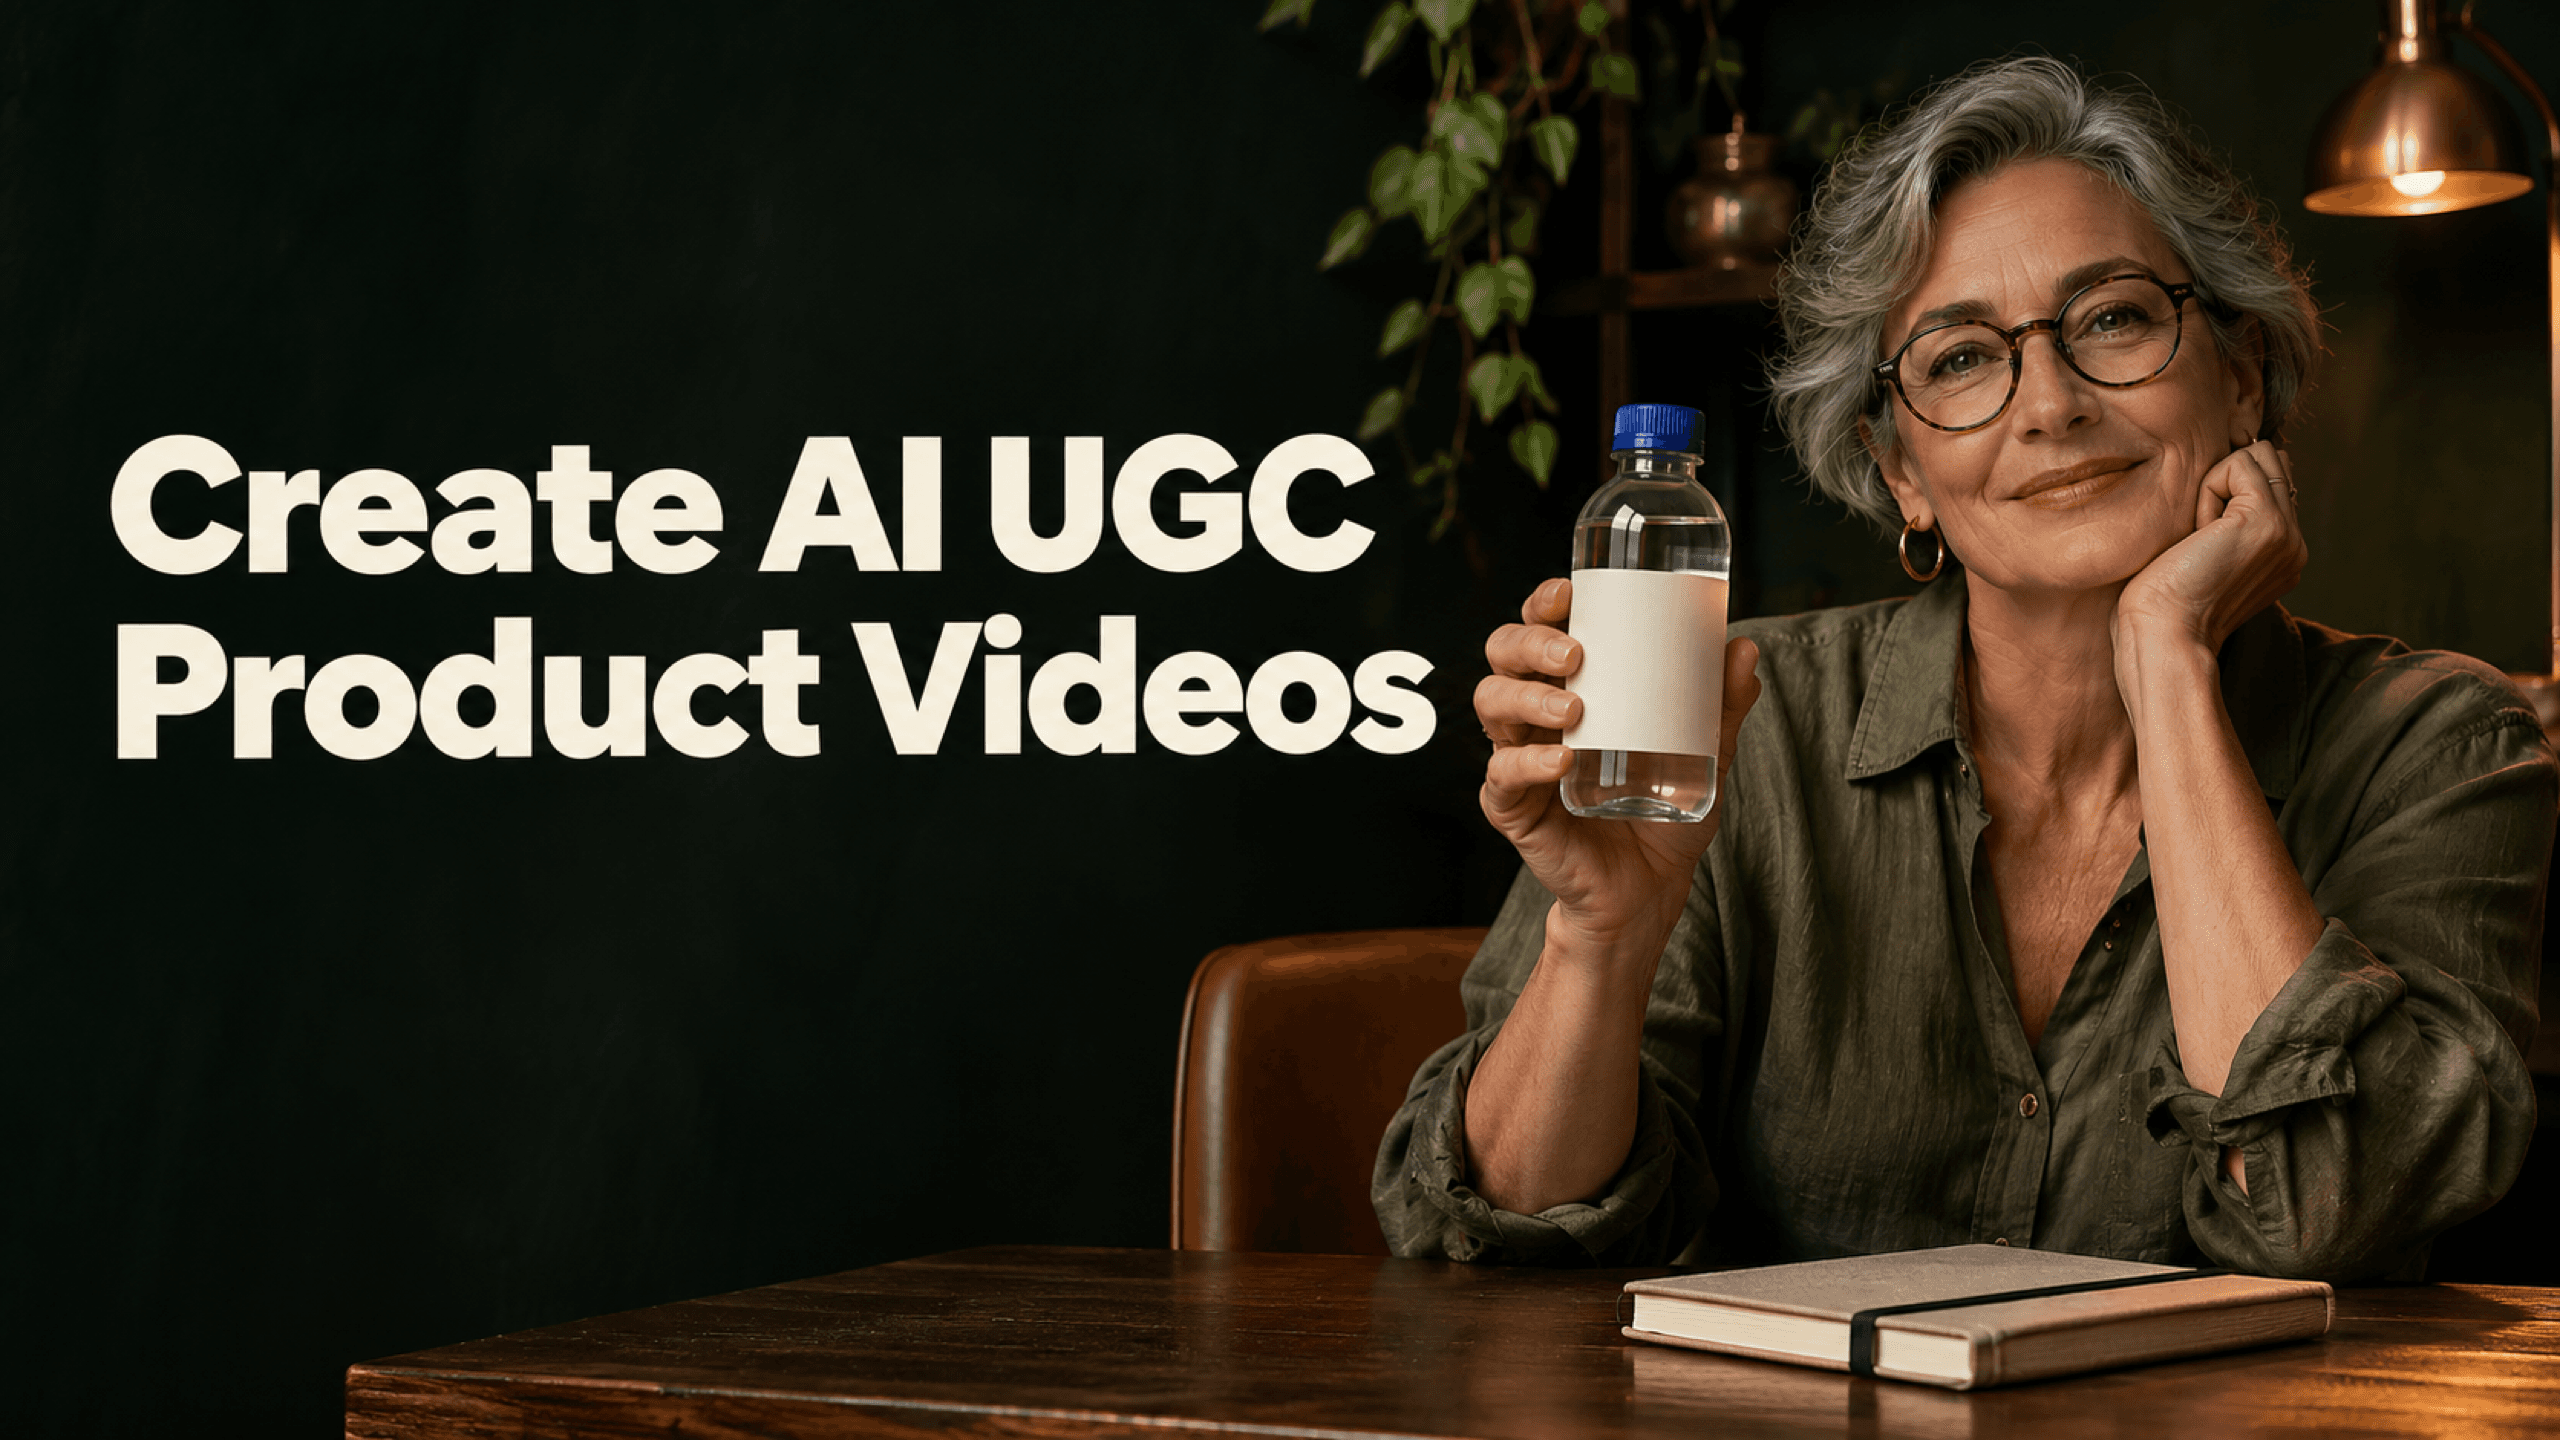
An AI UGC video turns a short script into a presenter-led product clip. Start with a clear product image, a factual brief and a few lines someone could say comfortably. In Astorie Ads, those pieces become Product, Avatar, Voice and the directions in This video.
We made two vertical presentations for a fictional MORI bottle. Both used Amy, the same product reference and the same connected voice input. The opening question changed between versions. The clips also show why you should review the complete new take each time you change a hook.
Build an AI UGC video around one simple message
Give the presenter one job: introduce a visible feature, show a simple action or invite a closer look. Our bottle has a blue cap, a clear body and a white label. Those are things the viewer can see. We kept the script about the design rather than inventing a buying experience or a benefit the demo bottle could not support.
For version A, we used this short introduction:
Need a bottle for your desk? Meet the MORI demo bottle. Notice the blue cap, clear body, and simple white label. Take a closer look at the design.
Version B replaced only the opening question with “Prefer a simpler everyday bottle?” The remaining script stayed the same.
Version A uses the “Need a bottle for your desk?” opening, with Amy presenting the MORI bottle.
Version B uses the “Prefer a simpler everyday bottle?” opening. Notice the different room and notebook as well as the hook.
1. Prepare the product reference and facts
Open a project in the Astorie canvas workflow and add the approved product photo. Keep the front readable, with enough space to see the cap, body and base. Use a photo of the packaging you intend to show, rather than asking the presenter to reconstruct it from the product name.
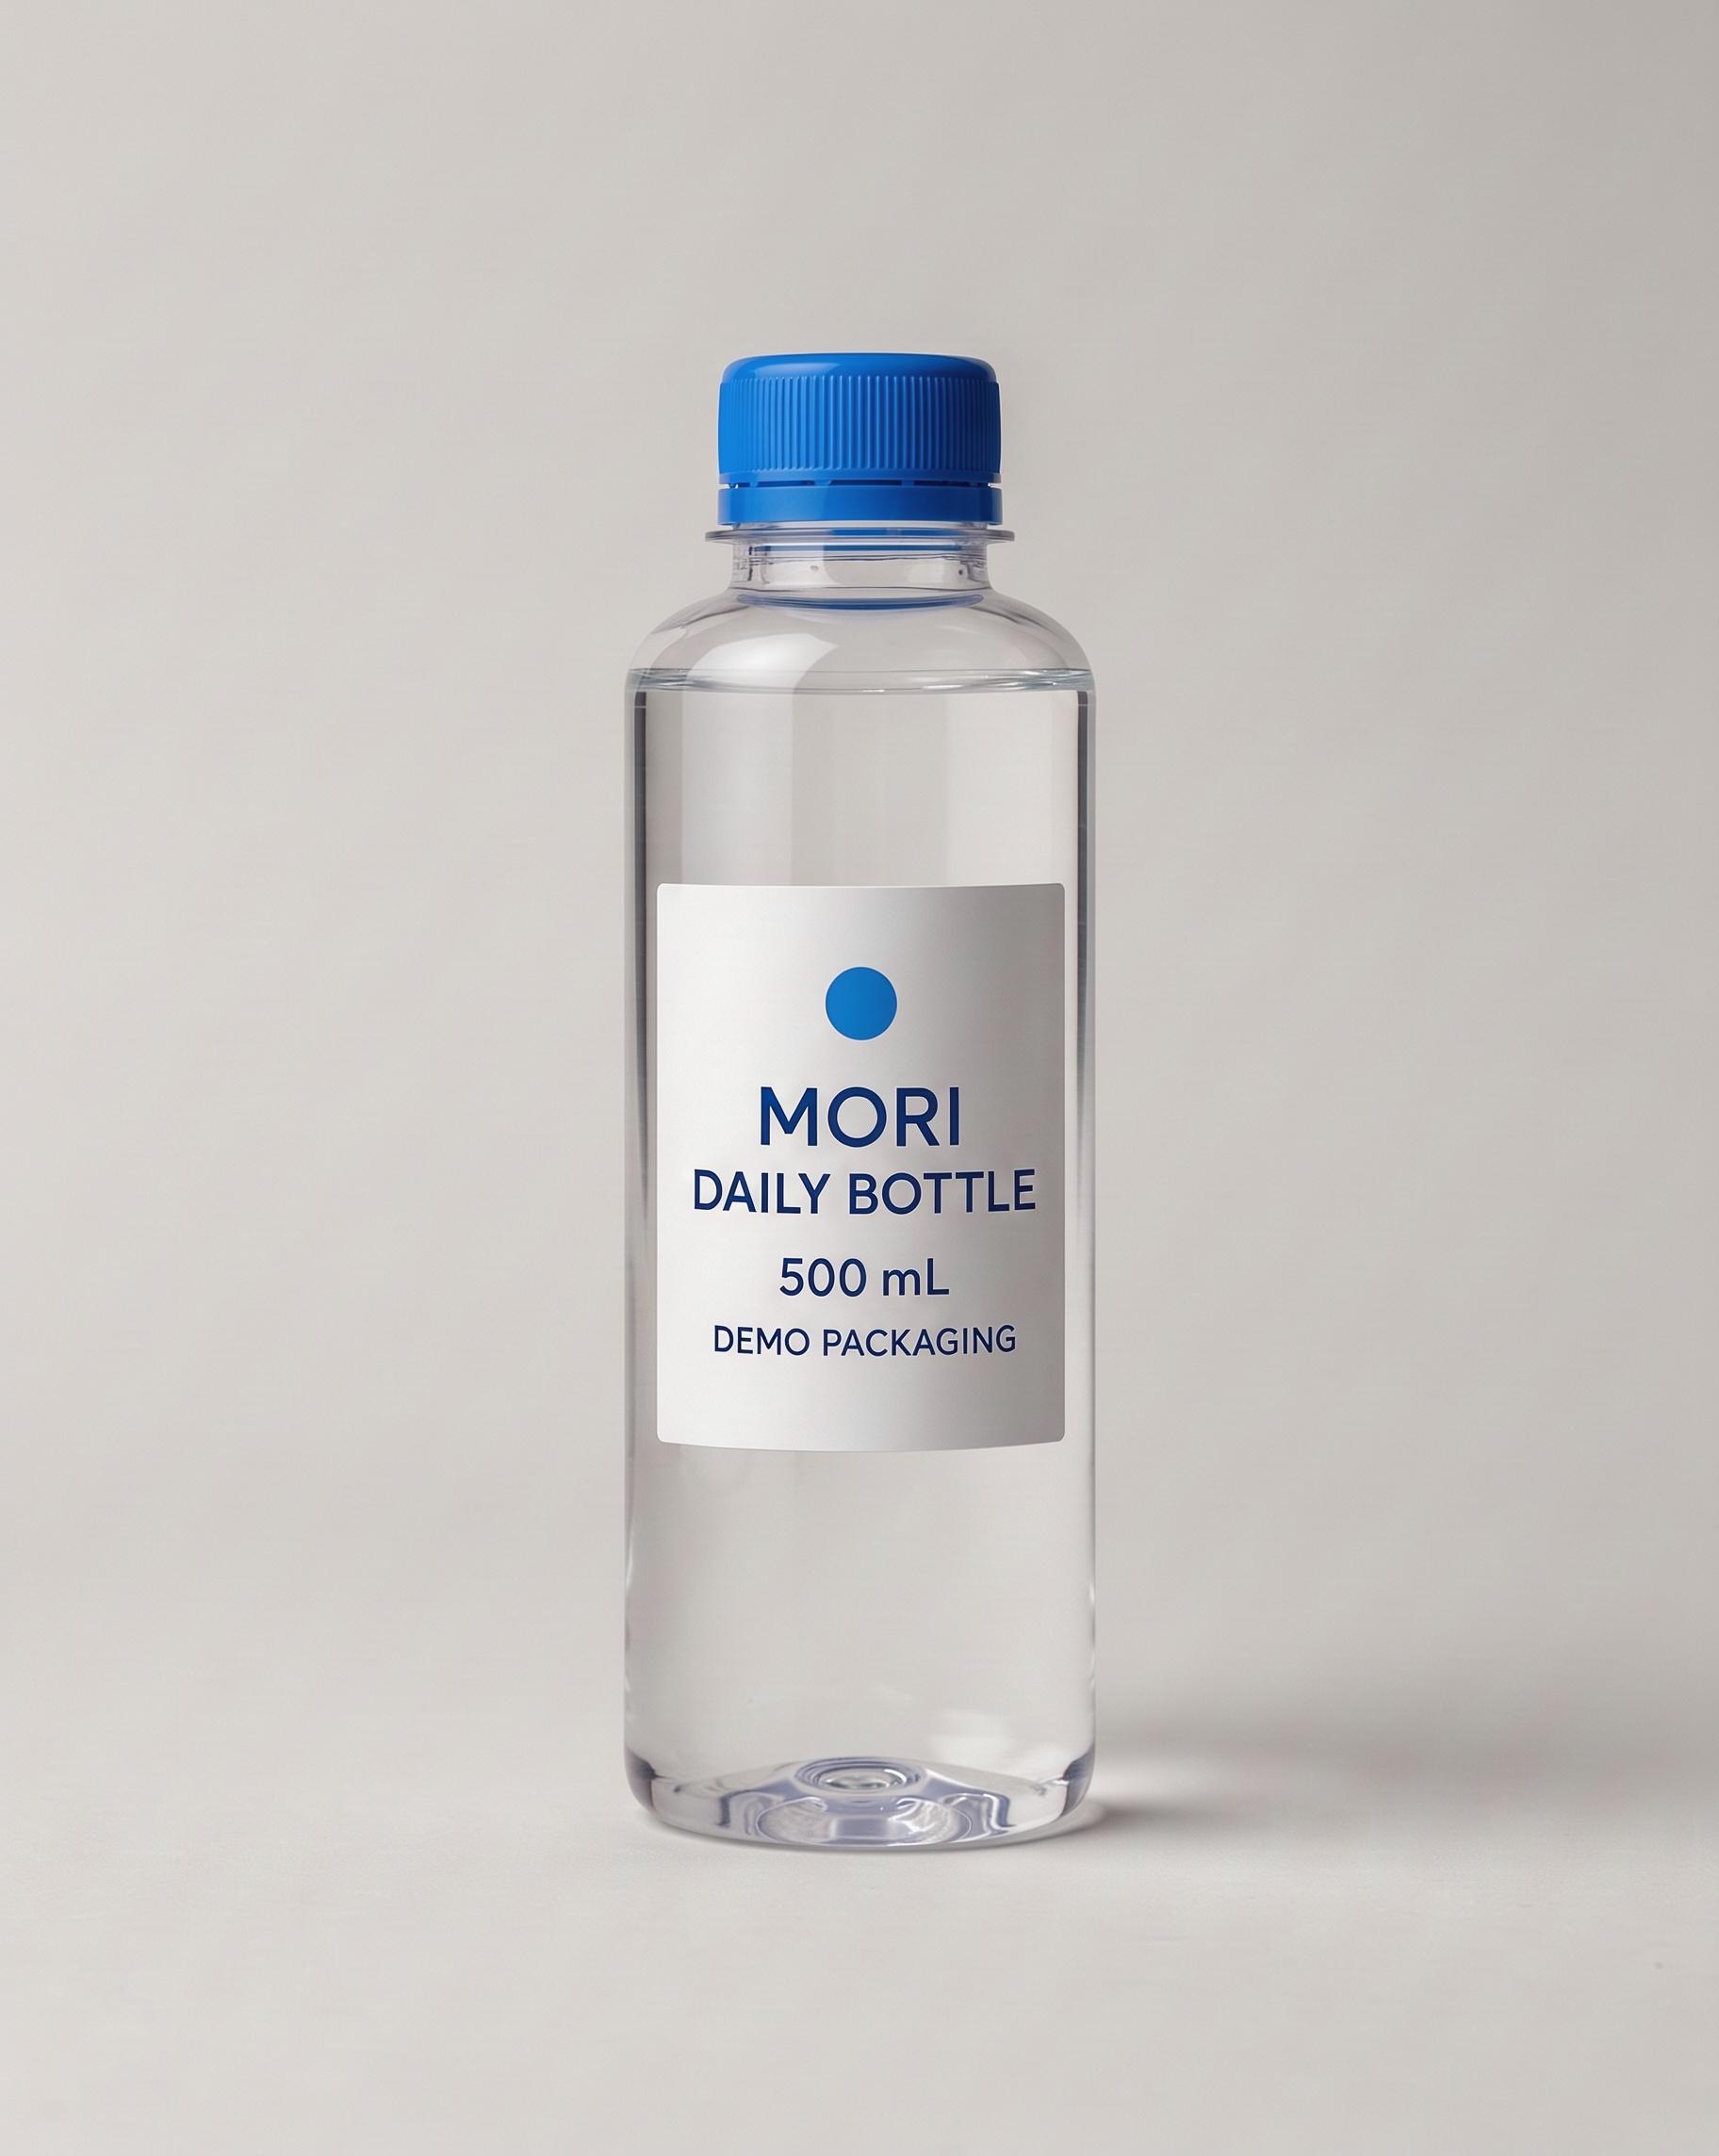
Figure 1. The MORI reference used for both presenter videos. This is fictional demo packaging.
Our reference was generated with FLUX 3 Image at 4:5, 2K, JPEG, one image and Expand Prompt off. You can bring your own approved photo instead. Create a Video node, select Astorie Ads and connect that product image to Product.
Product facts has three columns. Put the name at the beginning of Product; there is no separate Product name field in this panel. Keep visual features distinct from claims.
Field | Example entry |
|---|---|
Product | MORI Demo Bottle. Fictional demo bottle with a clear body, blue screw cap and a white label reading MORI, DAILY BOTTLE, 500 mL, DEMO PACKAGING. |
Selling points | Blue cap, clear body, simple white label. Demo packaging for this tutorial. |
Audience | People viewing an example product presentation at a desk. |
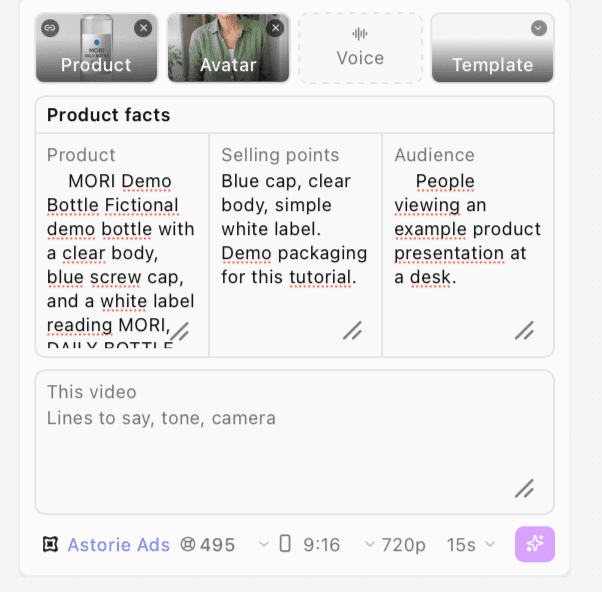
Figure 2. Product facts separates the product description, selling points and audience.
2. Choose Amy and connect a voice
Open Avatar and choose Amy for this example. Select a presenter whose appearance and delivery fit the brief, then keep that choice while you work on the script. A synthetic presenter should present the product plainly; avoid lines that pretend she is a customer describing a purchase she never made.
The Voice picker in this workflow offered connected canvas media and an audio upload. We first created an Audio node in Speech mode, selected MiniMax Speech 2.5 HD and chose Wise_Woman. The settings were speed 1.0, volume 1.0, pitch 0, neutral emotion, Language Boost Auto and English Normalization off.
The short voice sample was generated from these lines:
This is the MORI demo bottle. Notice the blue cap, the clear body, and the simple white label. Let's take a closer look at the design.
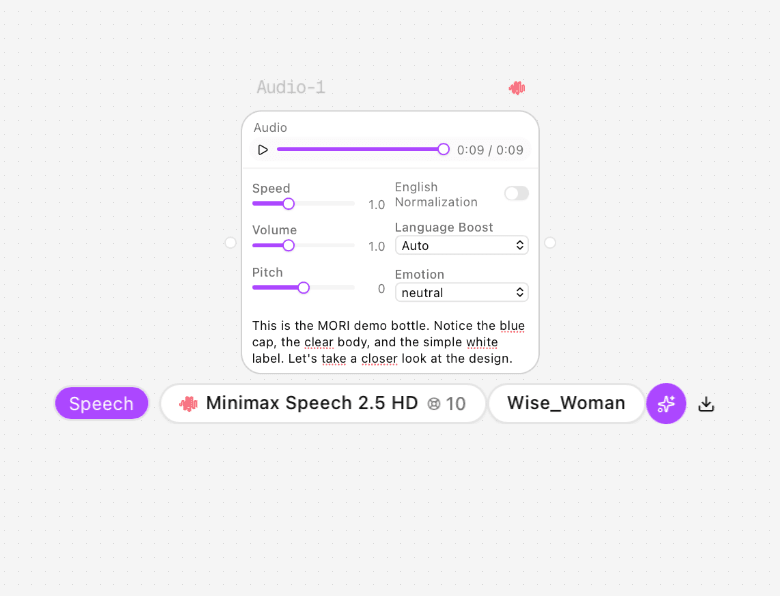
Figure 3. The Speech node supplies the connected Wise_Woman voice sample.
Generate the sample, connect the Audio node to the Ads node and pick Audio-1 in Voice. Listen to the sample before continuing. Then choose Review in Template.
Put the final script in This video and check it against the download. Our video used the opening question written there, rather than the different opening of Audio-1.
3. Give the presenter a manageable action
Describe the setting, framing and handling before the exact lines. Asking for a single lift is easier to inspect than a presentation with repeated handoffs, cap removal and several cuts. This was the complete direction supplied for version A:
Create one continuous product presentation using the selected avatar, product, and voice. The presenter sits at a light wooden desk beside a closed plain notebook and speaks directly to the camera in relaxed, conversational English. Use a steady eye-level medium shot. Start with the bottle standing on the desk. Lift it once to chest height, keep the front label facing the camera with fingers below the wordmark, then place it back beside the notebook. Keep the face, blue cap, bottle shape, and label consistent. No cuts, added captions, music, sound effects, purchase history, or extra claims. Speak only the following lines, exactly as written, and finish the last sentence before the video ends.
"Need a bottle for your desk? Meet the MORI demo bottle. Notice the blue cap, clear body, and simple white label. Take a closer look at the design."
Select 9:16, 720p and 20 seconds for the example, then generate one version. When it has finished, download the full video and play it with sound. Compare the words with the script, inspect the mouth during speech and check the final sentence and product placement.
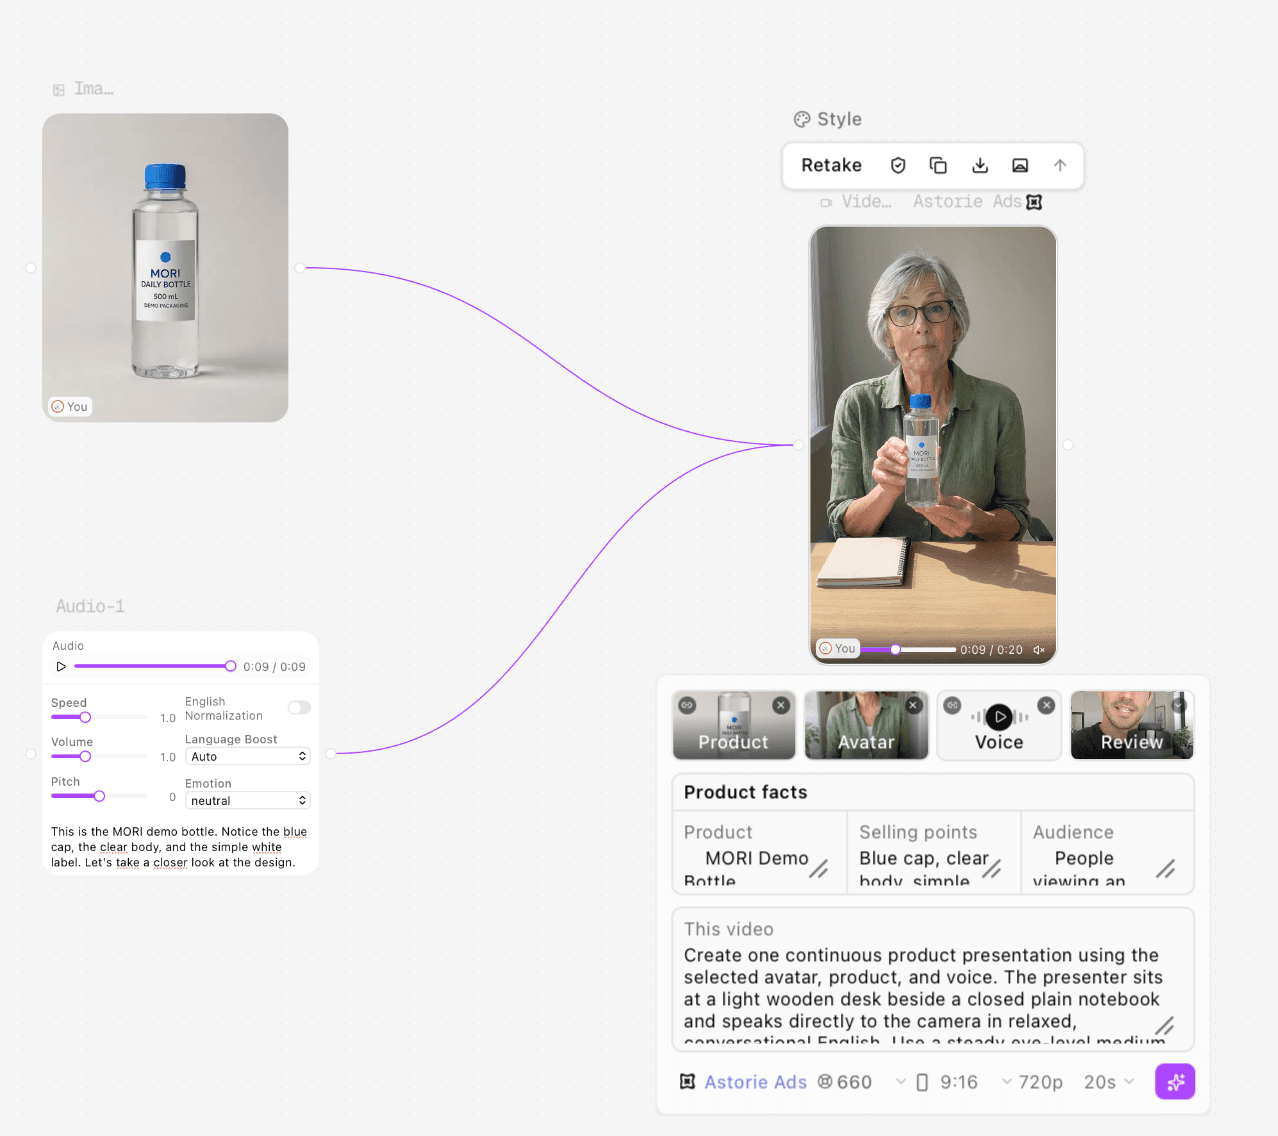
Figure 4. The completed Ads setup connects the product and Audio-1, with Amy, Review and a 20-second vertical output.
4. Change the hook and review the new take
For a second draft, keep the product facts, reference, Amy, Audio-1, Review and output settings. Replace just the opening question in This video, then generate and download that version separately. This reuses the brief and inputs without rebuilding the setup.
Part of the brief | Version A | Version B |
|---|---|---|
Opening supplied | Need a bottle for your desk? | Prefer a simpler everyday bottle? |
Remaining spoken lines | Same MORI introduction and visible features | Same as A |
Product, avatar and voice input | MORI, Amy, Audio-1 | Same as A |
Output setting | 9:16, 720p, 20 s | Same as A |
Visible setting in the result | Bright room; closed notebook | Darker room; open notebook |
Before comparing the hooks, look at the rest of the shot: version B has a darker room and an open notebook. Those changes could affect an ad comparison too. For a tighter comparison, use takes with similar visuals or build both openings around the same approved footage in your editor.
Inspect the bottle when it moves
In version A, Amy lifts the bottle and later puts it back. Fine label lettering changes during the handling, even though the blue cap and general bottle design remain recognizable. Look closely at the pickup and the moment fingers pass the label, not only at the opening still.
- Read the product name and quantity during the hold. Do not accept invented letters because the package looks familiar.
- Follow finger contact, bottle edges and the cap as the product lifts and returns.
- Listen for every line, including the ending, and compare mouth movement with speech.
- Check the desk, notebook and lighting against your intended scene before keeping another hook version.
If handling distracts from the message, try leaving the bottle on the desk in the next draft. For separate shots that focus on the object, continue with the product video workflow.
FAQ
Do I need to generate a voice sample first?
In the setup shown here, we supplied a generated Audio node because the Voice picker used connected media or uploads. If you already have a suitable voice recording you can use, upload it and select it instead.
Where does the product name go?
Put it at the beginning of the Product column inside Product facts. Put the lines you want spoken in This video, together with the performance directions.
Does a voice input lock the spoken script?
Do not assume so. In our example, the opening followed This video rather than the different opening of the connected sample. Listen to the final download and check it against the intended script.
Can I use these two hooks to choose an ad winner?
They give you two drafts to evaluate. The room and notebook also changed, and there is no campaign performance data here. Keep visual differences in mind before using a hook test to make a spending decision.
Ready to try it on the canvas?
Open Astorie and fan your prompt across every frontier model in one workflow.