

Continuity Editing: Cut-Point Rules for Action, Eyelines and Screen Direction
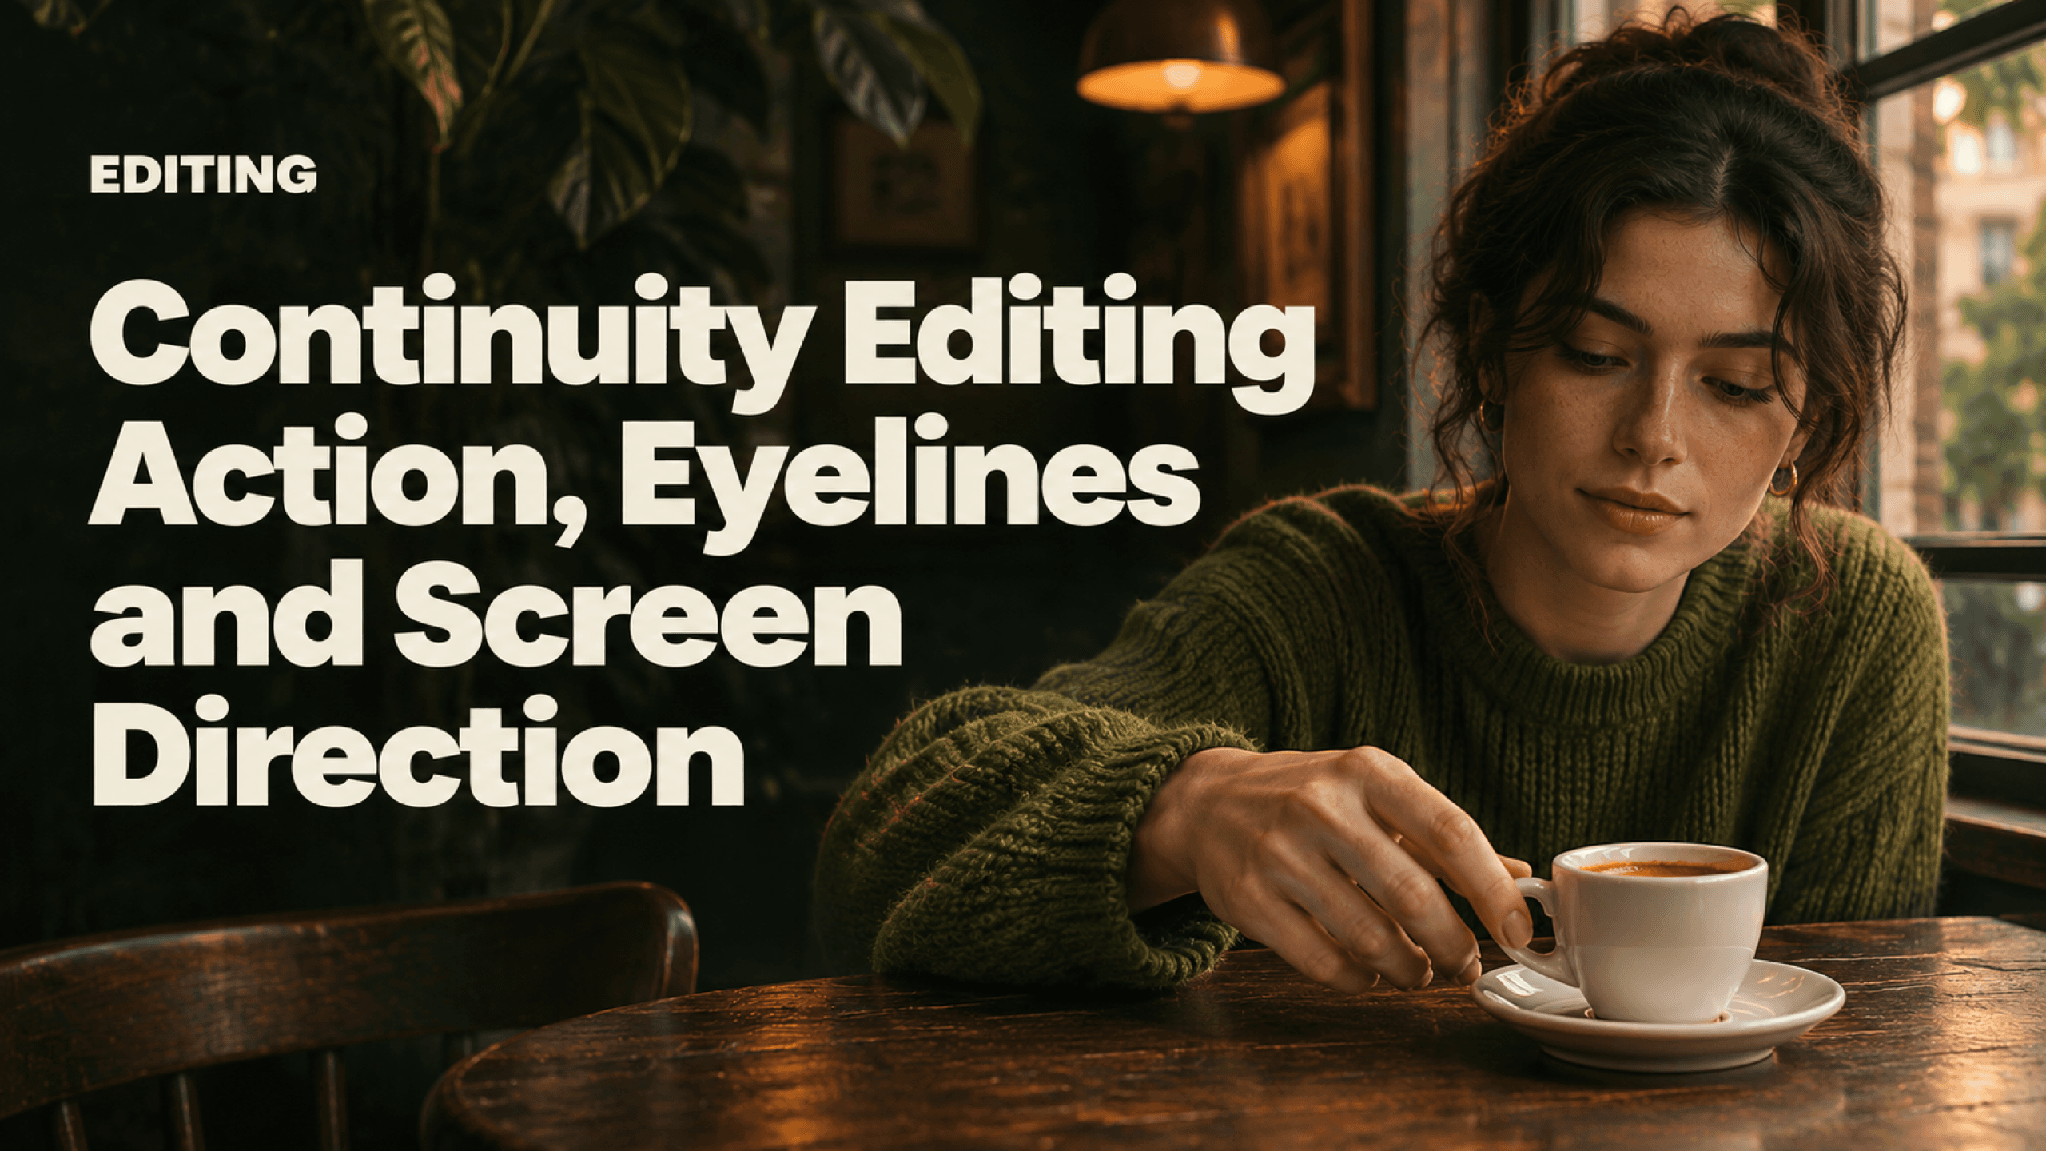
Continuity editing makes separate shots feel like one coherent event. Match the stage of an action, connect a look to a plausible target, and keep screen direction understandable. Choose cut points by what the audience believes is happening, rather than by matching the same timestamp in two files.
A cut can be understandable without being invisible. What matters first is whether the viewer can follow who is acting, what they are looking at and where everything is. Use the rules below to diagnose a join before deciding to trim, insert another angle or replace a shot.
Continuity editing starts with a shared scene map
Write a simple map before placing clips on the timeline: the person is on the left, the cup is on the right, and the hand travels toward the cup. Keep that relationship in mind when judging tighter views. The continuity conventions described in Oklahoma State University’s film textbook include matching action, eyeline relationships and the axis of action. [1]
For dialogue, a shot of one speaker should connect to a reverse angle that makes the other person’s position understandable. Two people looking toward the same edge of the frame can confuse that relationship unless a wider view establishes a different arrangement. The coffee example is a person-and-object scene, not a tested two-person conversation.
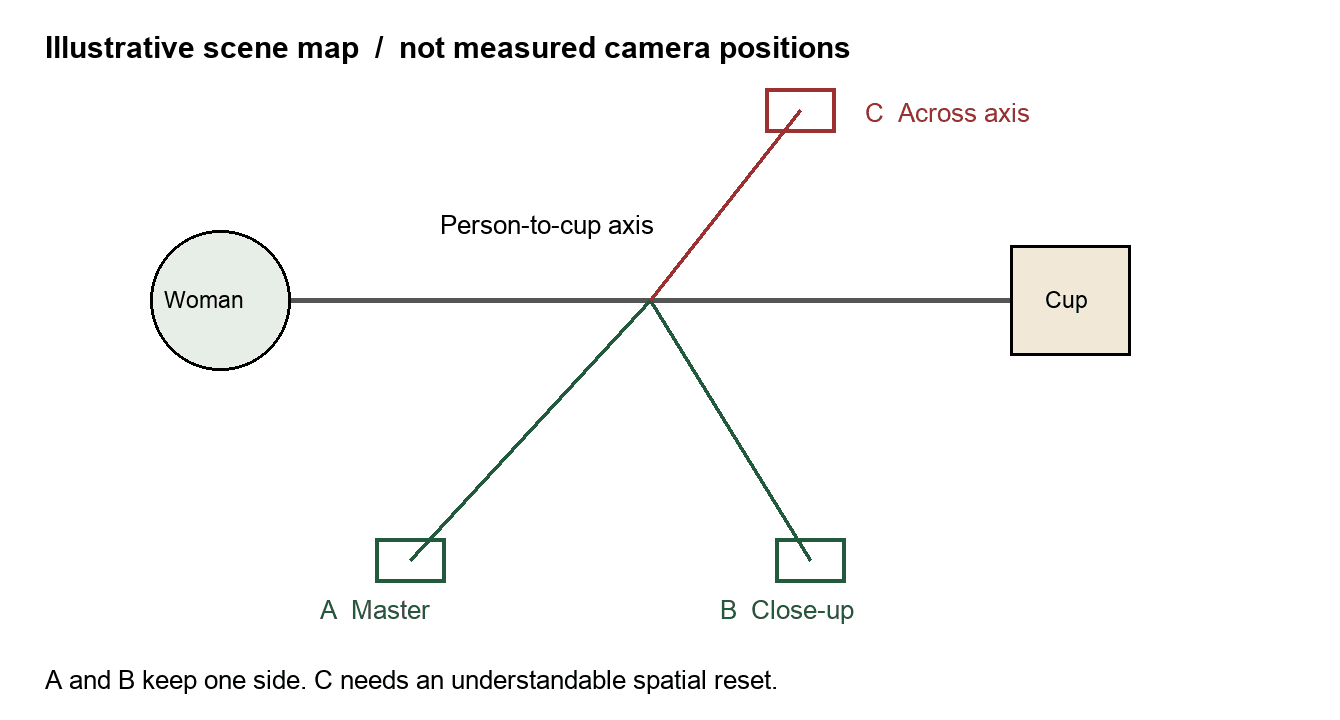
Figure 1. An illustrative overhead scene map. Cameras A and B remain on one side of the person-to-cup axis; camera C crosses it. This is a teaching diagram, not recovered camera metadata from the generated clips.
The 180-degree convention is a way to maintain that map. Crossing the axis can be intentional, but give the viewer a clear spatial reset, such as a wider shot or visible camera movement. A camera position is not wrong merely because it is on the other side; an unexplained reversal is the problem.
If coverage is still being planned, use the separate guide to create multi-shot AI videos. This article starts at the editing decision, once candidate shots exist.
Match the action phase before matching the frame number
For a cup pickup, mark four beats in each shot: hand at rest, reach, grip and lift. The files can reach those beats at different times. Cutting both files at 3.00s does not guarantee a match.
Clara generated the coffee scene in Astorie on November 11, 2026. The master and close-up were separate Veo 3.1 Fast I2V outputs, each using its own still as the first frame, with 720p and 8s selected. Both exported at 1280 × 720, 24 fps and approximately 7.929s. They share a visual reference, but were not recordings of one synchronized performance.

Figure 2. Clara’s master reference: a woman on the left looks toward a white cup on the right. The hand-to-cup relationship supplies the scene’s action direction.
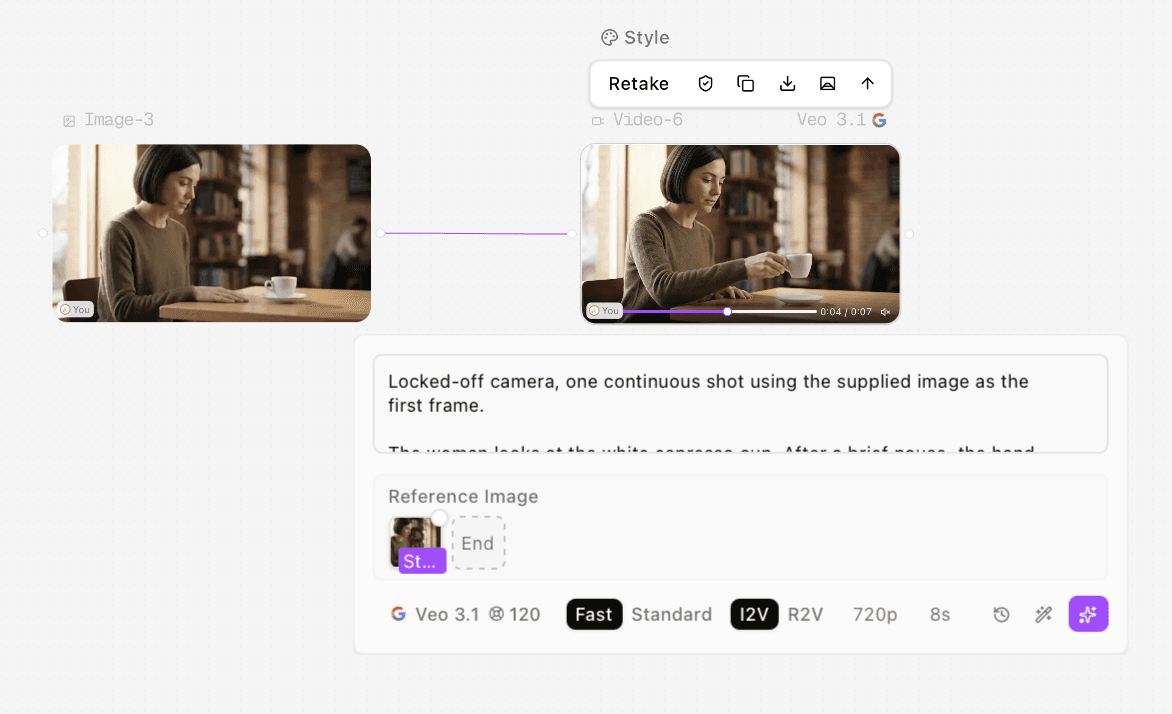
Figure 3. The master clip’s visible Veo 3.1 Fast I2V setup. The first-frame reference and 720p, 8s settings belong to source generation, not to an edit between shots.
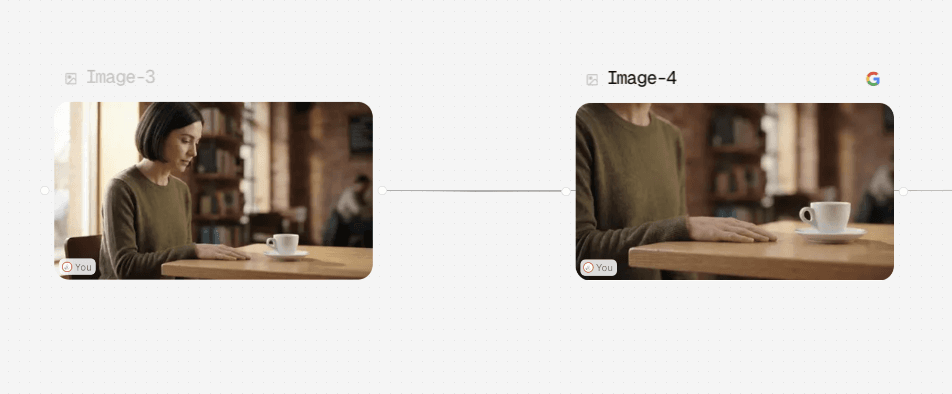
Figure 4. The supplied close-up reference derives from the same café scene. This screenshot establishes the image relationship; it does not establish an image-model version that is not visible.
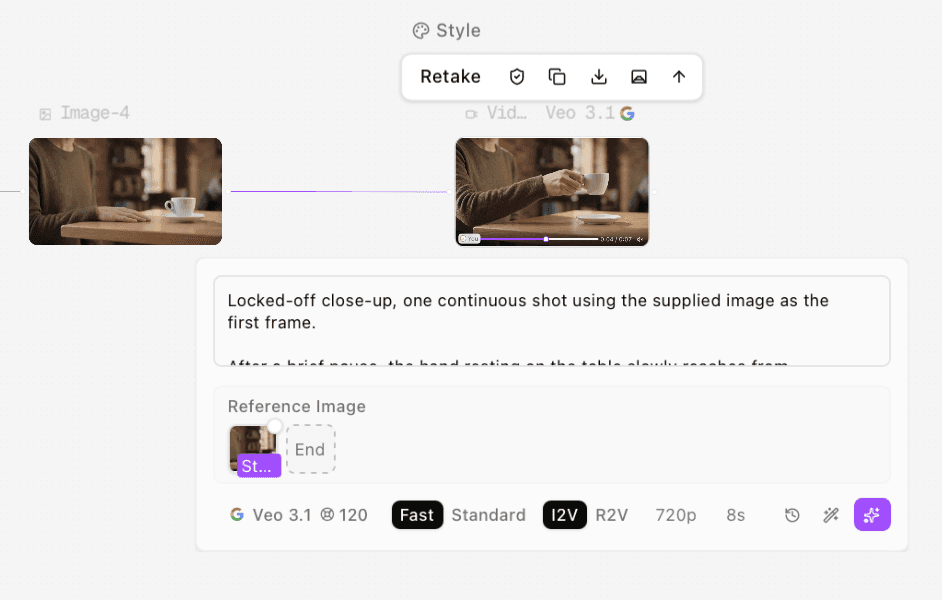
Figure 5. Clara’s separate close-up motion clip uses Veo 3.1 Fast I2V. Its timing must be aligned by action rather than assumed to match the master automatically.
Master source clip used in the action-cut examples.
Close-up source clip used in the action-cut examples.
Action beat | Master clip sampled range | Close-up sampled range | Editing implication |
|---|---|---|---|
Hand begins reaching | About 1.75–2.75s | About 1.25–2.00s | The two performances are not synchronized |
Hand is at the handle | About 3.00–4.25s | About 2.25–4.25s | A short overlap gives possible cut points |
Cup begins lifting | Around 4.50s | Around 4.50s | Test a join just before the lift |
Cup is higher | Around 5.00–6.00s | Around 5.00–6.00s | Avoid cutting back to an earlier reach |
These are review markers from sampled frames, not frame-accurate event boundaries. Fine-tune on the timeline at the actual project frame rate.
A matching cut and a deliberately repeated action
The matching demonstration uses master 2.75–4.25s followed by close-up 4.25–6.25s. It joins a hand already at the handle to the continuation of the lift. At 24 fps, the last outgoing frame is immediately before 4.25s; 4.25s is the start of the incoming range.
The deliberately wrong demonstration uses master 4.50–5.50s followed by close-up 1.00–3.50s. The cup has already lifted, then returns to the saucer while the hand reaches again. This repeats the action and makes the moment feel as if it starts twice.
Extract reference frames with Astorie’s frame extraction tool to compare the last outgoing and first incoming images. Then judge the moving join in an editor: stills reveal pose differences, while playback reveals rhythm.
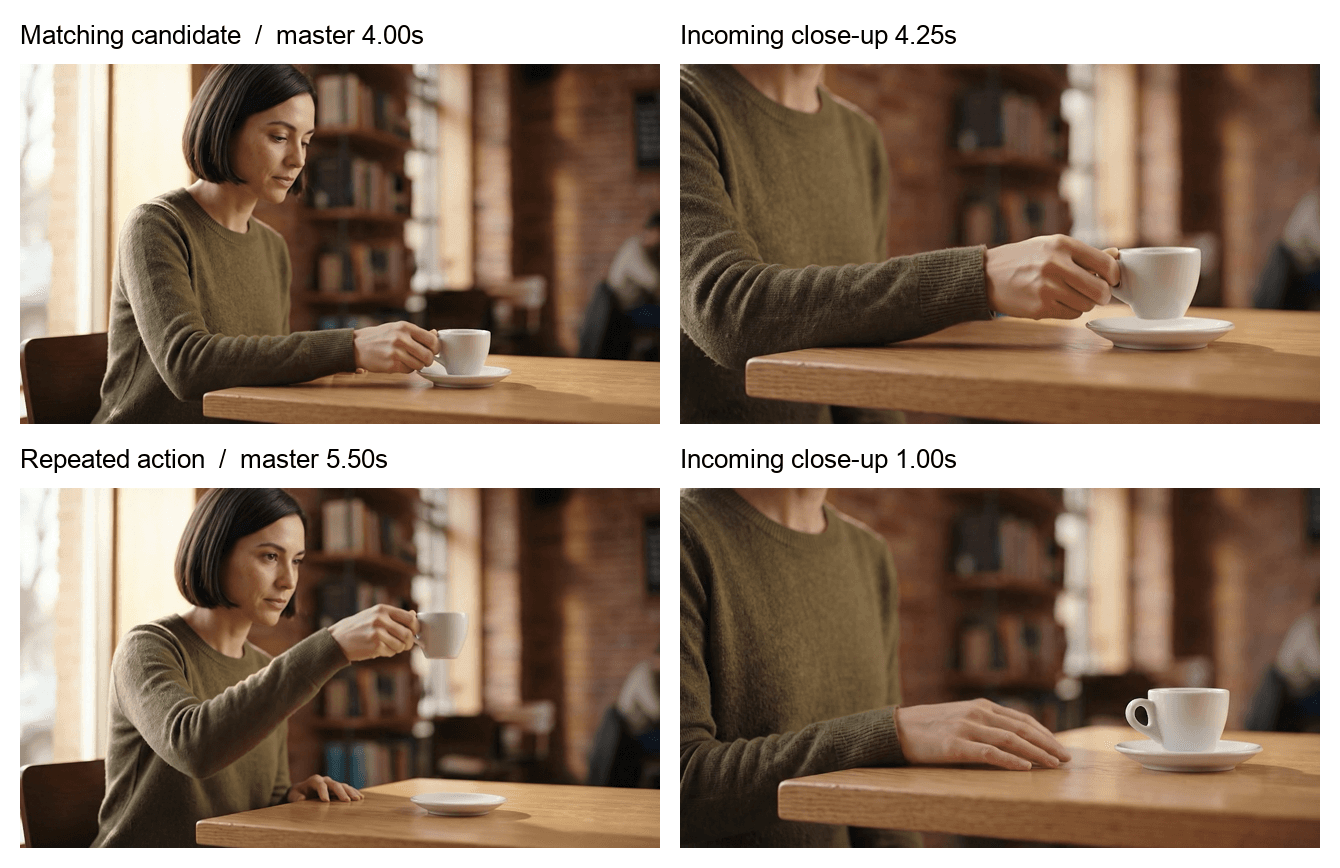
Figure 6. Cut-point comparison using real extracted frames. The upper join preserves the broad grip-to-lift order. The lower join deliberately cuts from an elevated cup to a hand at rest. Small pose and framing differences remain even in the matching candidate.
Matching action candidate: master 2.75–4.25s followed by close-up 4.25–6.25s. Newly assembled from Clara’s source clips; audio intentionally omitted.
Repeated action: the raised cup cuts back to the hand before its reach. This is an intentional editing example, not a model failure. Audio intentionally omitted.
Play each join repeatedly with a short lead-in and tail. Watch the hand’s direction, cup height and point of contact. The matching example is a candidate for a natural join, not proof that independently generated hands and props match perfectly. If the cup shape or grip changes visibly, choose a less exposed cut point or different coverage.
Match the look to the target
An eyeline match asks the viewer to connect a person’s look with the next image. In the reference, the woman looks down toward the table on screen right. A view of the cup can complete that thought. A frame in which she looks ahead suggests a different target.

Figure 7. The supplied facial close-up looks down and right. This is the useful starting direction for a cut to the tabletop cup.
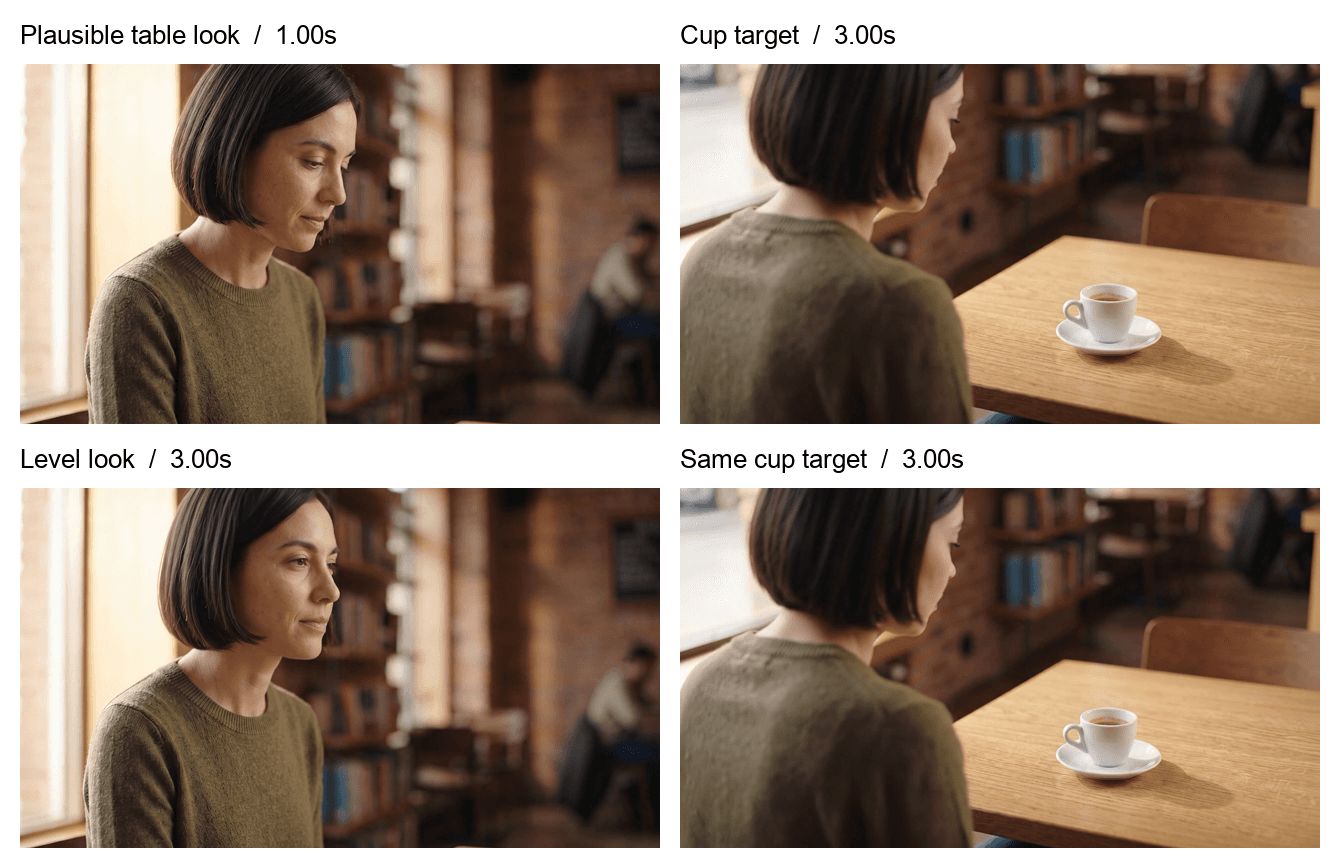
Figure 8. Actual sampled looks compared with the same cup insert. The upper pairing is plausible for the table target; the lower pairing deliberately uses a more level look and weakens that relationship. It does not prove the woman is looking at a specific offscreen object.
The facial clip has a useful downward look early, while samples around 3.00–4.25s show a more level look. Use an early range, roughly 0.25–2.00s, for the tabletop connection; do not assume the whole facial clip holds the same eyeline. The over-the-shoulder view can then identify the object without requiring an exact match between the cup’s screen position in both shots.
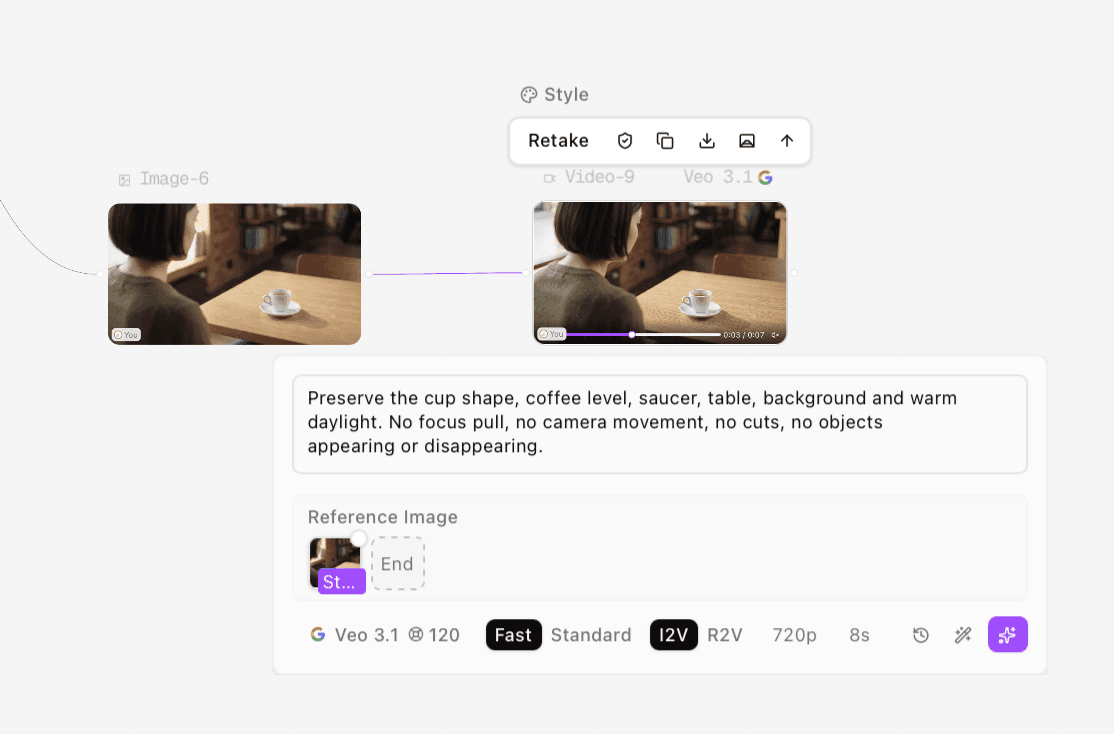
Figure 9. The successful over-the-shoulder run shows an I2V first-frame reference. An earlier T2V run did not preserve that connection and is excluded from the cut examples.
Facial source clip: compare the early downward look with the later level look.
Over-the-shoulder source clip used as the cup insert.
Preserve screen direction when changing shot size
In the master, the hand travels from the woman toward screen right. The tighter action view keeps that broad direction. If a new angle makes the same reach travel left, the viewer may interpret a different movement or position.
Use the scene map to diagnose the reversal. Do not automatically flip a shot: mirrored clothing, text, handedness and asymmetrical props can introduce new discontinuities. An insert or a wider re-establishing shot is often safer. For a deliberate axis crossing, show enough of the transition that the new orientation is understandable.
Repair the edit or replace the coverage
Problem at the join | Try in the edit first | Replace or regenerate when |
|---|---|---|
Action repeats | Advance the incoming shot to the matching beat | No matching beat exists |
Cup height jumps | Trim around the transition or use a short insert | The grip or prop geometry remains visibly incompatible |
Eyeline points at the wrong height | Choose an earlier look or another reaction | The target direction is wrong throughout the clip |
Screen direction reverses | Re-establish space with a wider view | The available coverage cannot explain the reversal |
Product or costume changes | Use coverage that hides no essential information | A required identity detail is inconsistent |
Rhythm feels stalled | Shorten the overlap around the action | The performance never supplies a usable transition |
Frequently asked questions
Must a match cut use the same timecode in both clips
No. Align the action state. Two separately generated clips can reach the same gesture at different times.
Can continuity editing fix inconsistent product geometry
Trimming can hide a brief mismatch, but it cannot make incompatible objects identical. If the product is prominent at the cut, replace the shot or make a controlled repair.
Does every cut need to be invisible
No. Clear spatial and action relationships matter more than hiding every transition. A visible cut can still preserve continuity and support the scene’s rhythm.
Ready to try it on the canvas?
Open Astorie and fan your prompt across every frontier model in one workflow.