
How to Create AI Explainer Videos: From Script to Export
How to create AI explainer videos reliably: lock the viewer outcome, write a script for the ear, record or generate timed narration, storyboard one visual job per beat, create only the shots that support the explanation, assemble them in an NLE, then review captions, claims, sound, and export settings. Lock the production script and narration timing before generating final shots; early style exploration and concept frames can happen sooner.
Astorie can organize the upstream generation workflow by holding the script, references, image and video branches, and selected takes on one canvas, while an NLE gives you frame-level control over final timing, sound, captions, graphics, color, and delivery.
How to Create AI Explainer Videos: Key Takeaways
• Start with the viewer's before-and-after understanding, not with a visual style.
• Time the narration before creating shots; pacing is an editorial decision.
• Give every storyboard beat one visual job: demonstrate, prove, simplify, or orient.
• Finish in an NLE and export a master plus channel-specific delivery files.
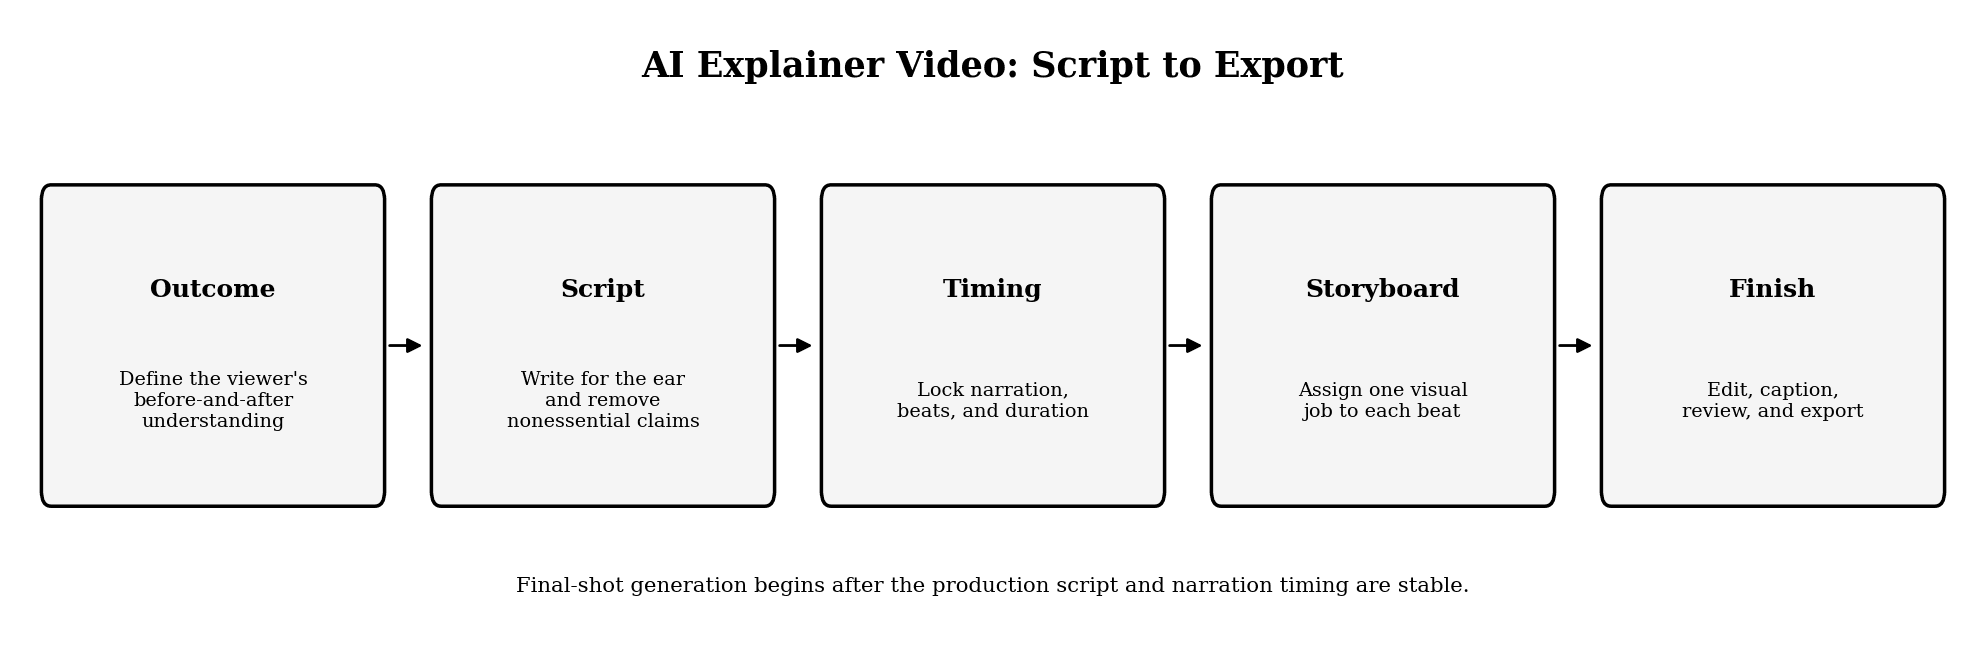
Figure 1. The explainer workflow from outcome to final export.
How to Create AI Explainer Videos in Seven Steps
Step | Deliverable | Main risk | Approval gate |
1. Define outcome | One-sentence transformation | Topic is too broad | Viewer can repeat the core idea |
2. Write script | Spoken-language draft | Copy reads like an article | Script is clear when heard once |
3. Lock timing | Narration and beat sheet | Shots are planned against guesses | Every beat has a time range |
4. Choose format | Visual system | Style fights the explanation | Format fits the subject |
5. Storyboard | Shot-by-shot plan | Decorative visuals | Every shot has a job |
6. Generate and edit | Selected takes and rough cut | Continuity and factual errors | Picture and sound support the claim |
7. QA and export | Master and delivery files | Captions, rights, or specs fail | Release checklist passes |
Step 1: Define the Viewer Outcome
Write one sentence in this form: “After watching, [audience] can explain or do [specific result] without [current confusion].” If the sentence contains two outcomes, split the video or choose one.
Also record the destination: product page, onboarding sequence, help center, classroom, sales deck, or social feed. The destination controls duration, aspect ratio, call to action, and how much context the viewer already has.
If the explainer contains factual, product, technical, medical, financial, or legal claims, create a source pack before scripting. Record the approved source, date checked, claim owner, and any wording constraint so the production script starts from reviewed evidence rather than model recall.
Step 2: Write the Script for the Ear
An explainer script should sound natural at normal speaking speed. Use short sentences, concrete verbs, and one idea per beat. Read it aloud before generating anything.
A reliable structure is:
1. State the problem in the viewer's language.
2. Show the mechanism, not only the promise.
3. Demonstrate the key steps or decision.
4. Address the main constraint or limitation.
5. End with one next action.
Remove claims that cannot be shown or sourced. If a sentence depends on a statistic, product state, technical specification, or legal promise, write it from the approved source pack and attach that source to the line in the production script.
Step 3: Lock Narration and Timing
Record or generate the narration, then mark the start and end time of each sentence. Do not estimate shot lengths from word count alone; pauses, emphasis, pronunciation, and transitions change the usable timing.
Use a pronunciation sheet for names, acronyms, and product terms. If localization is planned, avoid visual edits that depend on the exact length of the first language. Leave room for longer translated phrases.
Step 4: Choose the Right Explainer Format
The format should serve the hardest information problem.
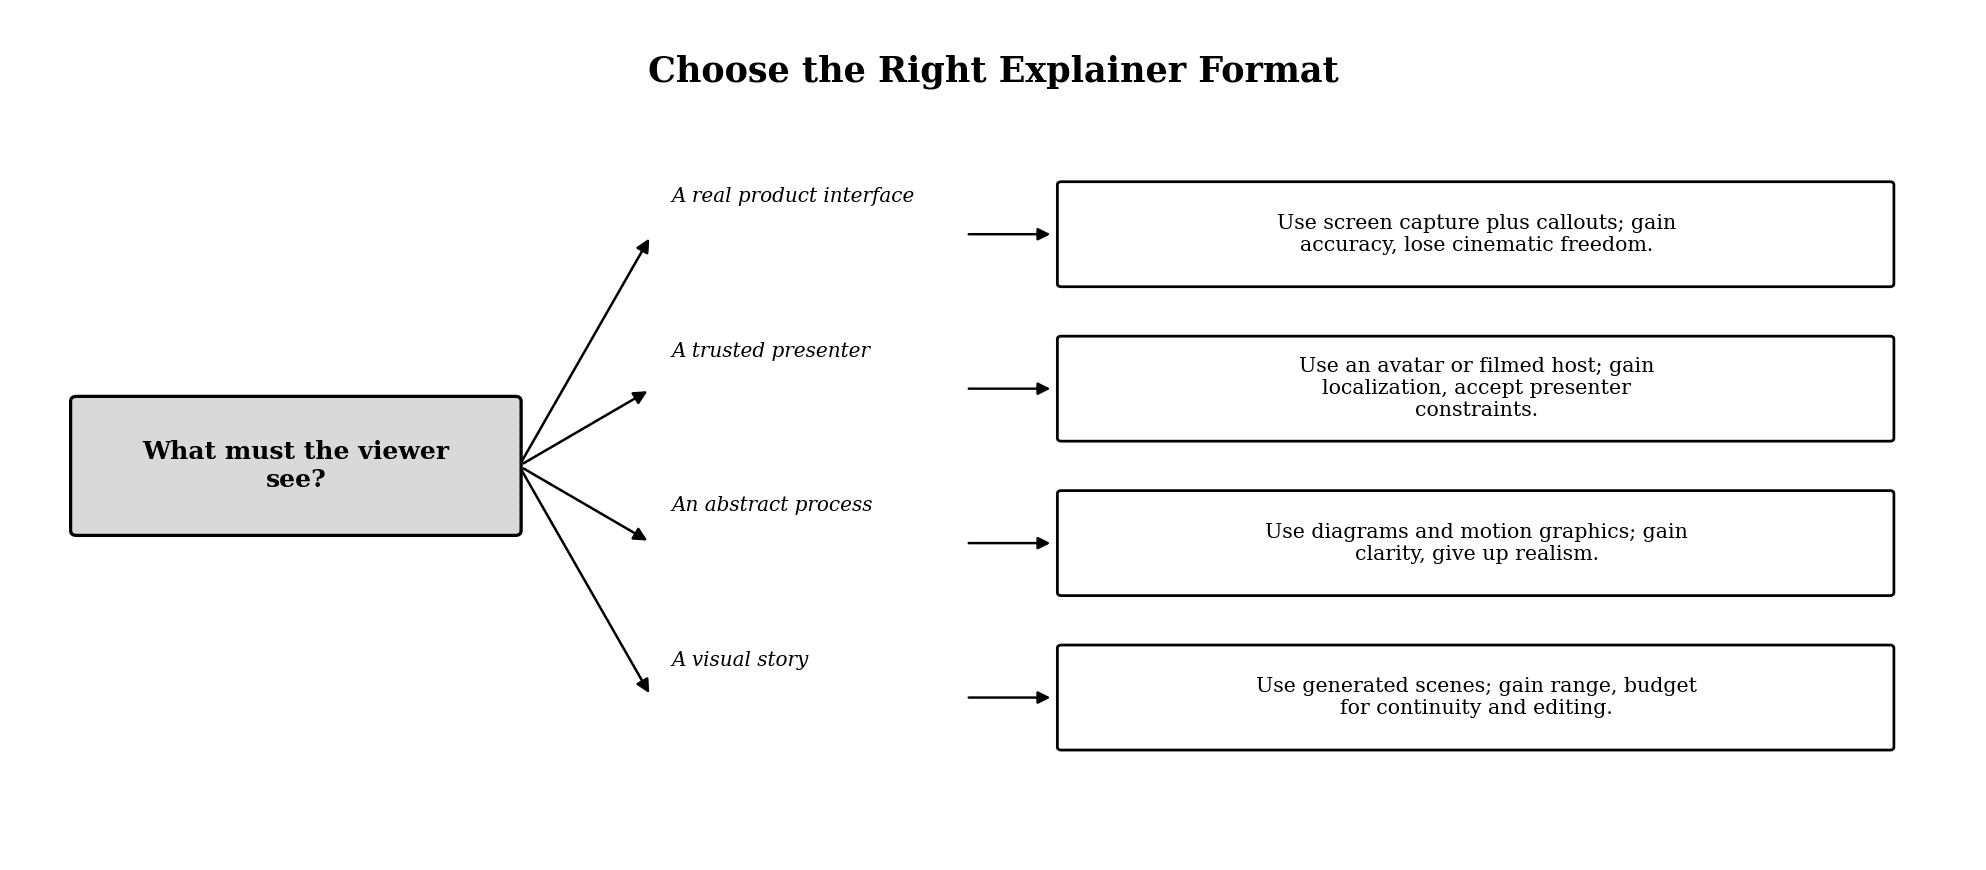
Figure 2. A decision tree for choosing screen capture, presenter, diagram, or generated scenes.
Use screen capture when the interface is the proof. You gain accuracy and easy updates but give up cinematic freedom. Switch to screen capture when a generated approximation could mislead the viewer about a real product state.
Use an avatar or presenter when trust, language coverage, or direct address matters. You gain a stable speaking presence and easier localization; you give up some visual variety and must review pronunciation and lip-sync carefully. Switch when the audience needs a guide more than a visual metaphor.
Use diagrams or motion graphics for systems, processes, and comparisons. You gain clarity and repeatable brand control; you give up realism. Switch when relationships matter more than atmosphere.
Use generated scenes for abstract concepts, emotional openings, or situations that are expensive to film. You gain visual range; you give up deterministic continuity and should budget for selection and NLE repair. Switch when a diagram is too literal but stock footage cannot show the idea.
Step 5: Build a Beat-by-Beat Storyboard
Each beat needs narration, a visual job, on-screen text, timing, and an acceptance rule. Do not ask one shot to explain several concepts.
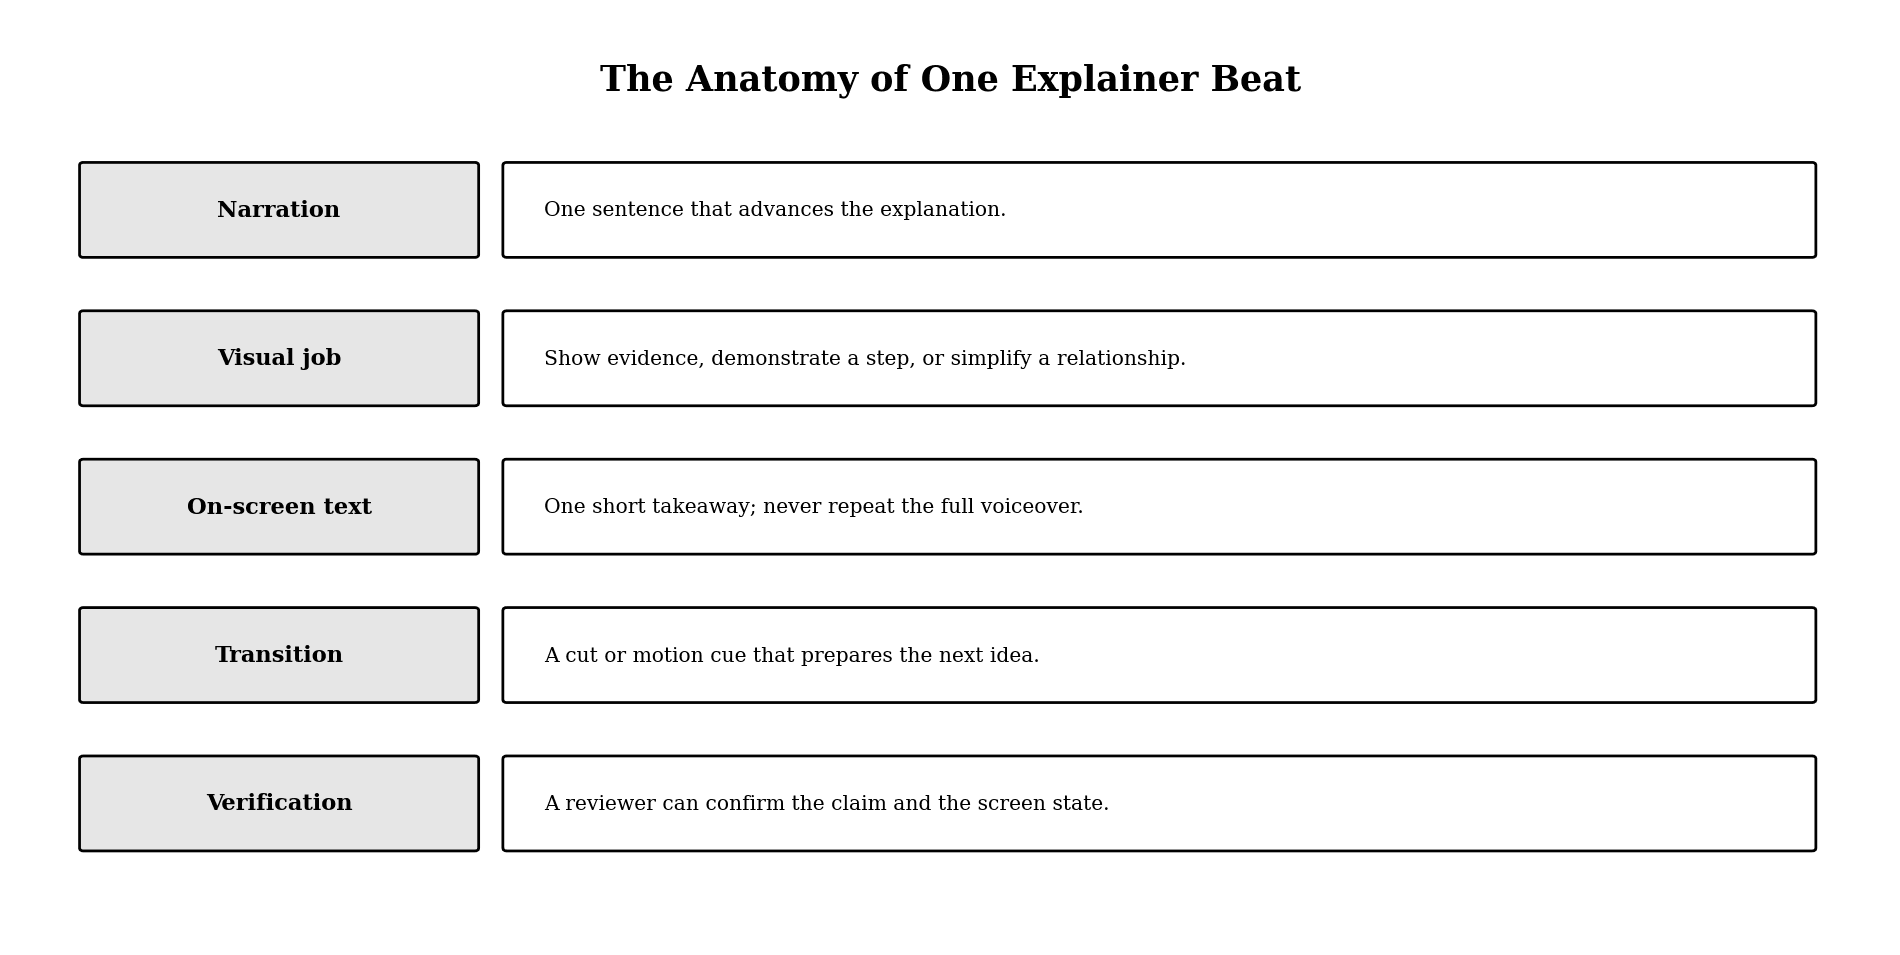
Figure 3. The production fields required for every explainer beat.
A storyboard row can use this template:
Time | Narration | Visual job | Asset | On-screen text | Acceptance rule |
00:00-00:05 | State the user's problem | Orient | Screen or scene | Five words maximum | Problem is clear without audio |
00:05-00:12 | Explain the mechanism | Simplify | Diagram | One labeled relationship | Diagram matches narration |
00:12-00:22 | Show the workflow | Demonstrate | UI capture or generated shot | Step label | Screen state is accurate |
00:22-00:30 | Clarify the limitation | Qualify | Comparison | Constraint | No unsupported promise |
00:30-end | Give next action | Direct | Product or end card | One CTA | CTA matches destination |
Step 6: Generate Visuals and Assemble the Rough Cut
Generate low-cost drafts first. Confirm composition, subject, camera direction, and continuity before using a high-quality route. For recurring people or products, create a small reference pack and reuse the same approved sources across shots.
On Astorie, keep the script, voice track, reference images, prompts, and selected video takes visible in the same project. Route by shot requirement rather than forcing one model across the entire video. The gain is per-shot flexibility; the loss is a more complex review process. Switch models only when a specific constraint such as typography, reference fidelity, dialogue, or motion makes the current route a bottleneck.
Bring selected assets into Premiere, DaVinci Resolve, Final Cut Pro, or another NLE. Use the NLE for frame-accurate cuts, audio mixing, color, graphics, captions, and export. Keep dialogue, music, ambience, and effects on separate tracks so one revision does not require rebuilding the mix.
Step 7: Review and Export
Run four passes:
• Comprehension pass: watch once without sound. The visual order should still make sense.
• Audio pass: listen without watching. The argument and pronunciation should remain clear.
• Accuracy pass: verify product screens, claims, names, numbers, and captions.
• Delivery pass: confirm aspect ratio, frame rate, resolution, audio, caption format, filename, and destination.
Export a high-quality master before creating compressed channel files. Match the final codec and container to the destination or post-production requirement rather than copying a universal preset. Adobe and Blackmagic both maintain current export and format documentation; check it when a broadcaster, client, or platform gives exact specifications.
A Prompt Template for Generated Explainer Shots
Use a prompt that describes the communication job, not only the look:
[Shot function]. Show [subject] performing [single visible action] in [environment]. Camera: [shot size and movement]. Brand locks: [palette, product, wardrobe, typography constraints]. Timing: [start state, change, end state]. Exclude [specific distractions]. Leave [screen area] clear for captions.
Keep text-heavy cards in a model or design tool that supports controlled typography. Do not rely on a cinematic scene generator to reproduce long, exact legal or product copy inside the image.
Common Mistakes
Generating Before the Script Is Timed
The result is a library of attractive clips that do not fit the narration. Lock the beat sheet first.
Using Visuals That Repeat the Voiceover
On-screen text should anchor the idea, not transcribe every sentence. Captions can carry the spoken words; the visual should add evidence or structure.
Hiding Product Limits
An explainer that omits a material constraint may convert once and create distrust later. State the boundary at the point where it affects the viewer's decision.
Sending Generated Assets Directly to Publish
AI output still needs editorial, continuity, rights, and technical review. Treat generation as asset production, not as final delivery.
Hands-On Case: A 30-Second MORROW Explainer Handoff
The MORROW test followed a 30-second product-explainer brief from locked script to handoff-ready assets. It did not produce a final exported master inside Astorie, so the evidence below separates completed upstream work from the external NLE step still required.
Lock the script and timing before final shots
The project brief, continuity contract, approved source pack, and locked production script were connected before the storyboard was generated. The script contained four narration blocks and ended with the line “Morrow Tea. Make space for what comes next.” Locking these beats before final visual work prevented the storyboard from expanding beyond the intended runtime.
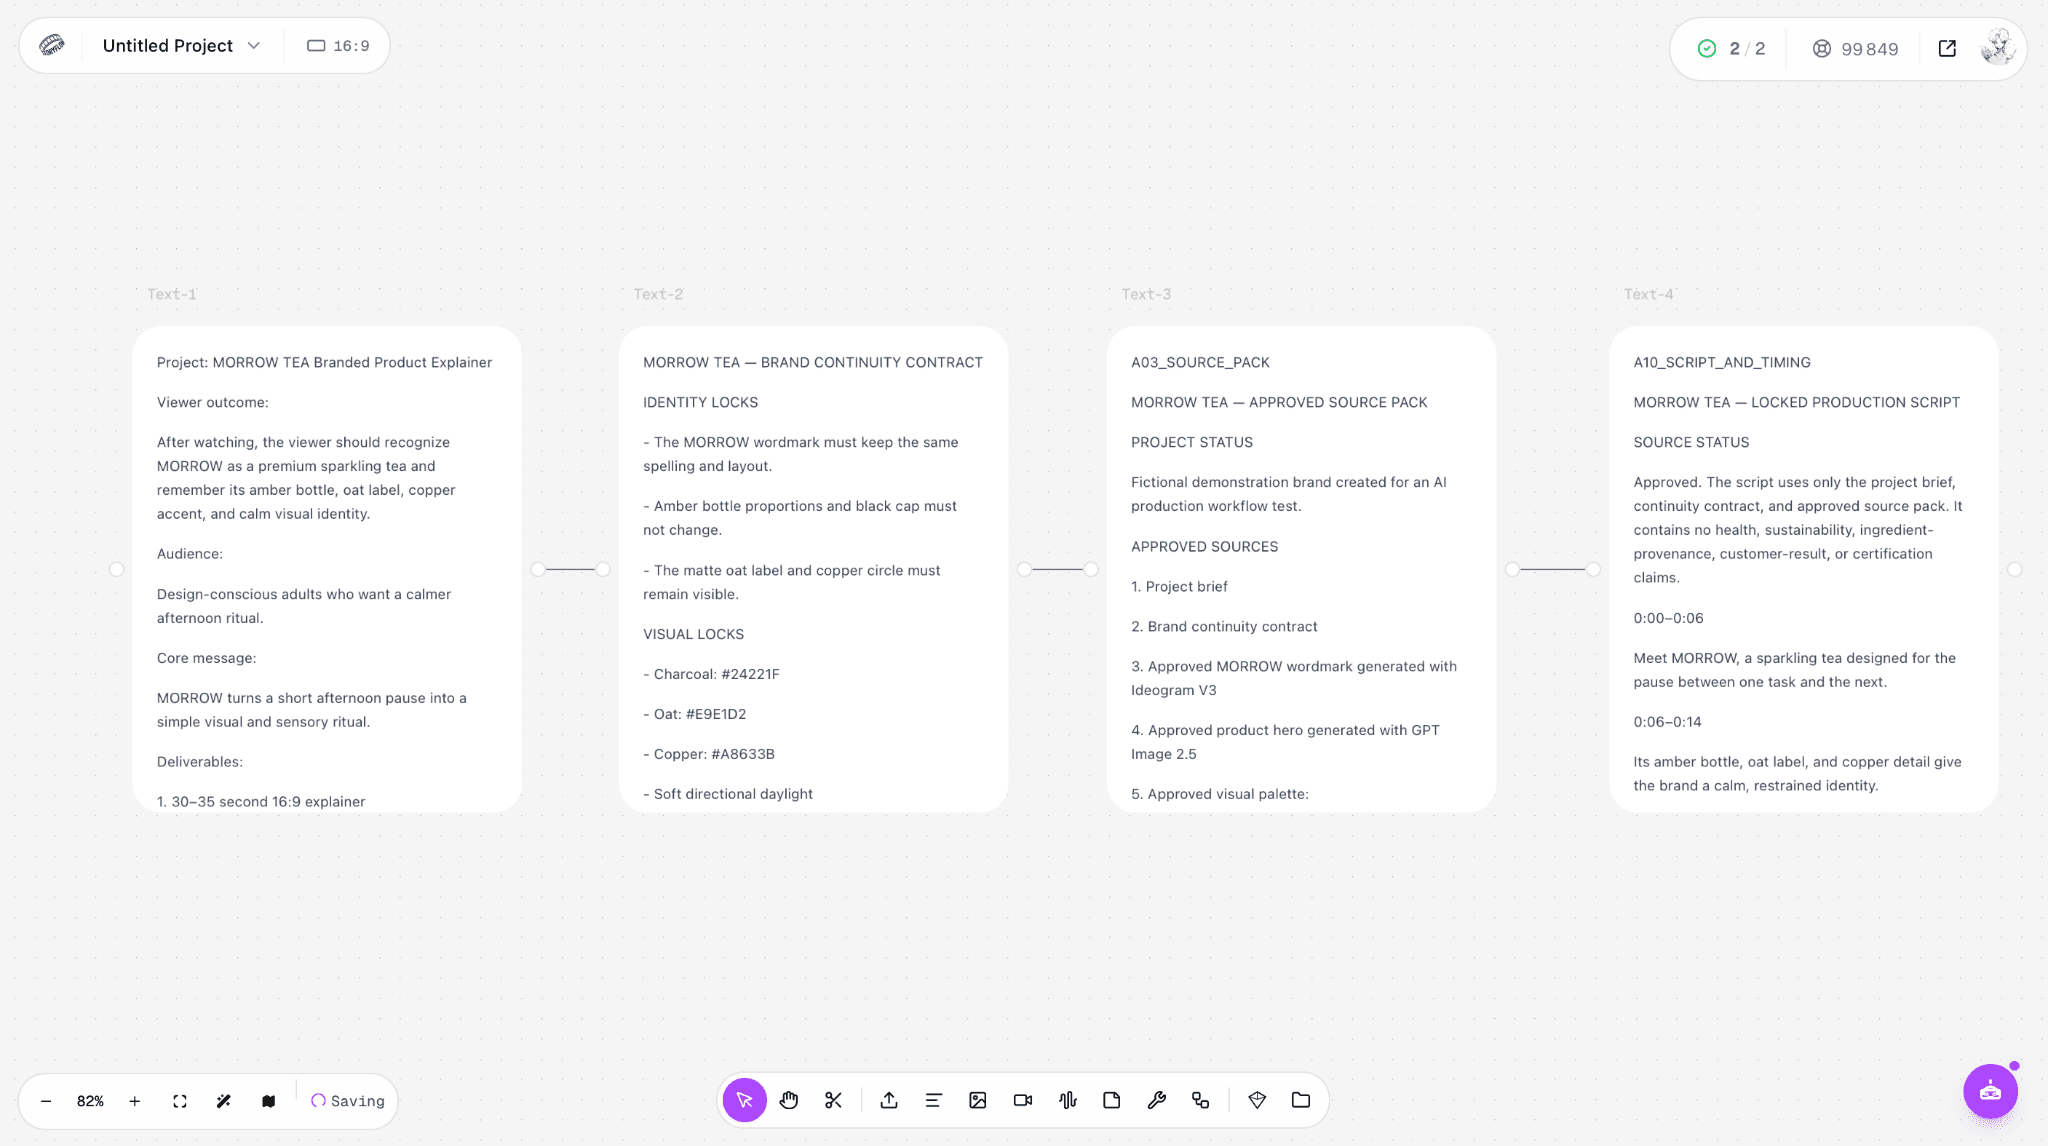
Figure 4.1. Brief, continuity contract, source pack, and locked script/timing connected on the canvas.
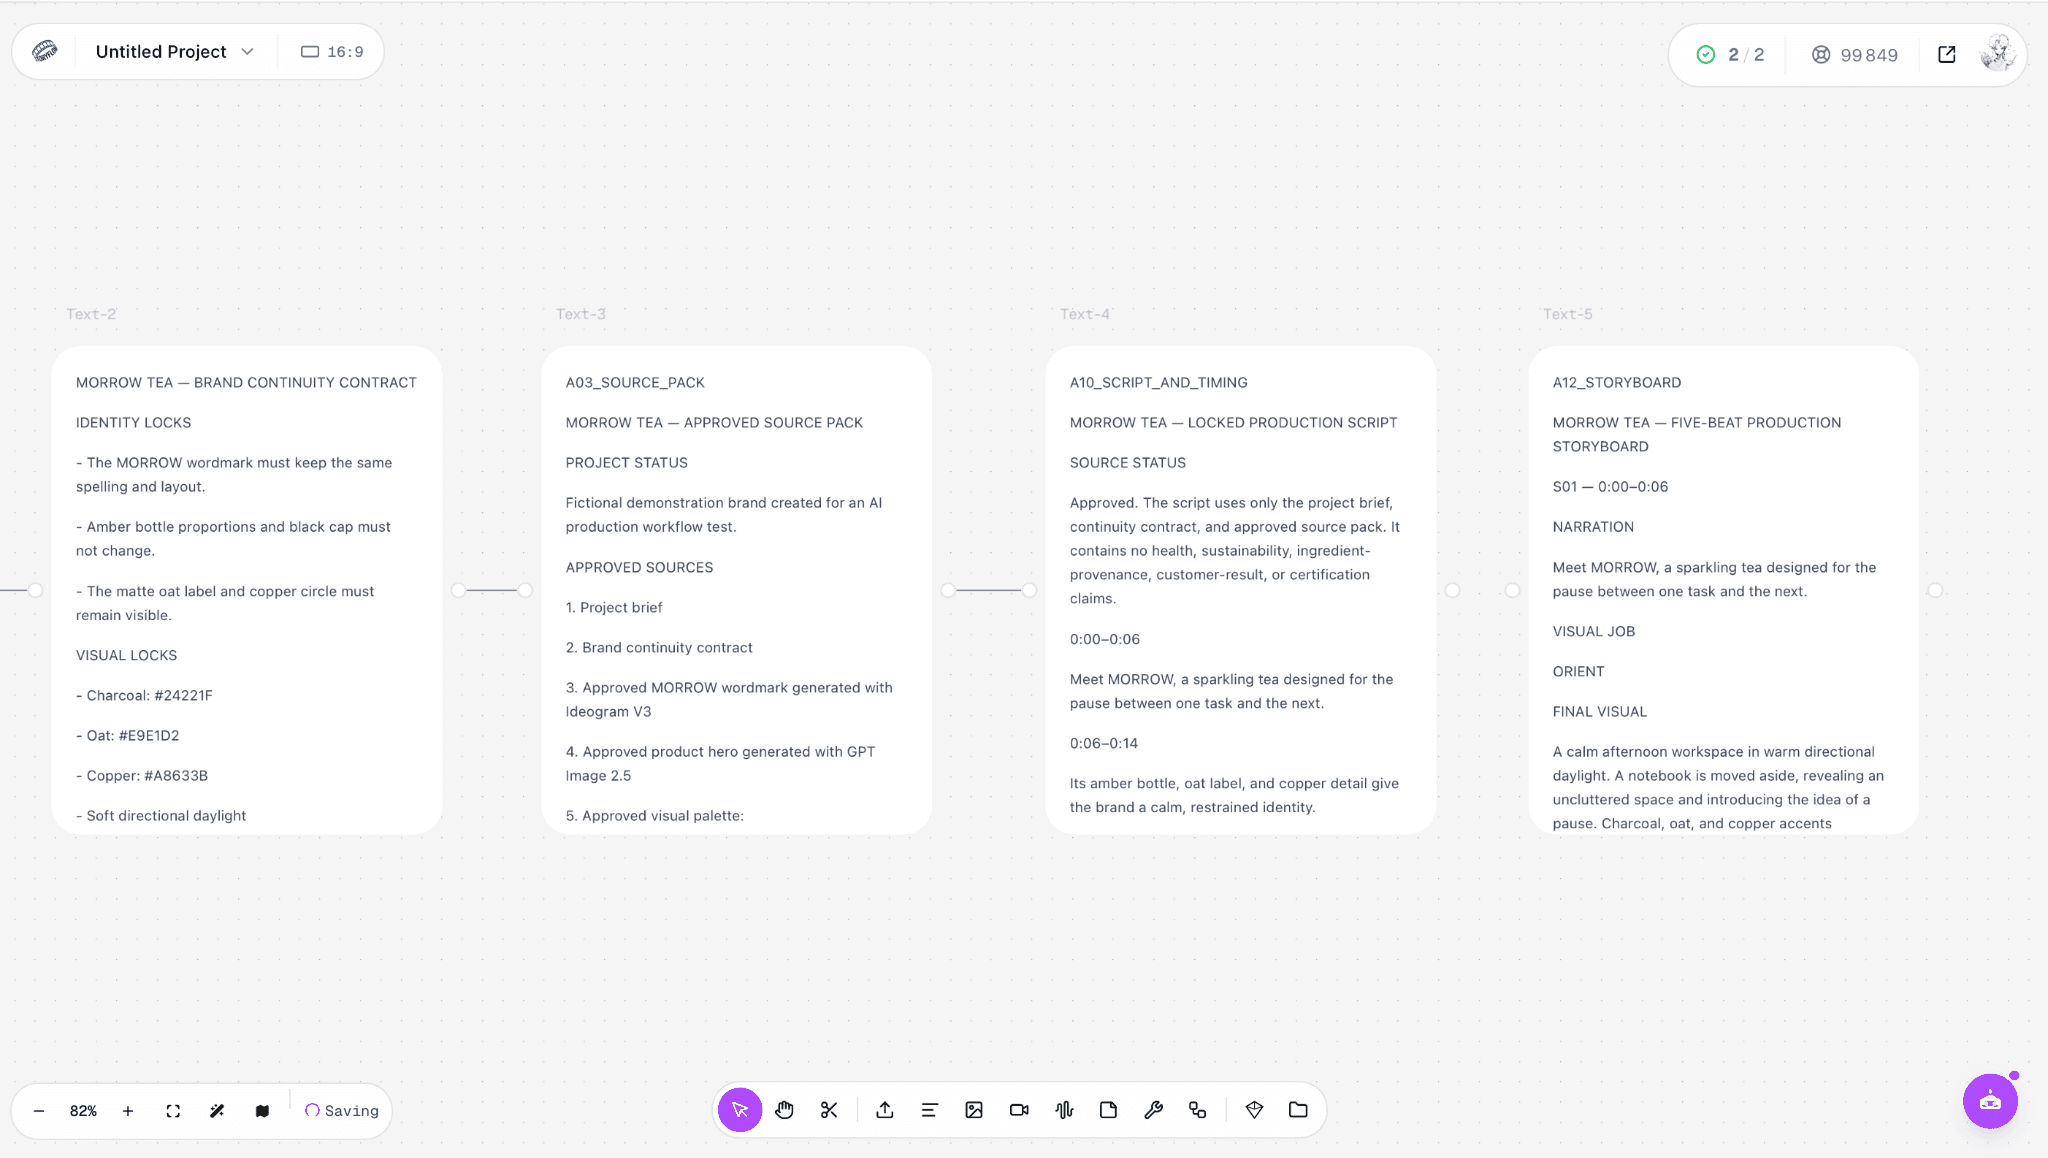
Figure 4.2. The five-beat storyboard added after the production script was locked.
Storyboard evidence for the five narration beats
Beat | Narration job | Approved visual job |
S01 | Introduce the pause between tasks | Notebook moves aside to reveal a calmer workspace |
S02 | Describe amber bottle, oat label, and copper detail | Clean product-identity hero |
S03 | Introduce pouring over ice | Hand pours amber sparkling tea into a low tumbler |
S04 | “Watch the bubbles settle” | Glass detail with bottle retained as identity anchor |
S05 | Deliver the final brand line | Resolved bottle-and-glass product frame held after narration |
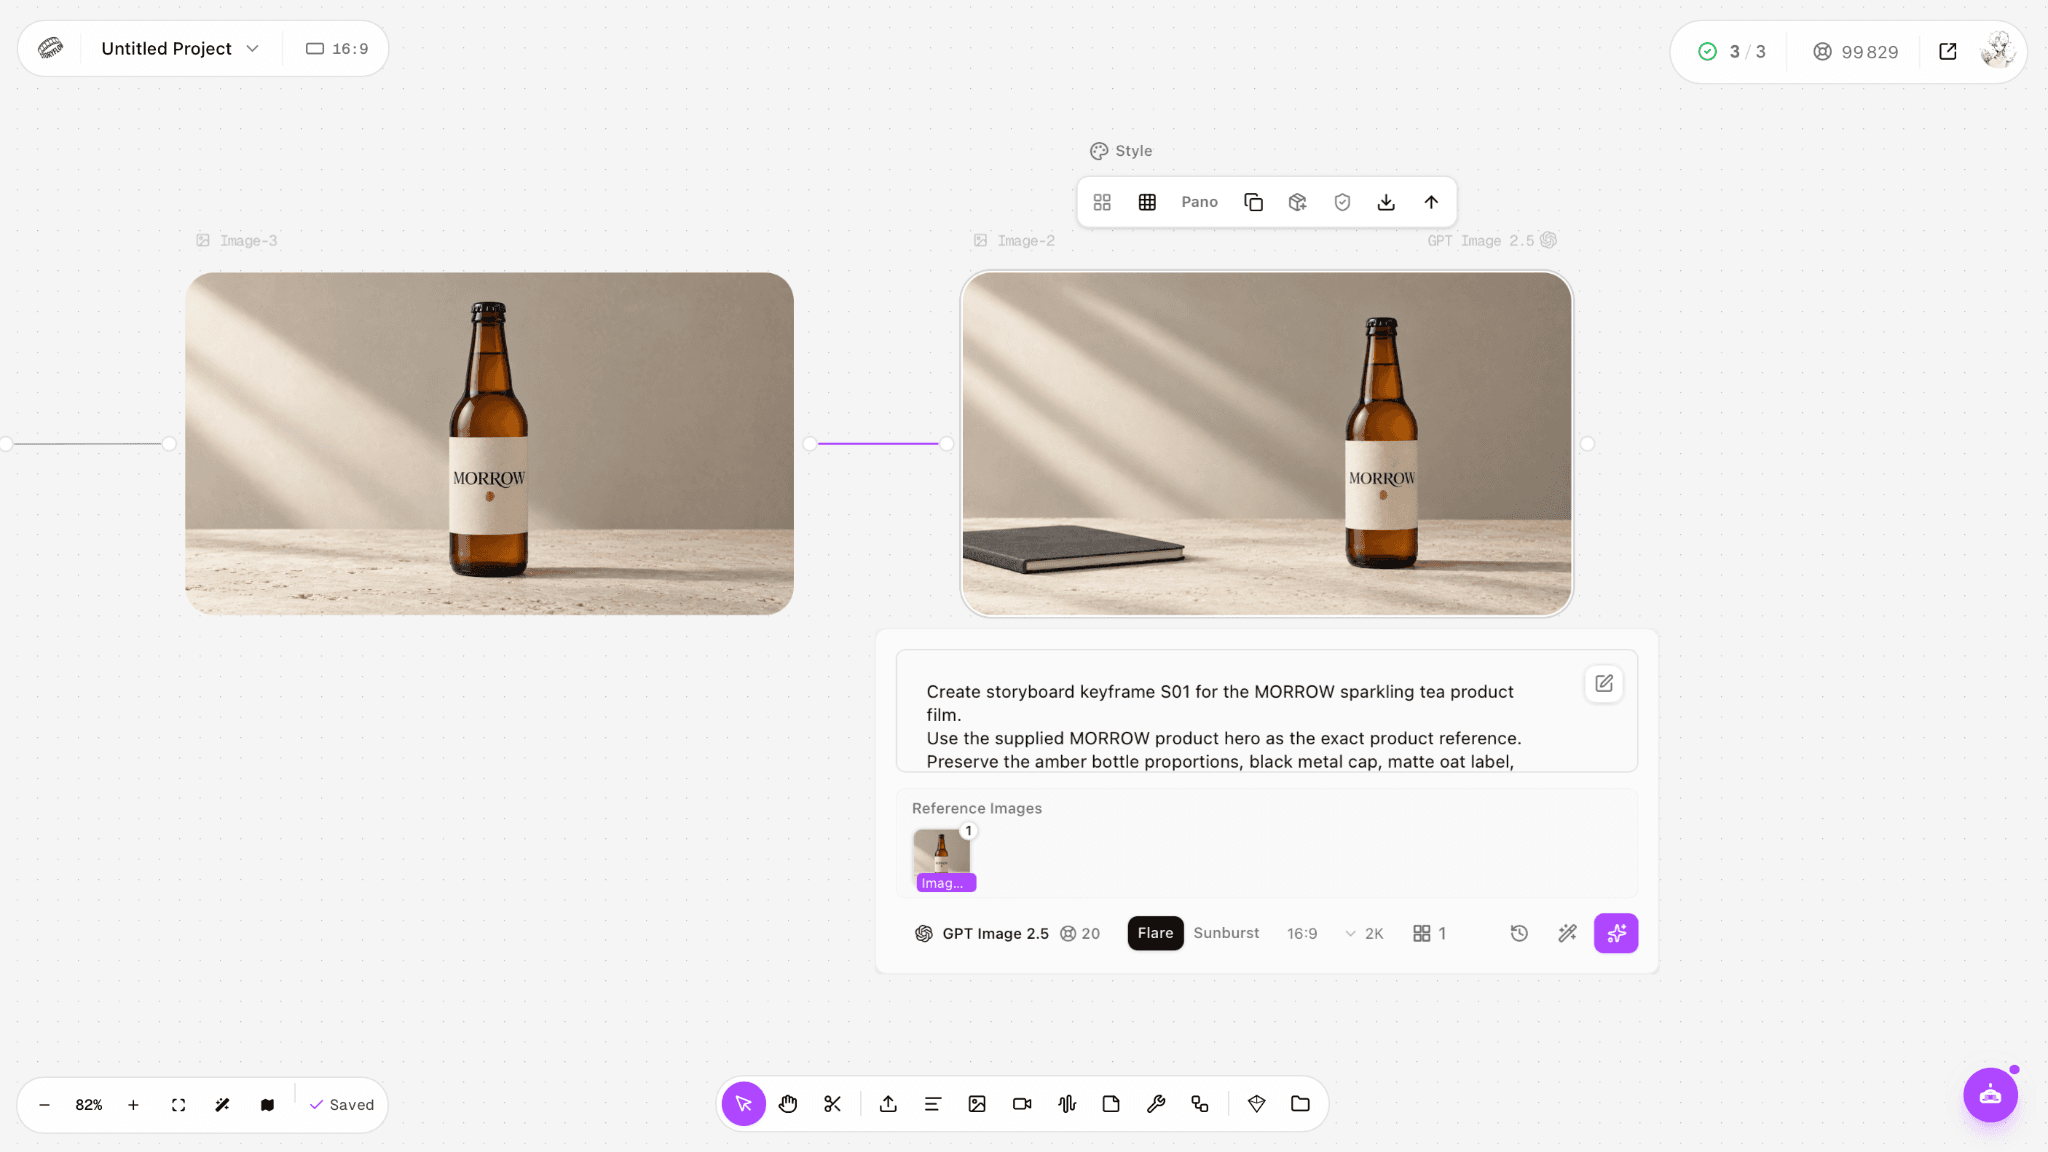
Figure 4.3. S01 generated from the approved product hero while preserving the product reference.
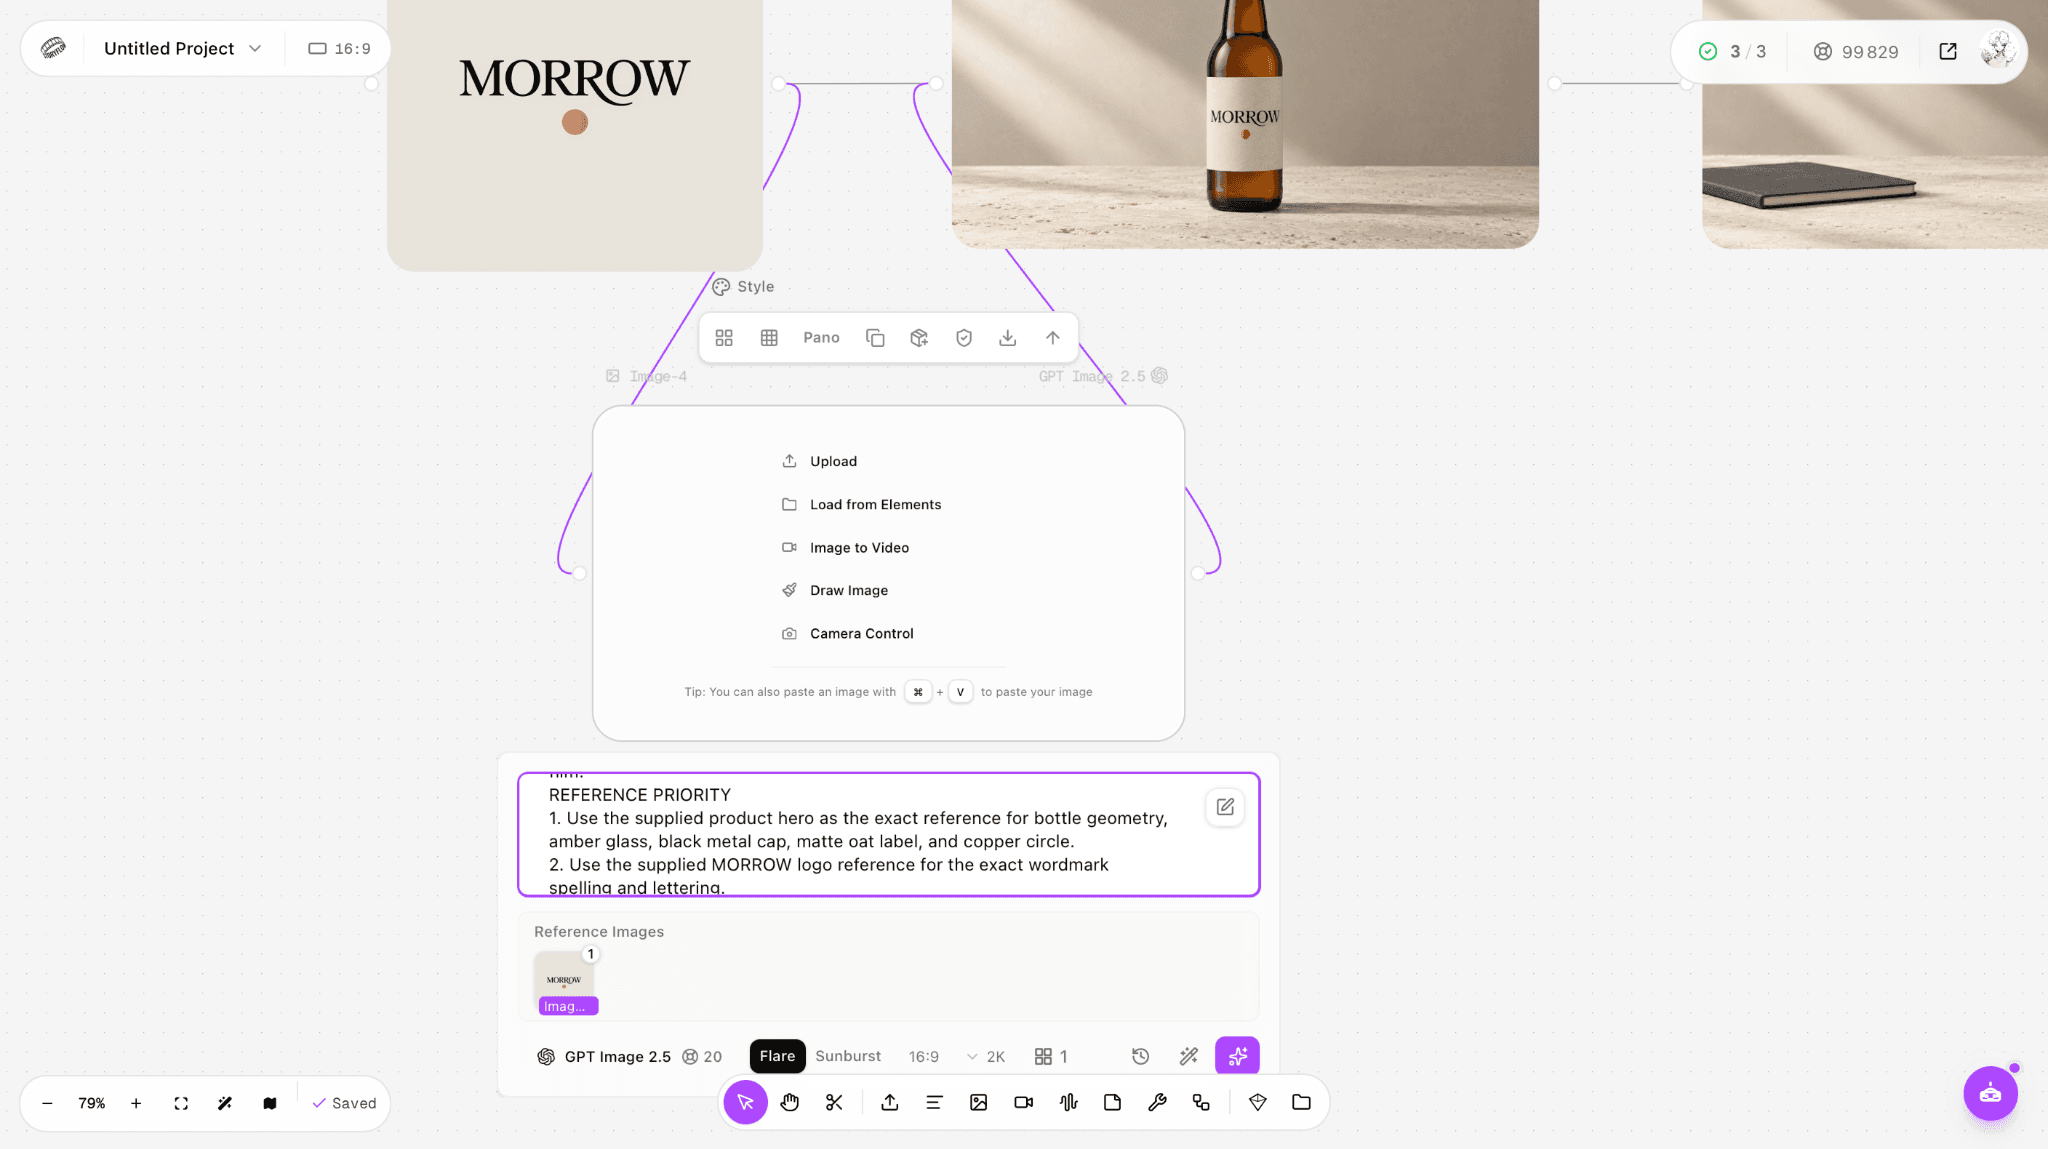
Figure 4.4. S03 pouring-keyframe setup with explicit bottle and wordmark priorities.
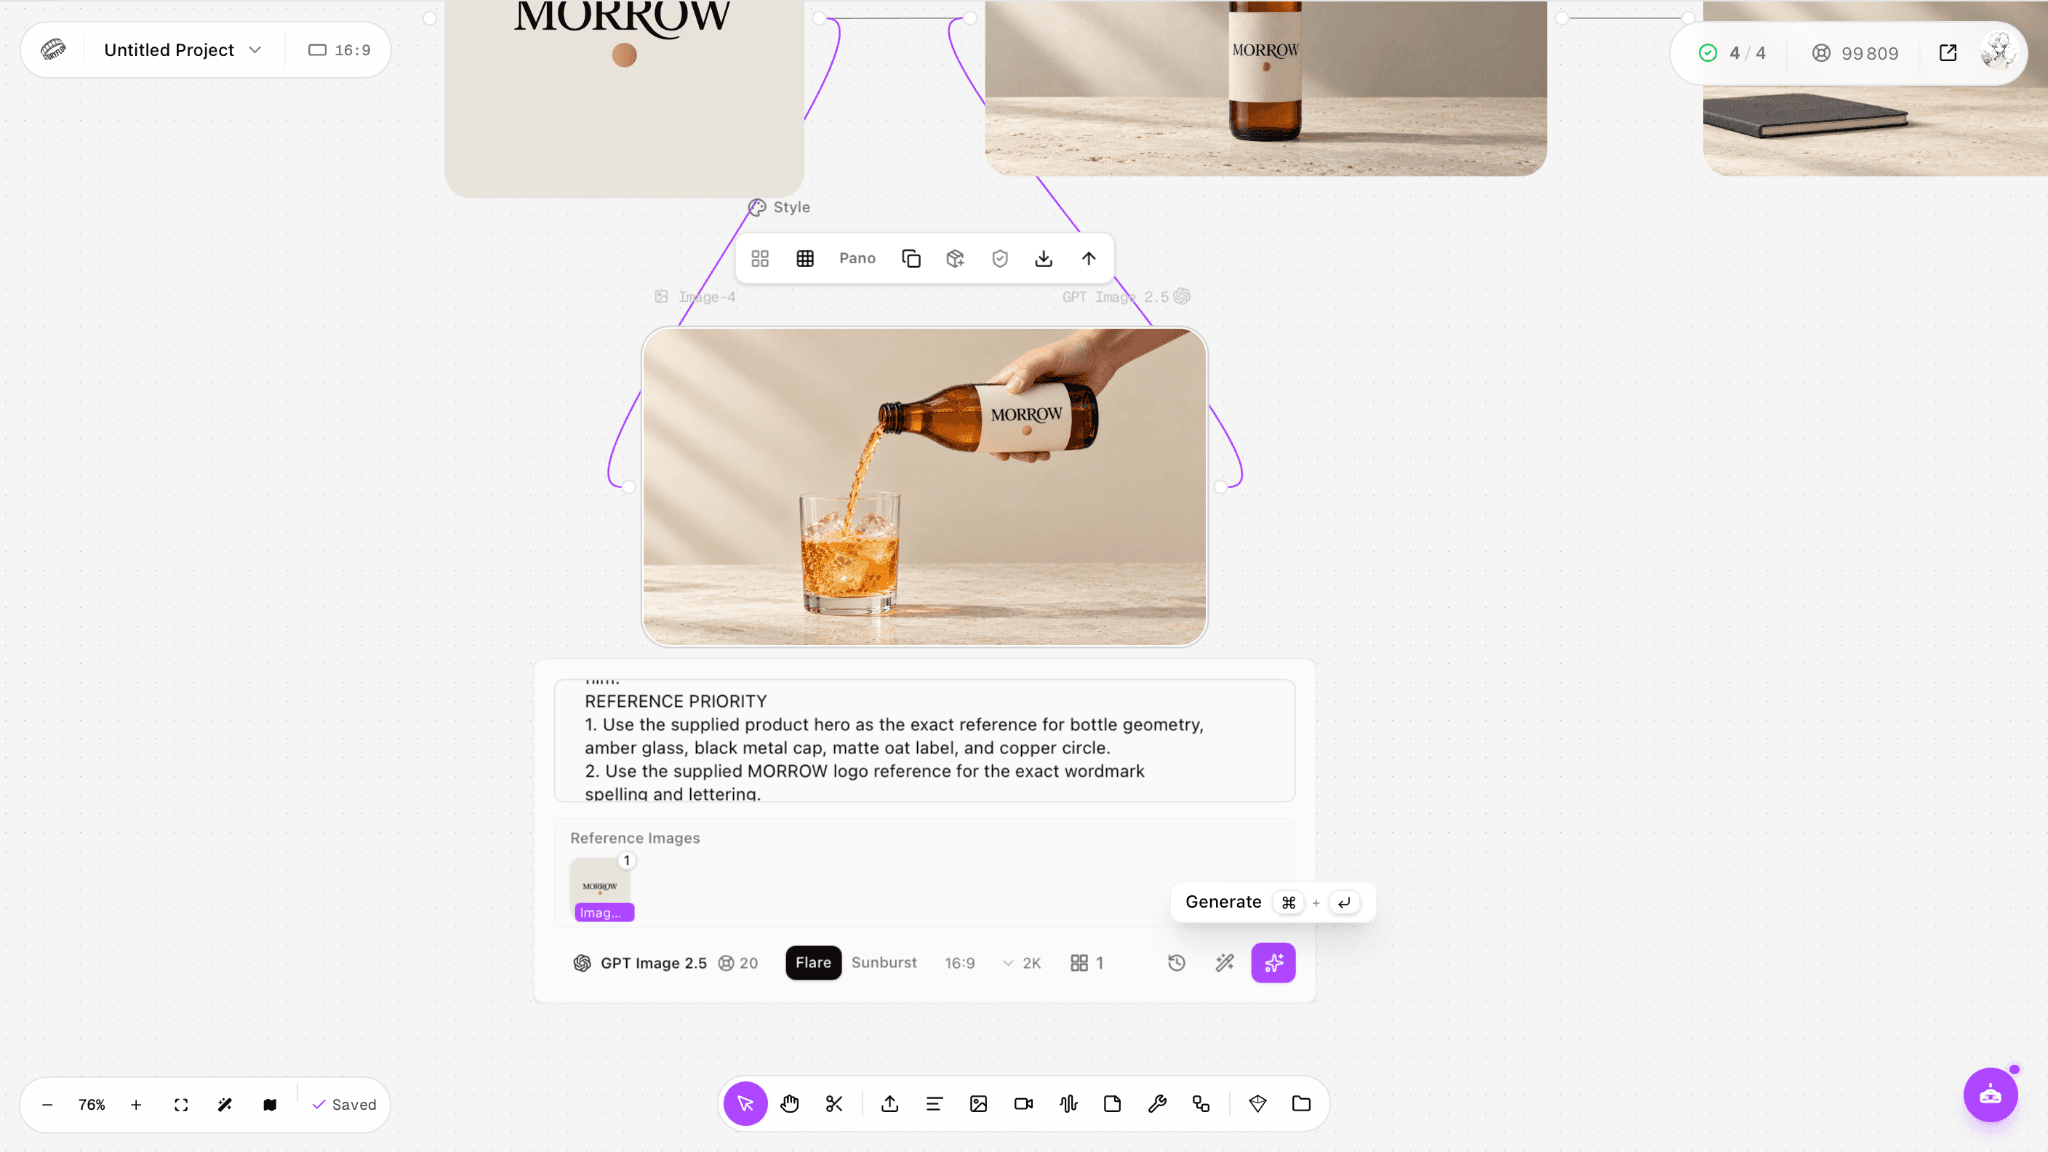
Figure 4.5. Approved S03 pouring still.
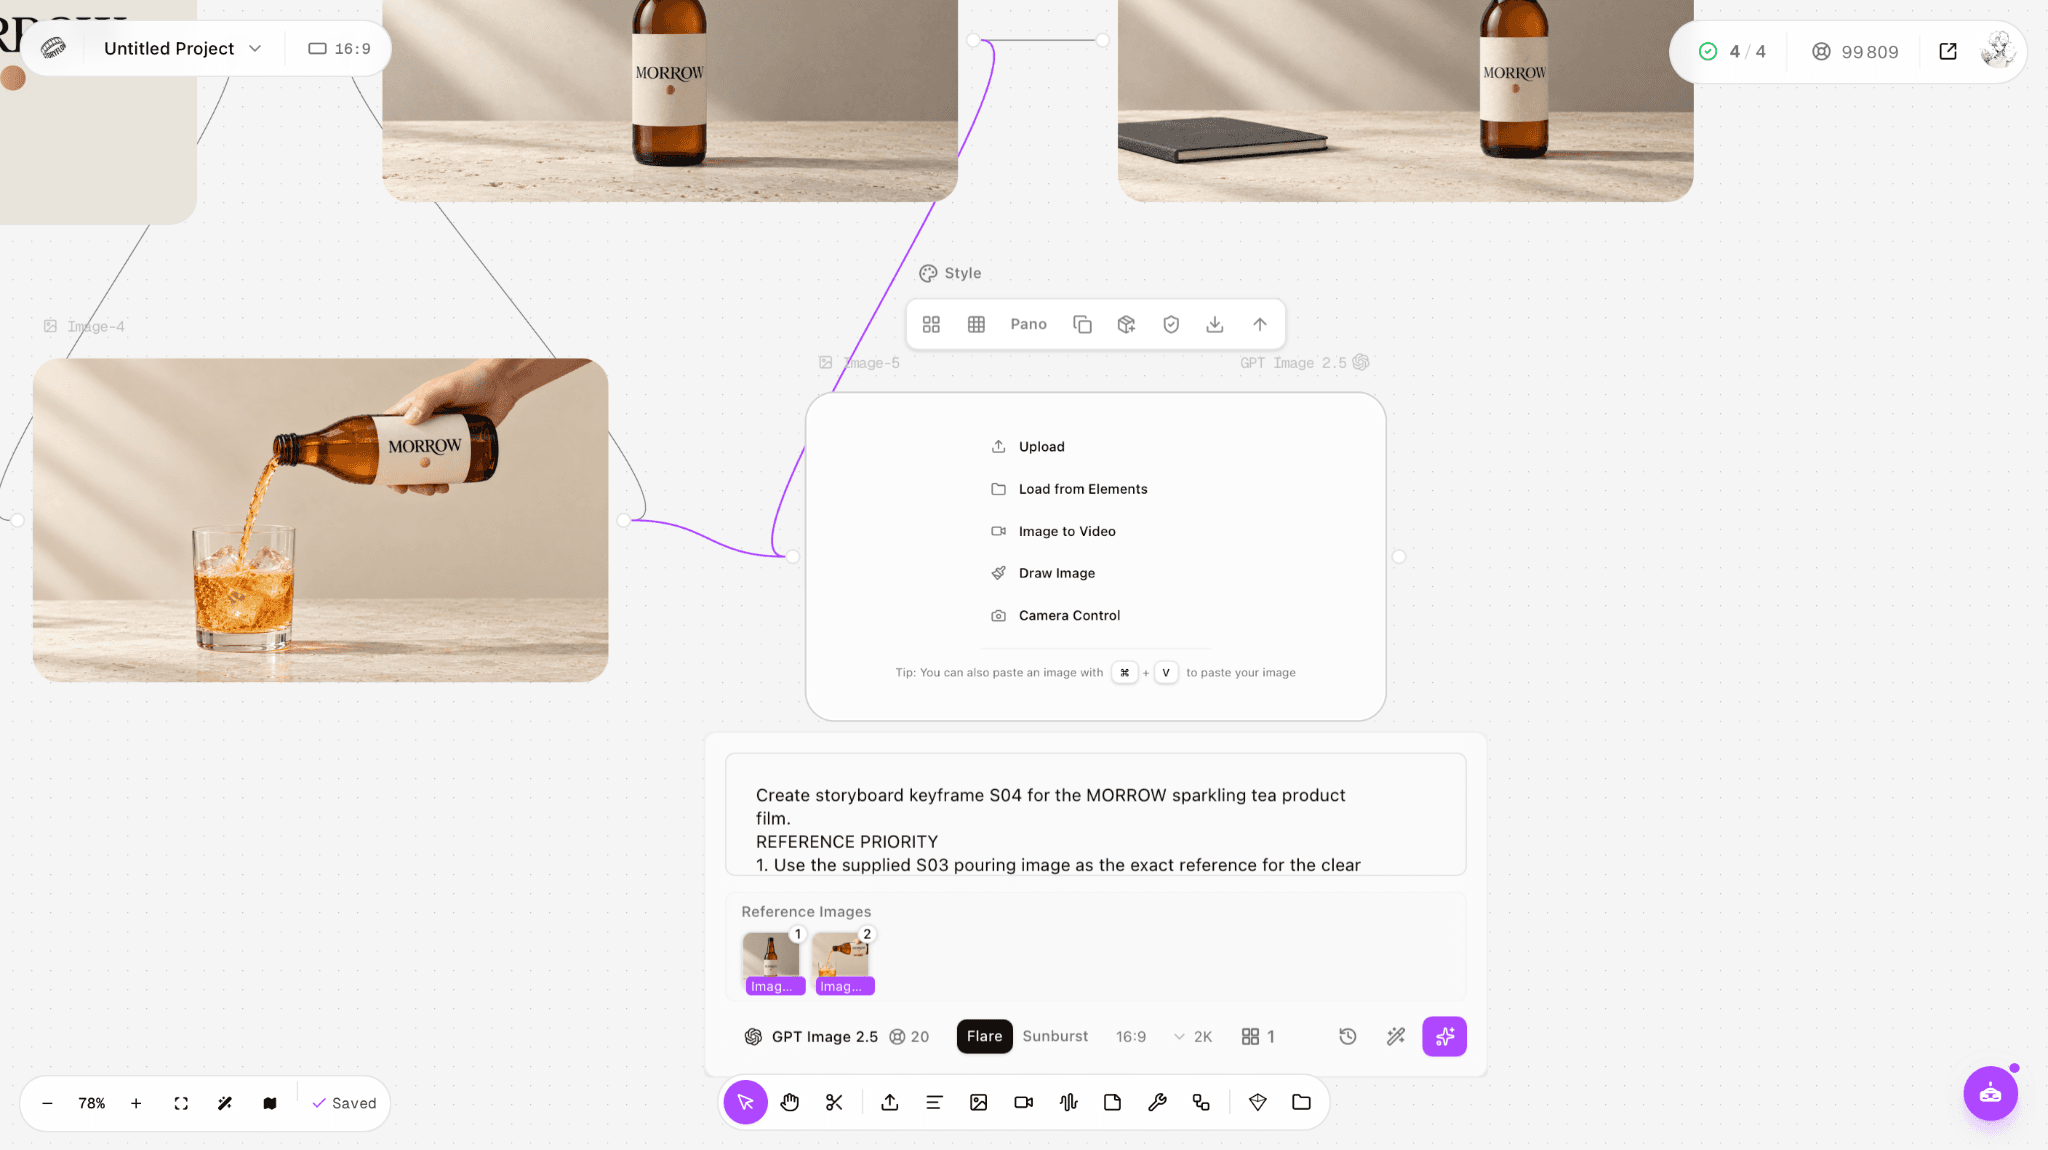
Figure 4.6. S04 setup reused the approved hero and S03 result as references.
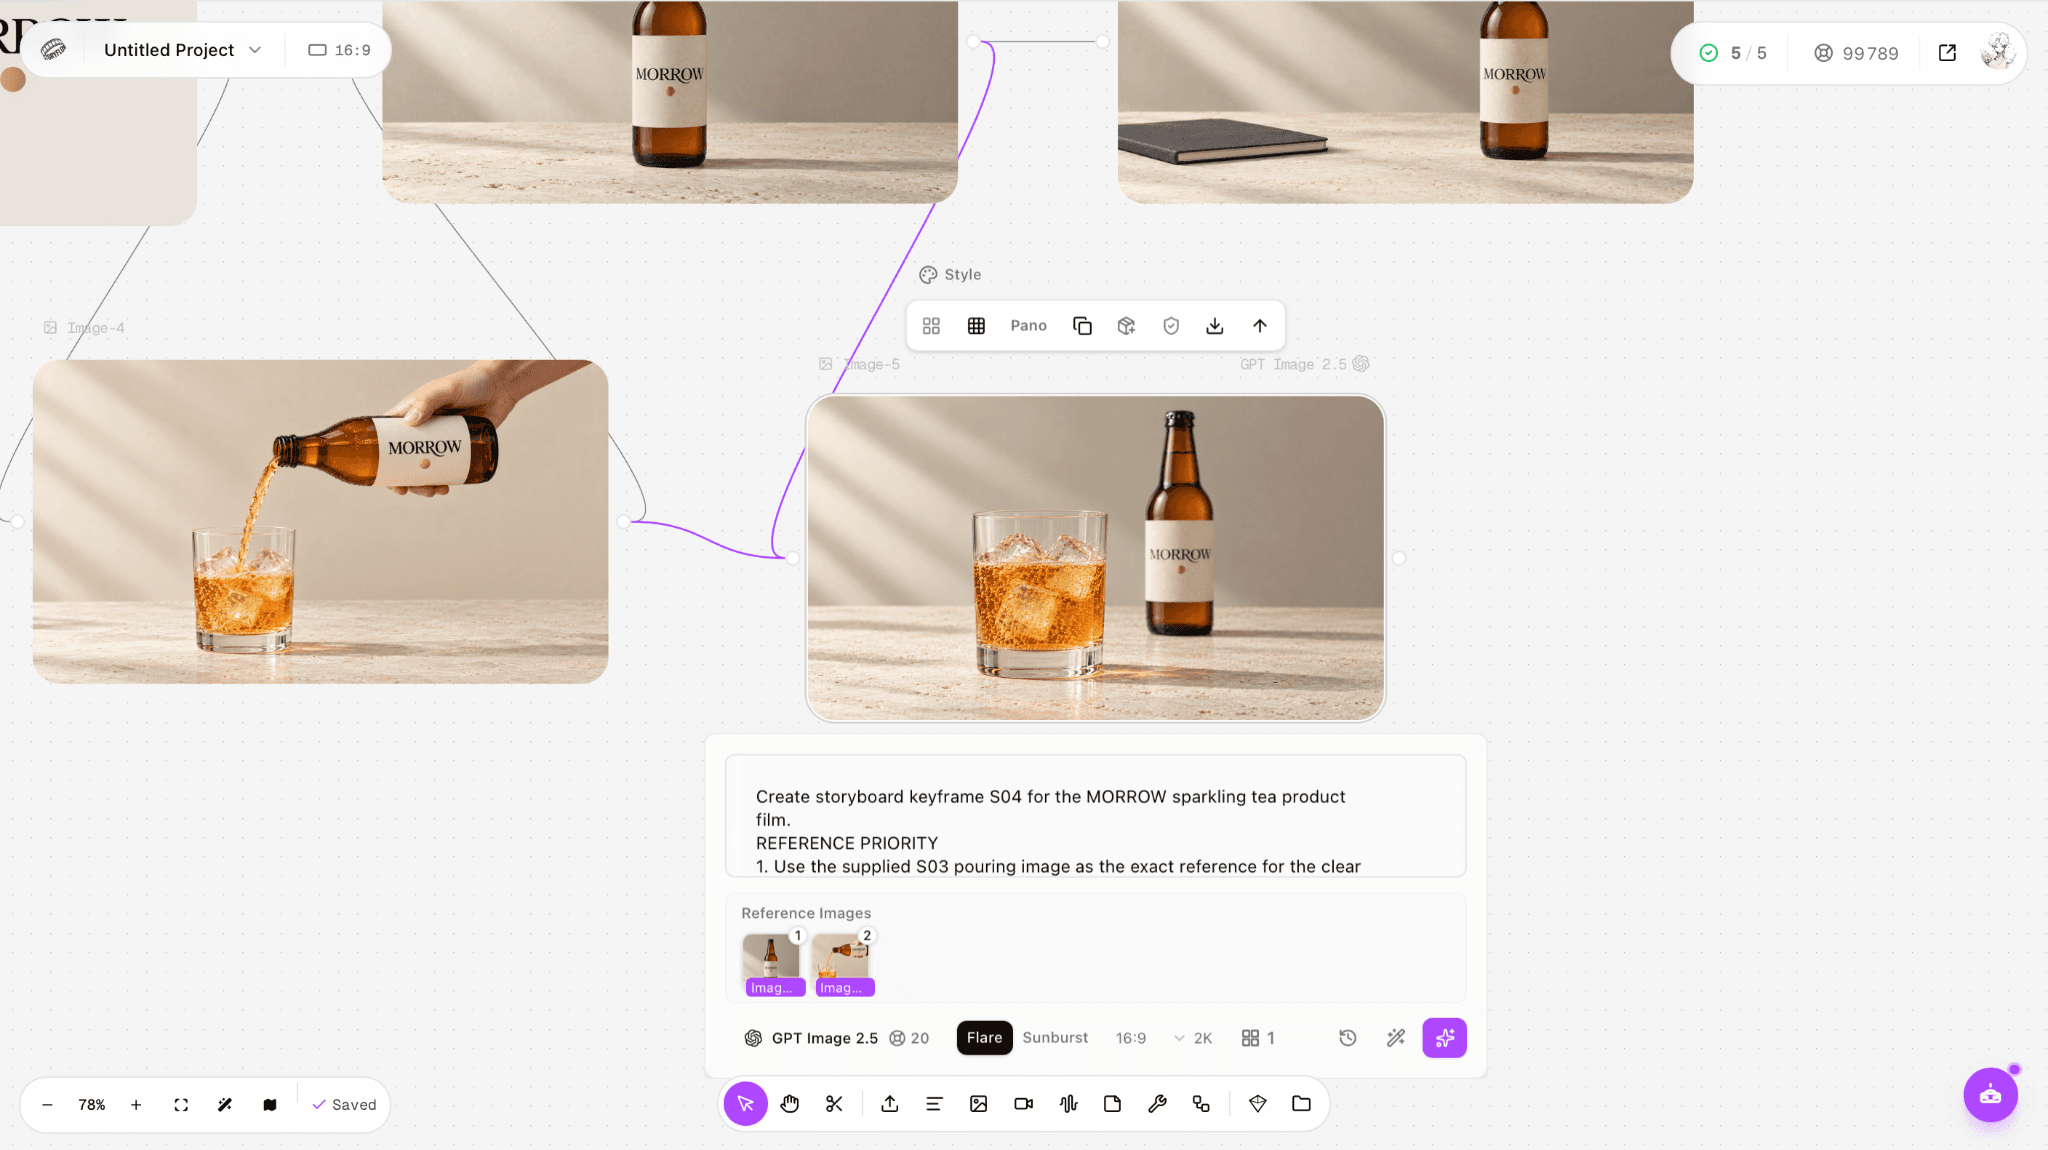
Figure 4.7. Approved S04 bubble-detail still.
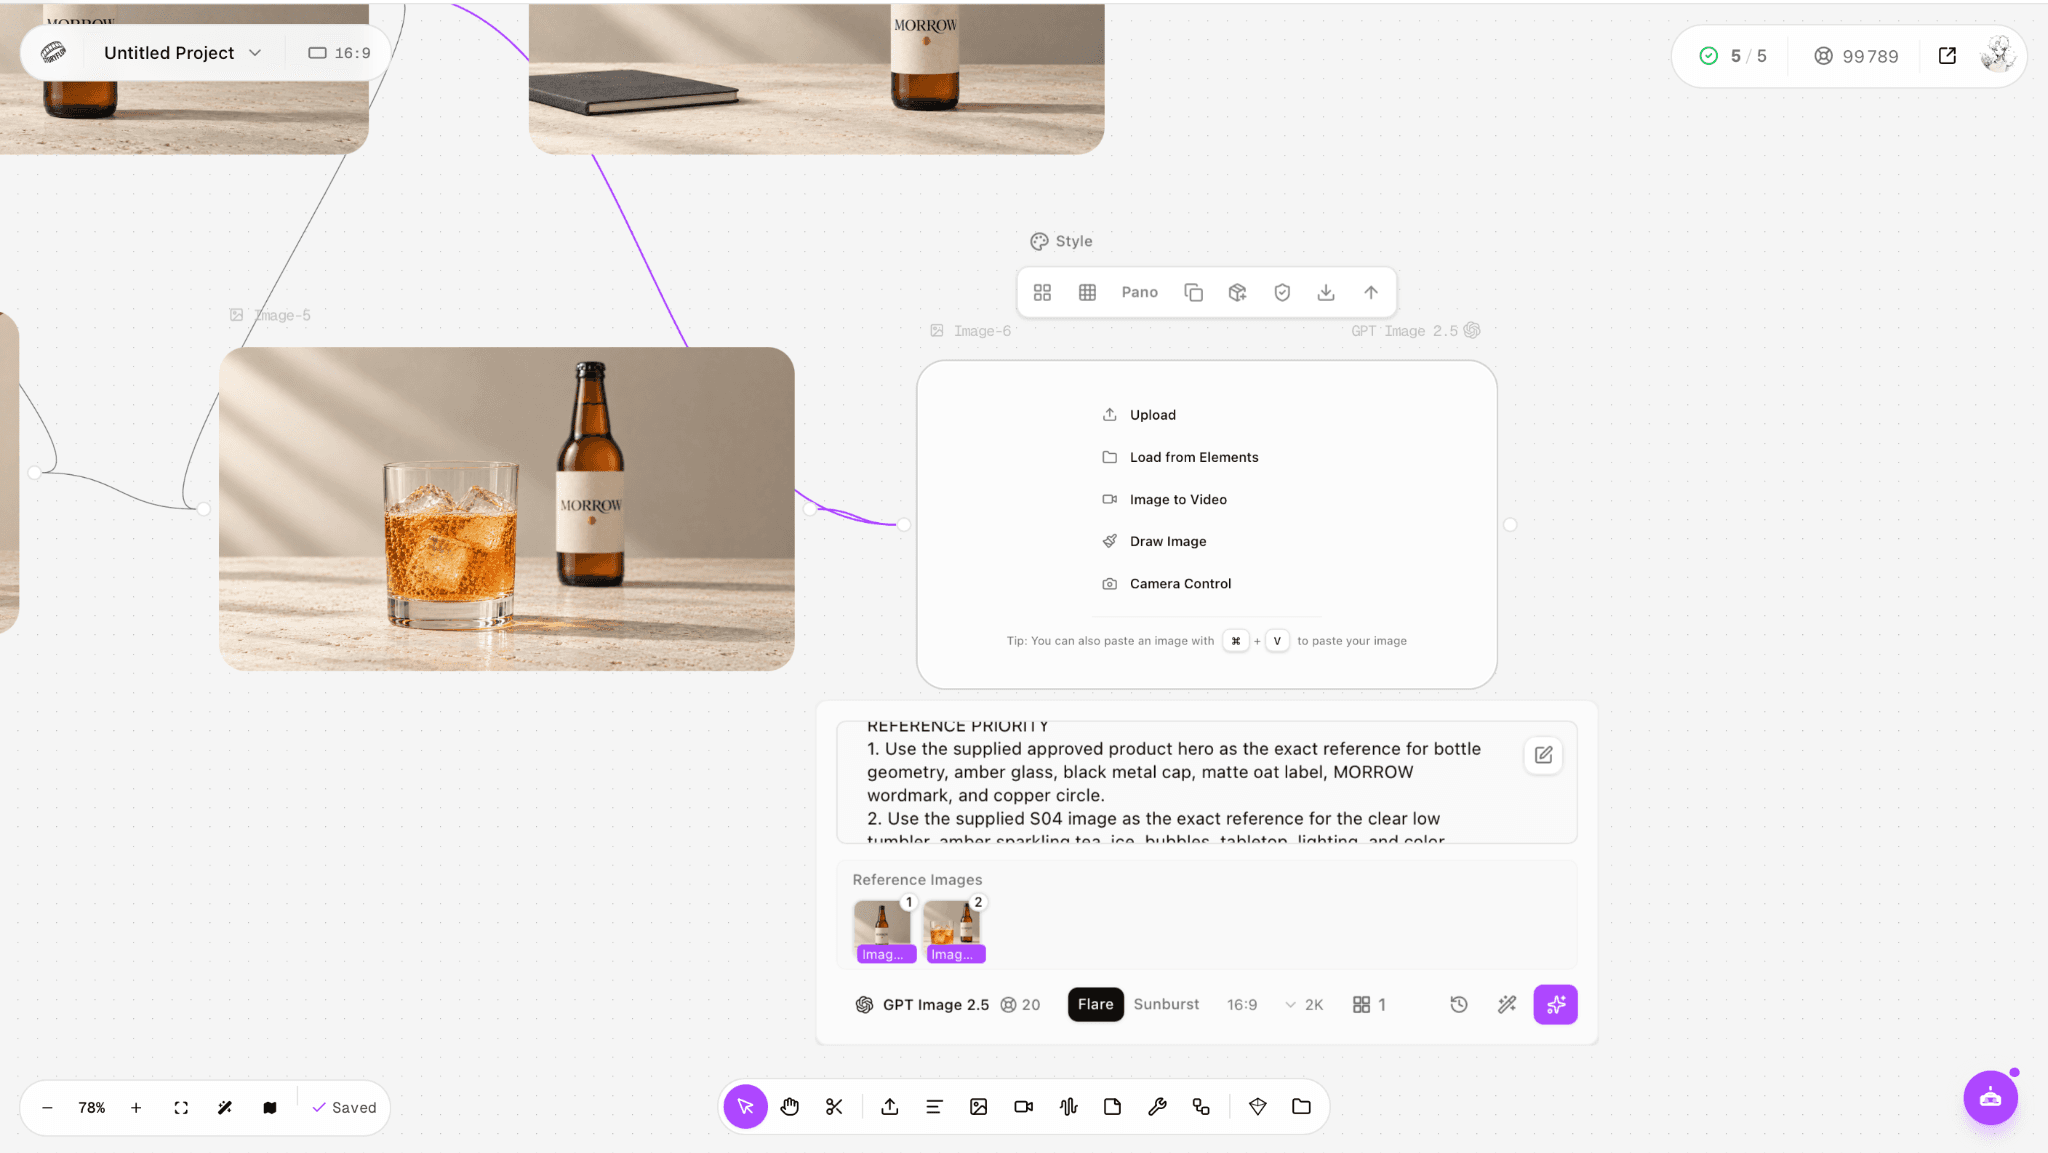
Figure 4.8. S05 setup reused the approved hero and S04 glass state.
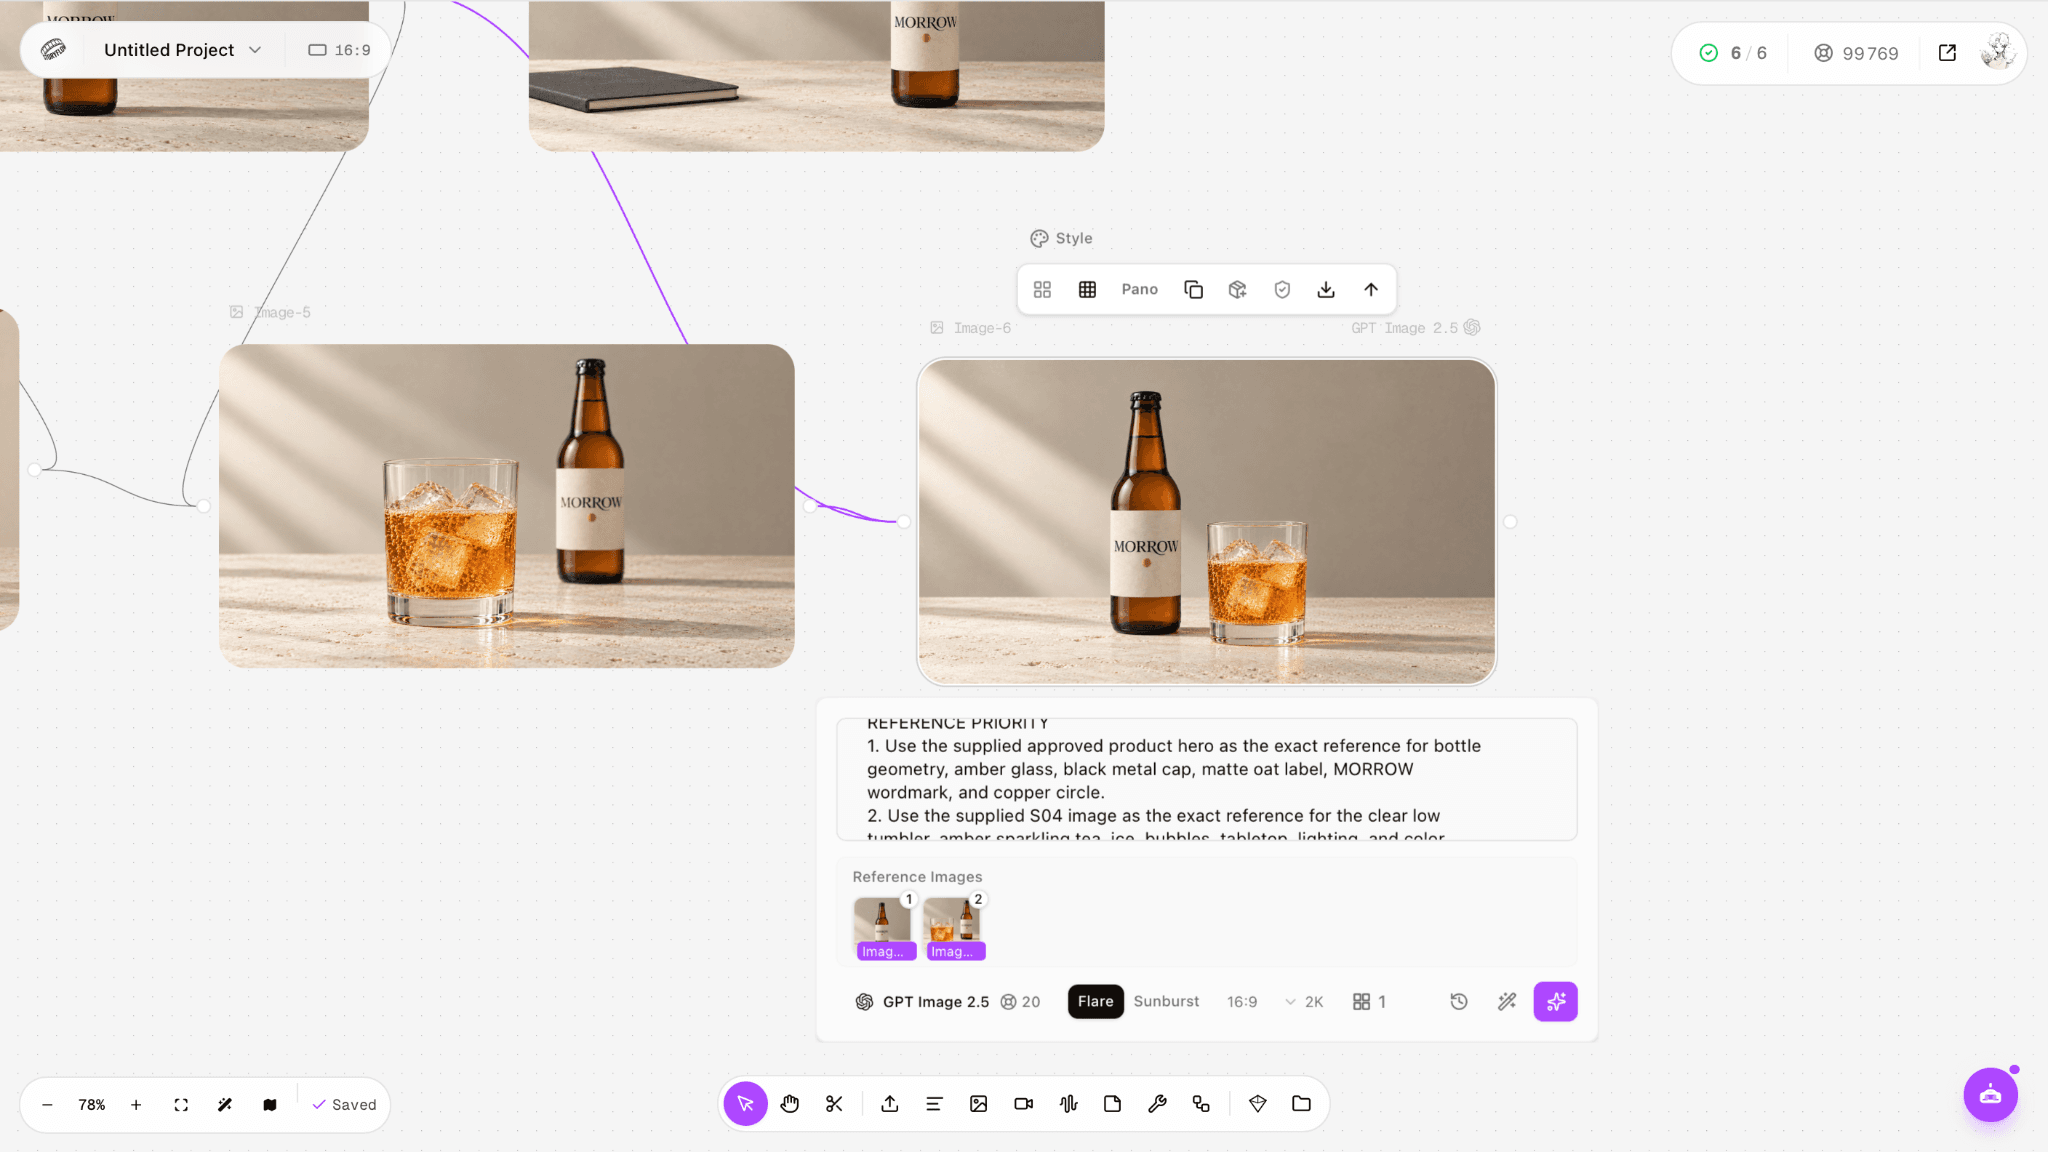
Figure 4.9. Approved S05 final product frame.
Narration, runtime, and handoff
ElevenLabs TTS Multilingual v2 with the Aria voice produced a 24-second calm female narration. Stability was 0.6, Similarity Boost 0.8, Style 0.0, and Speed 0.8. MORROW was pronounced correctly, and paragraph pauses were generally natural. The approved plan leaves roughly six seconds for a music-only S05 hold, creating an approximately 30-second sequence.
The final deliverable from Astorie was an approved asset package: five stills in narration order, the 24-second narration, a 27-second instrumental music track, selected/rejected motion records, and a handoff manifest. Sequence Builder and direct NLE export were not available in the tested Astorie workspace. The final timeline, captions, sound mix, and master export therefore require an external editing application.
Explainer result: handoff-ready, not a finished master
Completed in Astorie: brief, source pack, locked script/timing, storyboard, five approved stills, narration, music, motion tests, and asset selection.
Rejected before handoff: motion tests that altered bottle geometry, label layout, camera framing, or bubble behavior.
Still required externally: frame-accurate assembly, captions, audio mix, color matching, final quality control, and delivery export.
Frequently Asked Questions
How long should an AI explainer video be?
Use the shortest duration that can establish the problem, mechanism, proof, limitation, and next step. A help-center walkthrough may need more time than a landing-page explainer; the communication job matters more than a fixed number.
Should I write the script or create visuals first?
Write and time the production script first. Early visual exploration can inform style, but final-shot generation and the production storyboard should follow locked narration beats.
Do I still need an NLE?
Yes when you need reliable timing, sound mixing, captions, color, graphics, versioning, and delivery settings. Astorie can organize and generate the upstream assets; the NLE remains the controlled finishing environment.
When should I use an avatar?
Use an avatar when a stable presenter, language localization, or direct instruction is the core requirement. Choose screen capture for interface accuracy and diagrams for abstract systems.
How do I keep AI-generated shots consistent?
Reuse a canonical reference pack, lock wardrobe and product details, label every shot, change one major variable at a time, and approve continuity before final-quality rendering.
Ready to try it on the canvas?
Open Astorie and fan your prompt across every frontier model in one workflow.