

FLUX 3 Image Editing: How to Make Targeted Changes
FLUX 3 image editing starts with an image and an instruction about what to change. Name the target clearly, then describe the objects, text and framing you want to keep. In Astorie, connect the image to a FLUX 3 Image node before generating the edit.
A mug, a FIELD NOTES notebook and a blue vase give us clear details to follow through each edit. We changed the wall, warmed the light and recolored the mug. The wall and color edits were straightforward to judge; the lighting needed a closer look at the shadows.
Set up FLUX 3 image editing from a clear source
Create or open a canvas project and import the source image. Add an Image node and select FLUX 3 Image. Connect only the intended source and check its thumbnail in Reference Images. For this landscape example, use 3:2, 2K, JPEG, one image and Expand Prompt off.
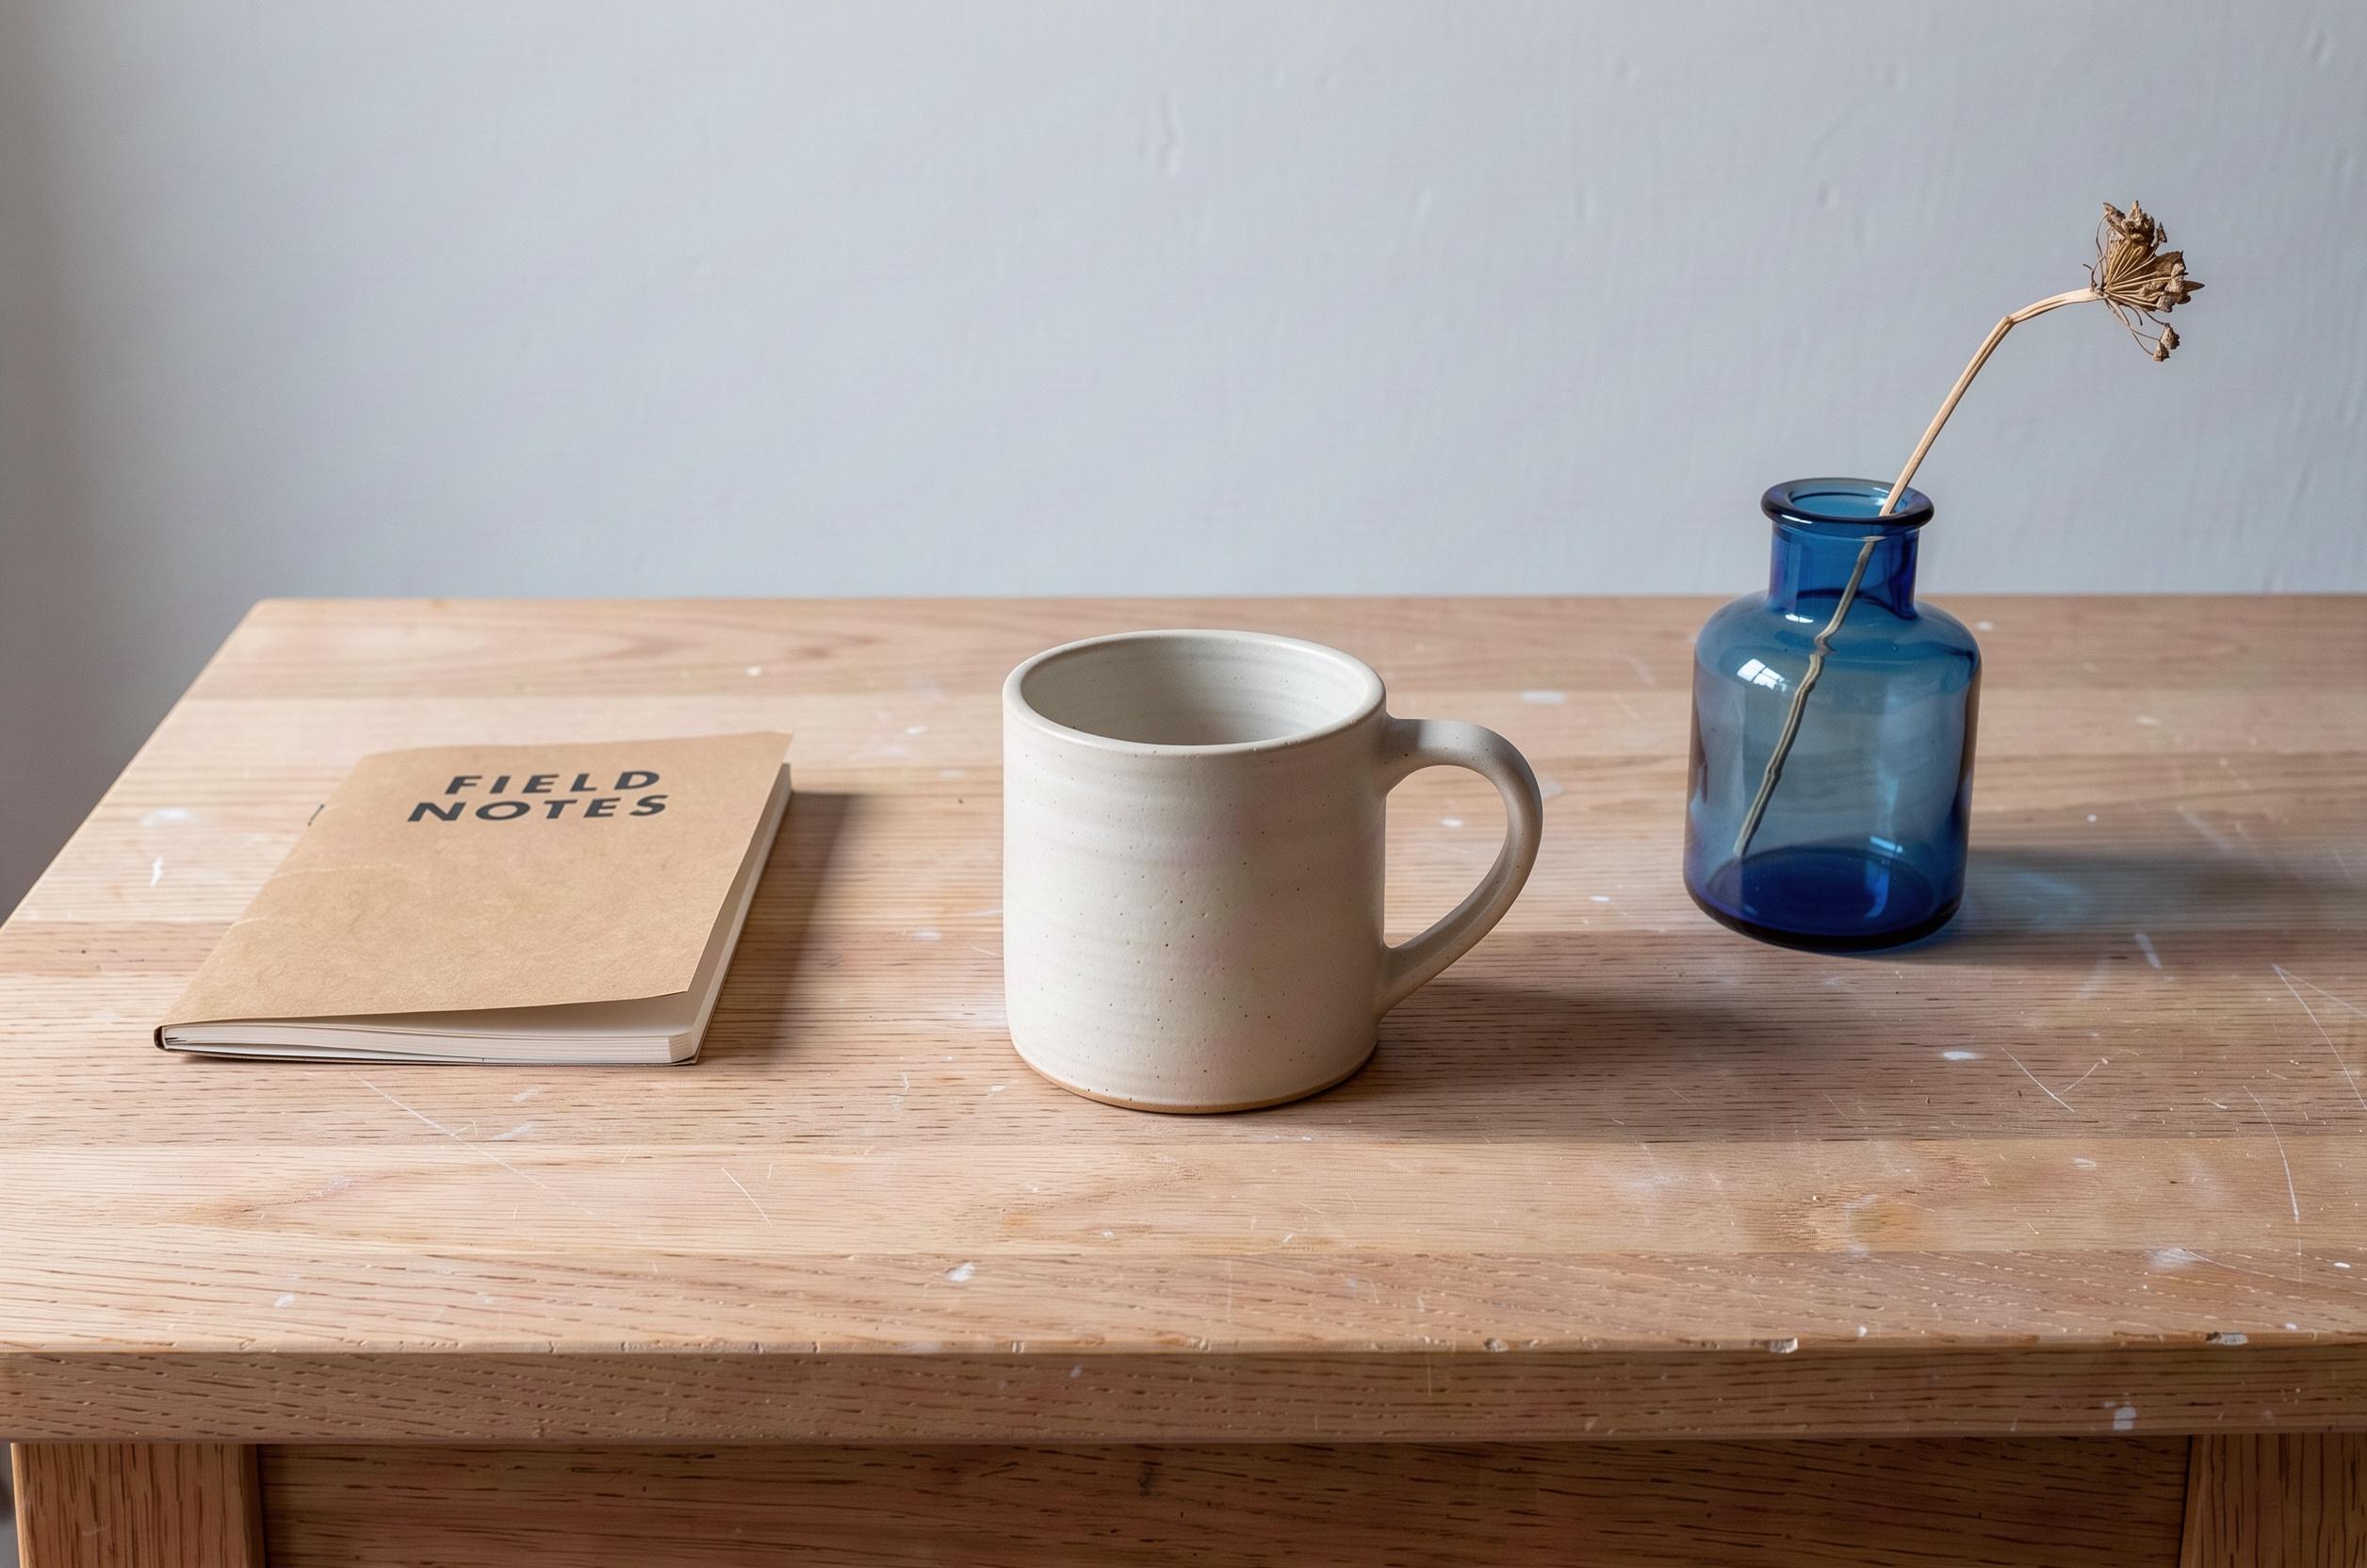
Figure 1. The original workbench gives each edit the same mug, notebook, vase and gray wall.
If you want to build a similar source, this was our original generation prompt:
A realistic editorial photograph of a small pottery workbench.
An ivory ceramic mug with a curved handle sits in the center foreground. A closed kraft notebook lies flat on the left, with the clearly printed title "FIELD NOTES" on its cover. A small cobalt-blue glass vase holding one dried stem stands on the right.
The three objects are fully visible, with clear space between them. Pale oak tabletop with visible wood grain, a plain light-gray plaster wall behind it, and soft neutral daylight from the left.
Use a straight-on three-quarter view, fine ceramic texture, realistic glass, and natural contact shadows. Keep all three objects sharp enough to inspect, including the notebook title.
No people, extra objects, logos, additional text, or strong background blur. Landscape 3:2 composition.
Black Forest Labs describes instruction-based FLUX 3 editing as supplying an image and naming the change. The Astorie examples here use one connected reference and written instructions; they do not depend on a mask or a box-selection step.
Change one thing and describe what stays
A useful edit prompt has a clear verb and target, followed by the details that would spoil the shot if they drifted. “Make it more stylish” leaves many decisions open. “Replace only the wall” tells you what result to look for and what should remain comparable.
Replace the background
Replace only the plain light-gray wall behind the workbench with a muted sage-green tiled wall.
Keep the tabletop, the ivory mug and its handle, the kraft notebook and its "FIELD NOTES" title, and the cobalt-blue vase with its dried stem in the same positions and at the same sizes.
Retain the original camera viewpoint, framing, and neutral daylight from the left. Do not add or remove objects.
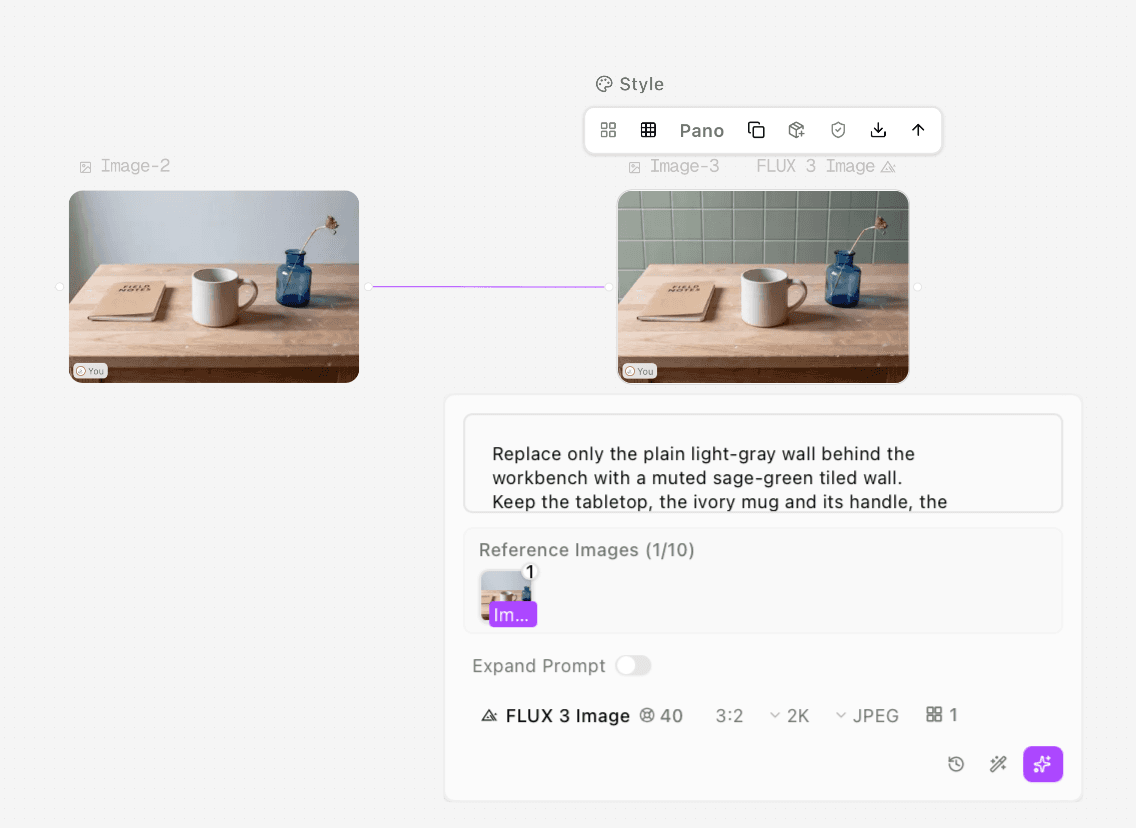
Figure 2. The original is connected as the single reference for the wall replacement.
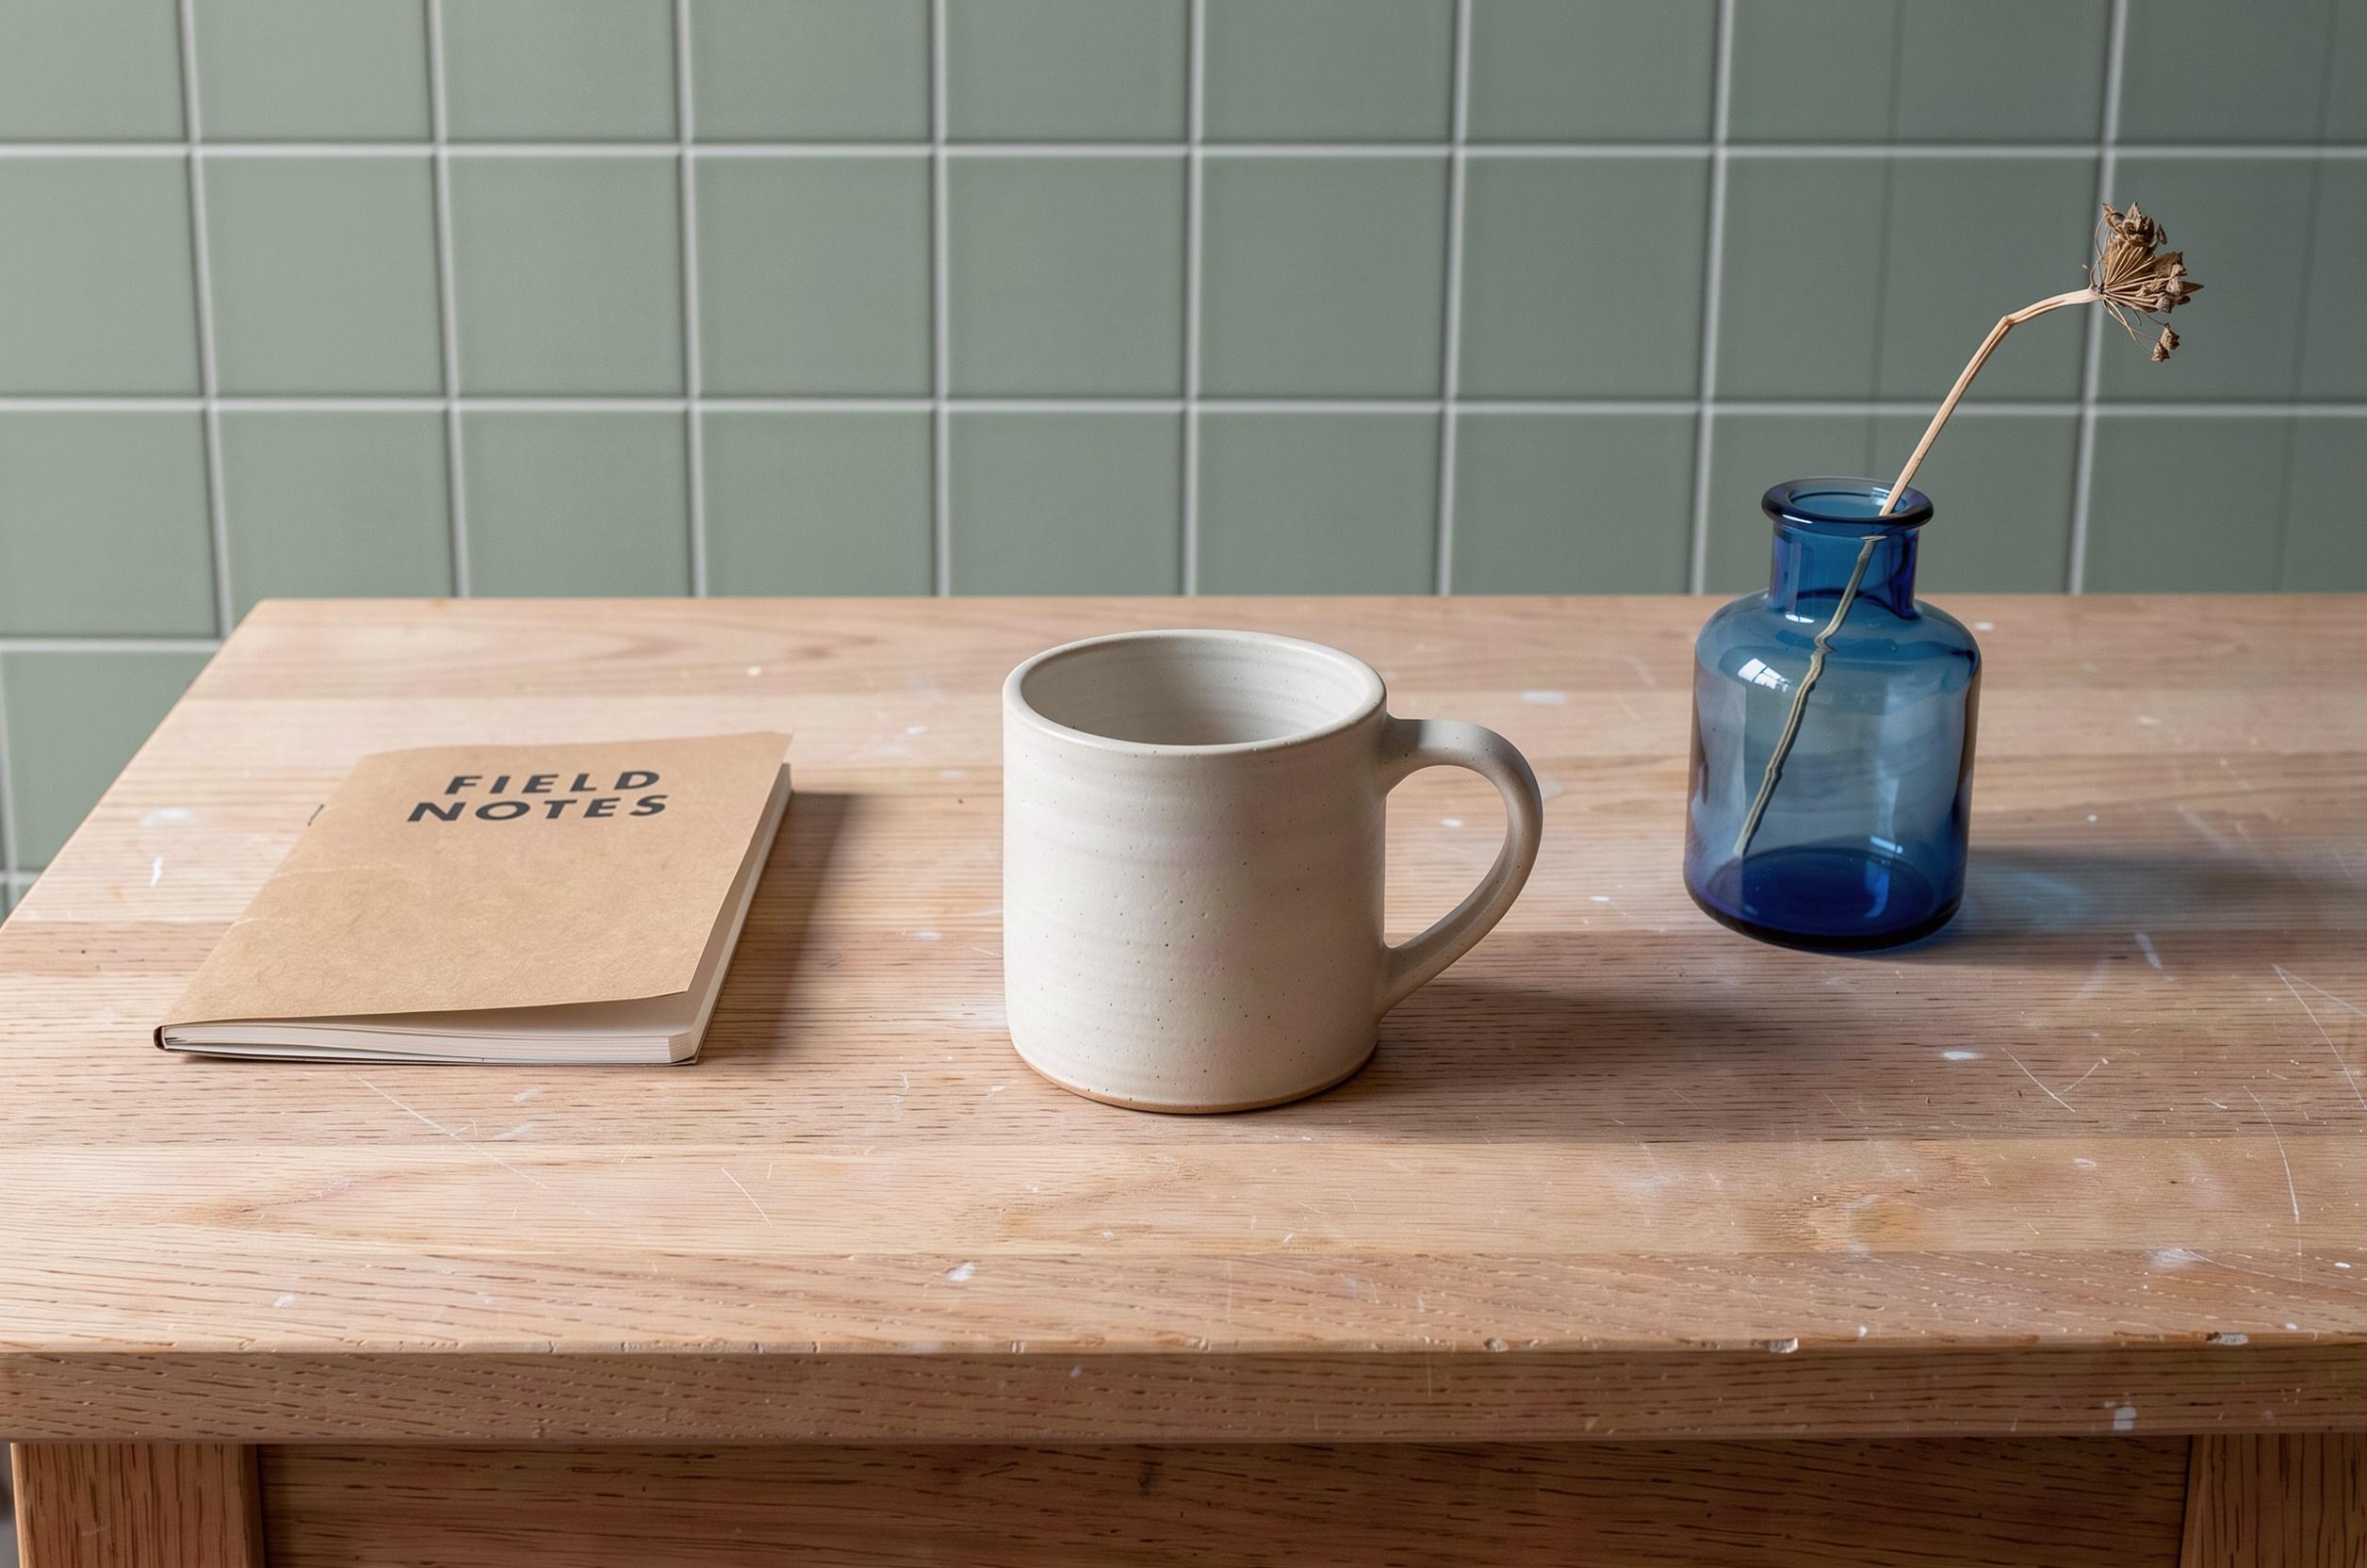
Figure 3. The gray wall becomes sage-green tile while the three foreground objects remain in their familiar arrangement.
This is useful when you like the existing arrangement but need another setting. If the scene is your only change, keep the existing light and camera viewpoint in the instruction. The background generator guide covers that narrower task.
Change the light and check its direction
For a separate lighting option, connect the original gray-wall image again, rather than the green-wall result. We asked for sunlight from the right and shadows falling left:
Change only the lighting to warm late-afternoon sunlight entering from the right, with a longer soft shadow falling to the left of the objects.
Keep the original light-gray plaster wall, pale oak tabletop, ivory mug, kraft notebook with the "FIELD NOTES" title, and cobalt-blue vase with its dried stem.
Preserve their shapes, positions, sizes, materials, and the camera viewpoint. Do not recolor the objects or add anything.
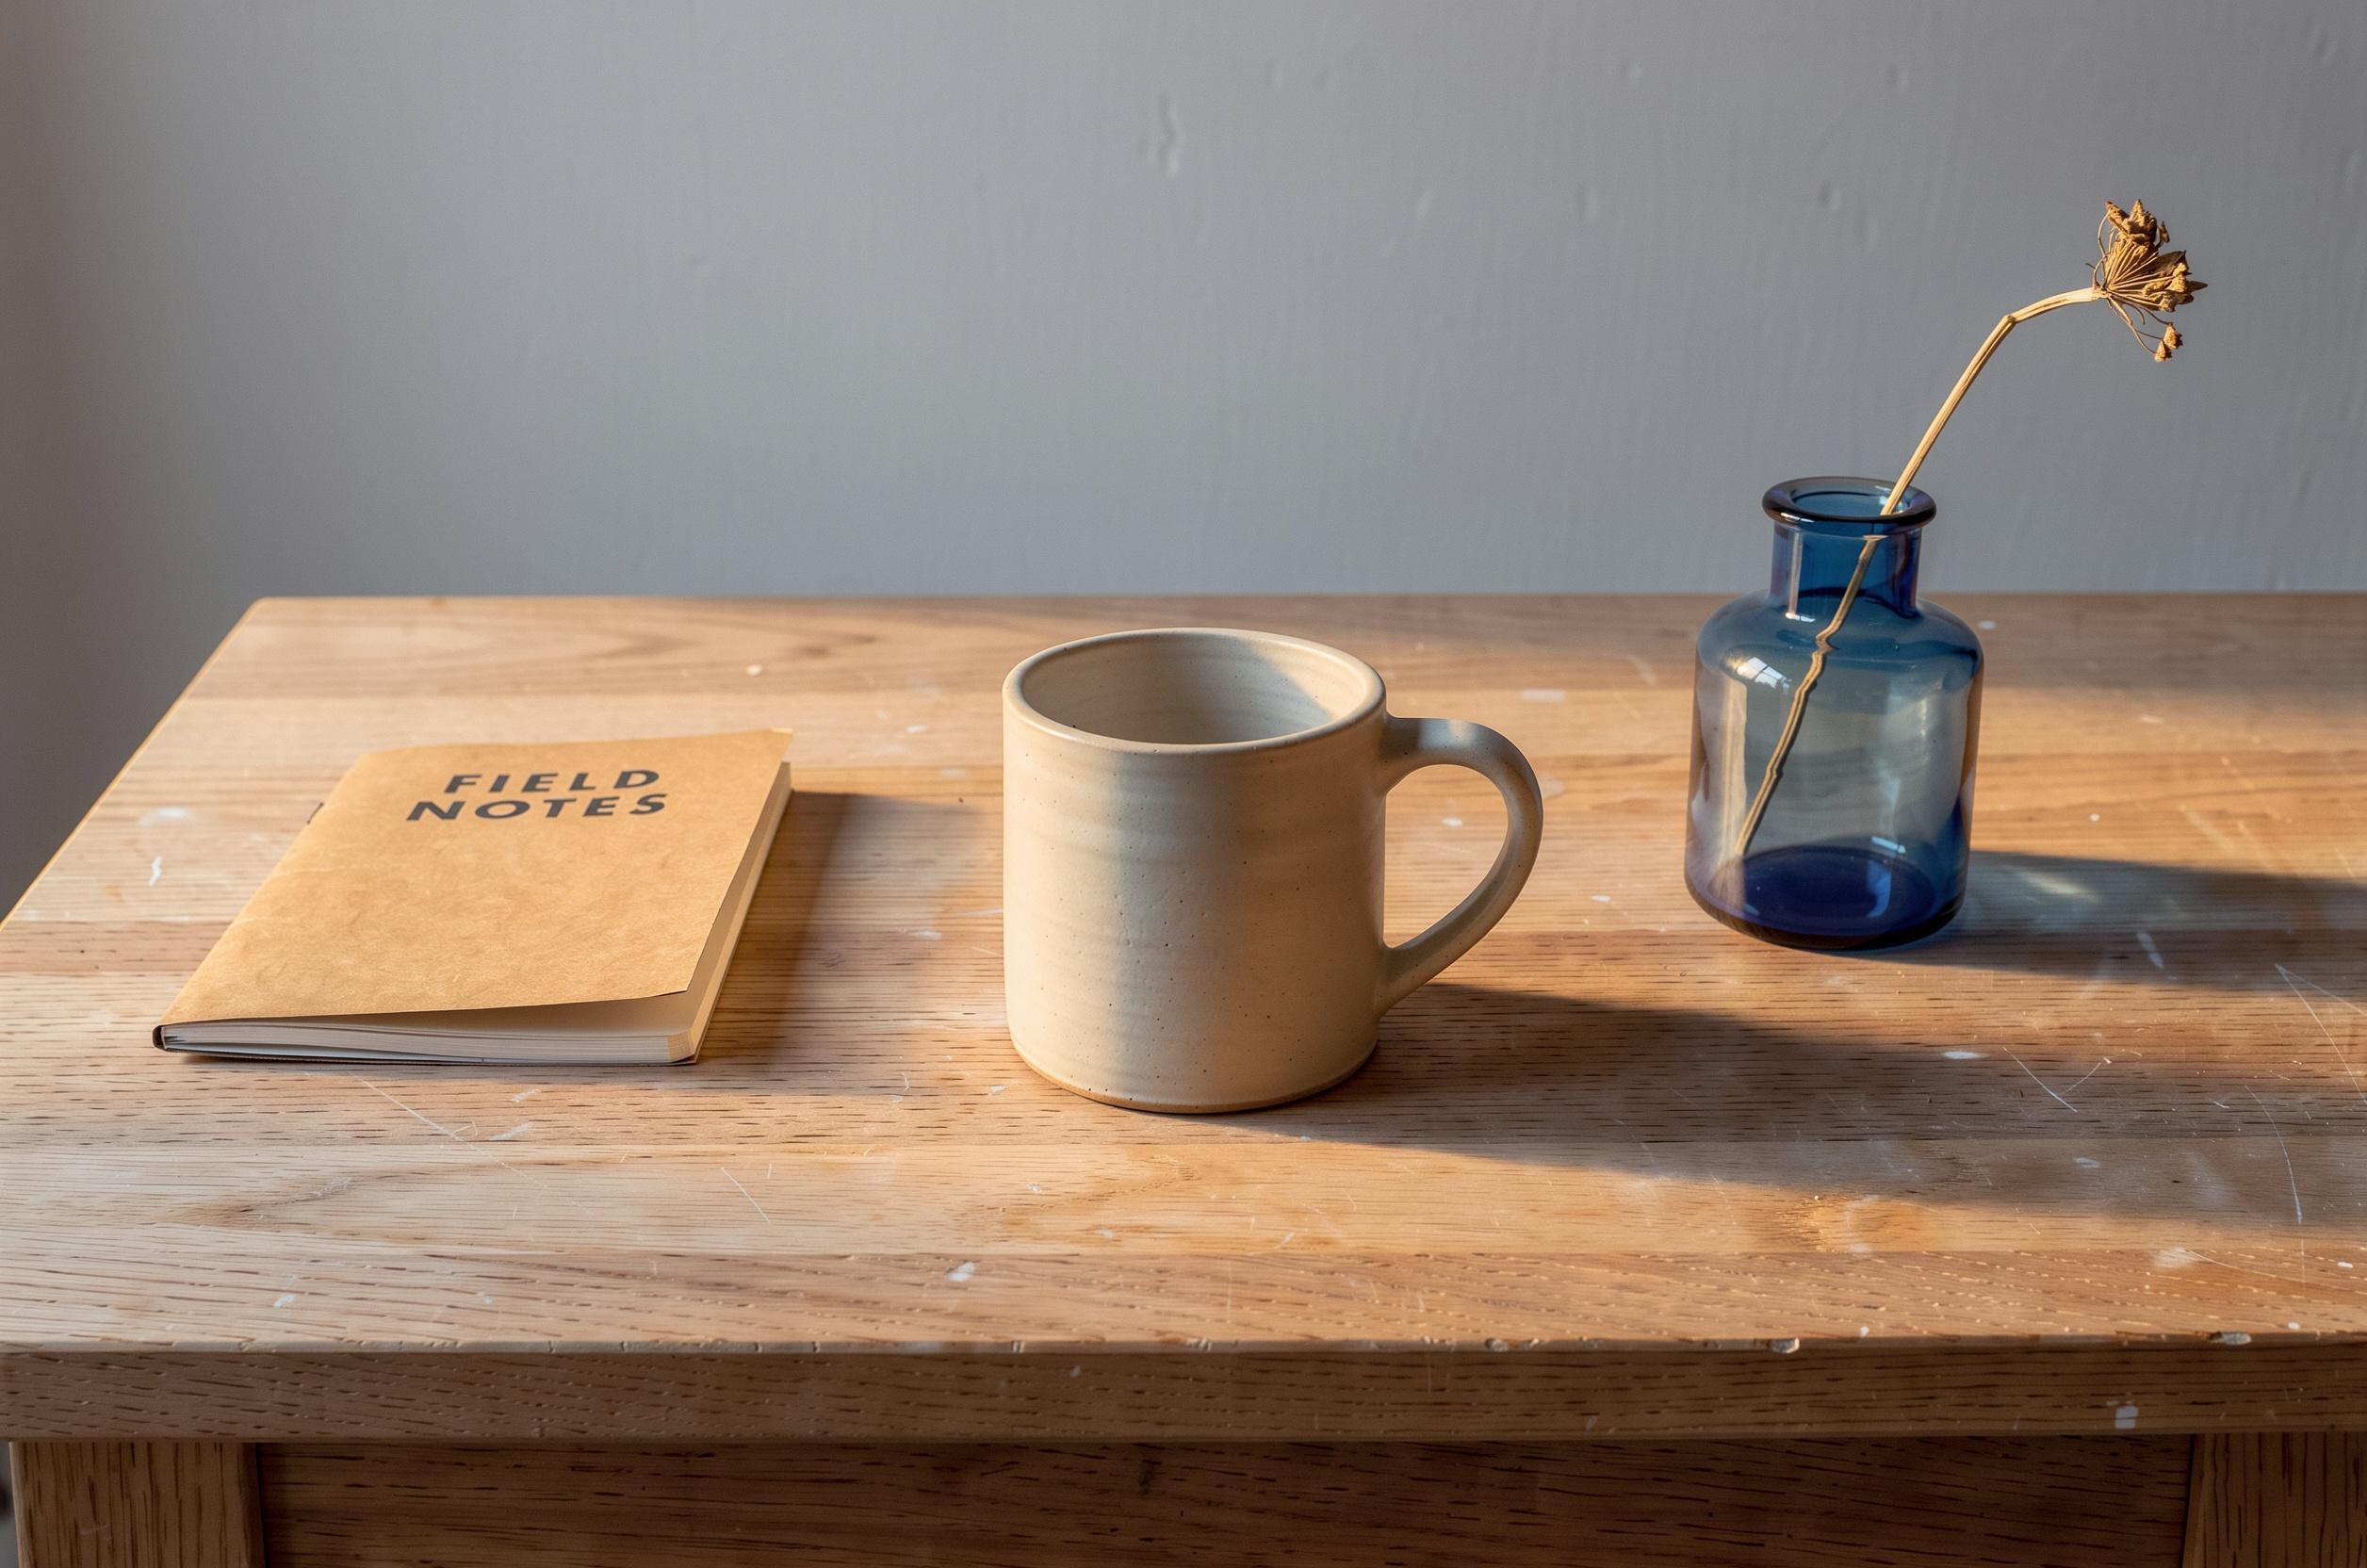
Figure 4. The independent lighting edit is warmer, but the main shadows extend right rather than the requested left.
Warmth and direction are different parts of the brief. The image became warmer, but it did not produce the requested leftward shadows. Trace the cast shadows on the tabletop before approving a lighting match to another shot.
Recolor a local object
Return to the original once more for an independent cup-color alternative:
Recolor only the ivory ceramic mug, including its handle, to matte terracotta red. Retain its existing surface texture, shape, handle, size, and position.
Keep the original light-gray plaster wall, pale oak tabletop, kraft notebook with its "FIELD NOTES" title, cobalt-blue vase with its dried stem, neutral daylight from the left, and camera framing.
Do not recolor the notebook, vase, wall, or table. Do not add or remove objects.
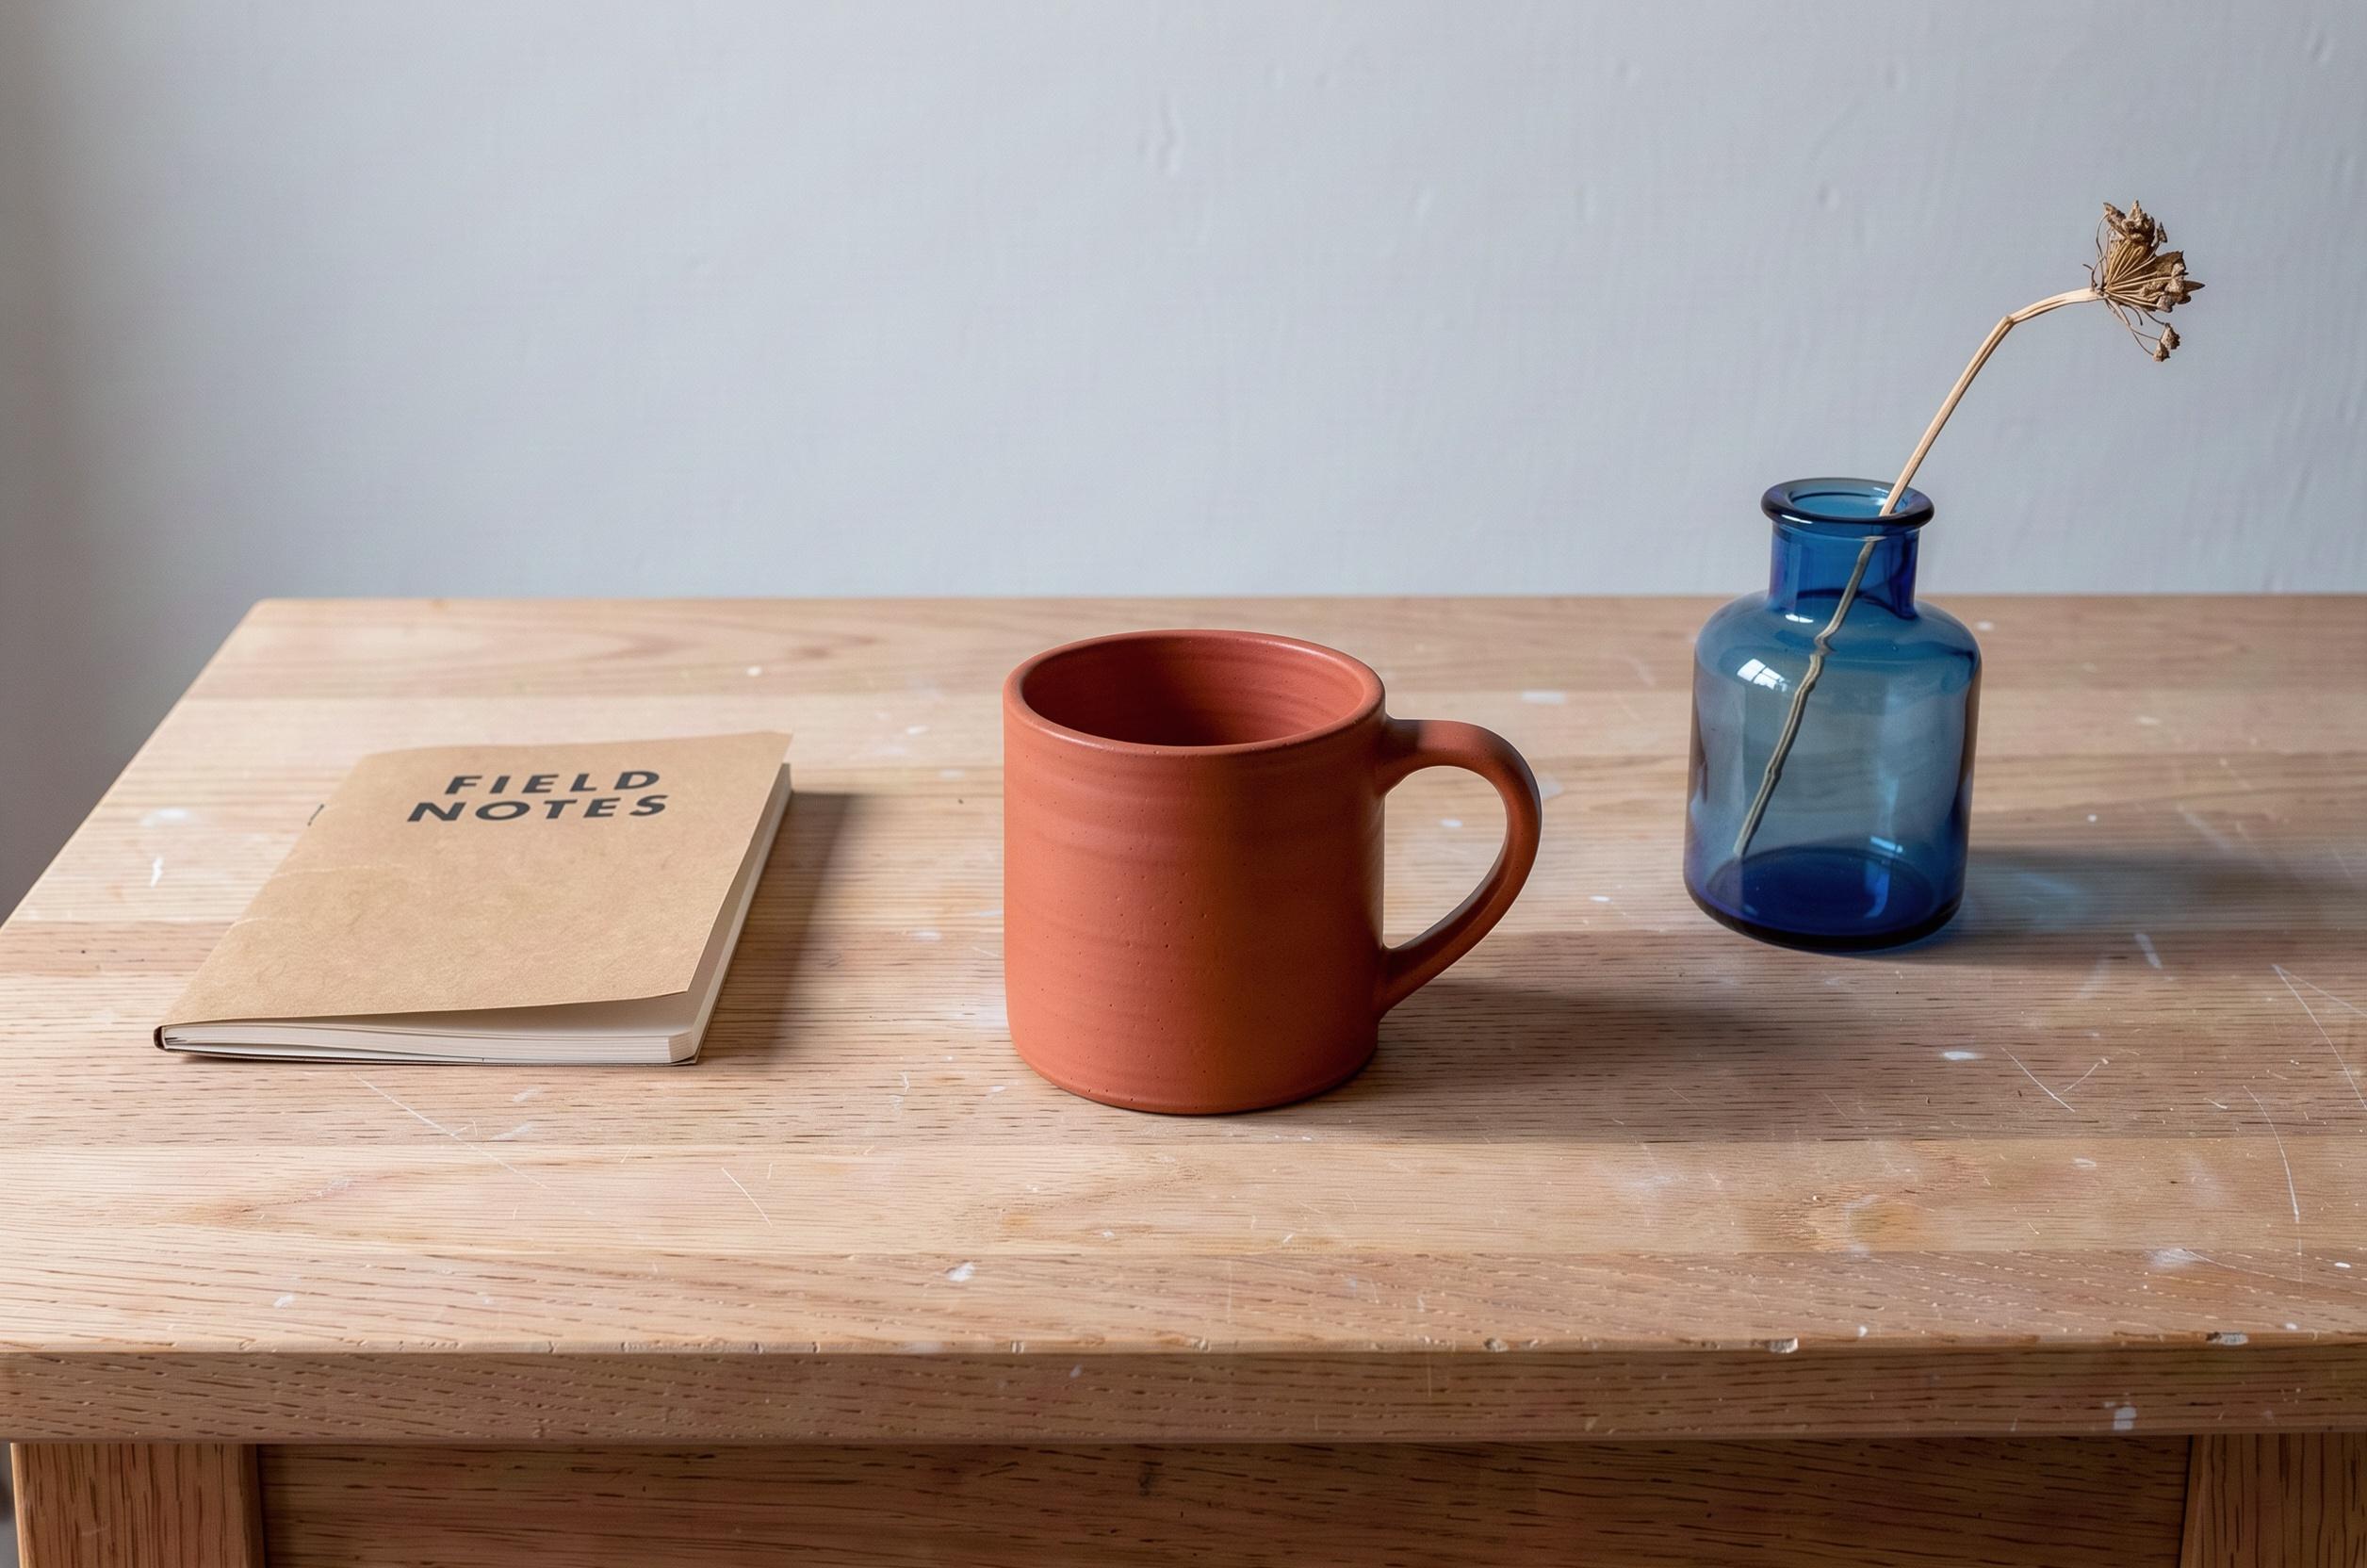
Figure 5. The mug and handle turn terracotta red; the gray wall and blue vase remain.
Read the notebook title and compare the cup handle, vase neck and stem as well as the color. An edit can satisfy the main instruction while changing a detail you still need.
Build a three-step version without losing track of the input
A branch starts from the original to make an alternative. A chain starts from an accepted edit to carry its changes forward. Keep both paths visible in the canvas workflow so the input thumbnail agrees with the prompt.
Step | Connected image | Requested next change |
|---|---|---|
1 | Original gray-wall workbench | Replace wall with green tile |
2 | Step 1 green-wall result | Add warm light; keep the green tile |
3 | Step 2 warm green-wall result | Recolor mug red; keep current light and background |
For step 2, the preservation sentence must describe the green wall now present in the input. This was the complete instruction:
Change only the lighting in this edited image to warm late-afternoon sunlight entering from the right, with a longer soft shadow falling to the left of the objects.
Keep the sage-green tiled wall, pale oak tabletop, ivory mug, kraft notebook with its "FIELD NOTES" title, and cobalt-blue vase with its dried stem.
Preserve their shapes, positions, sizes, materials, and the camera viewpoint. Do not recolor the objects or add anything.
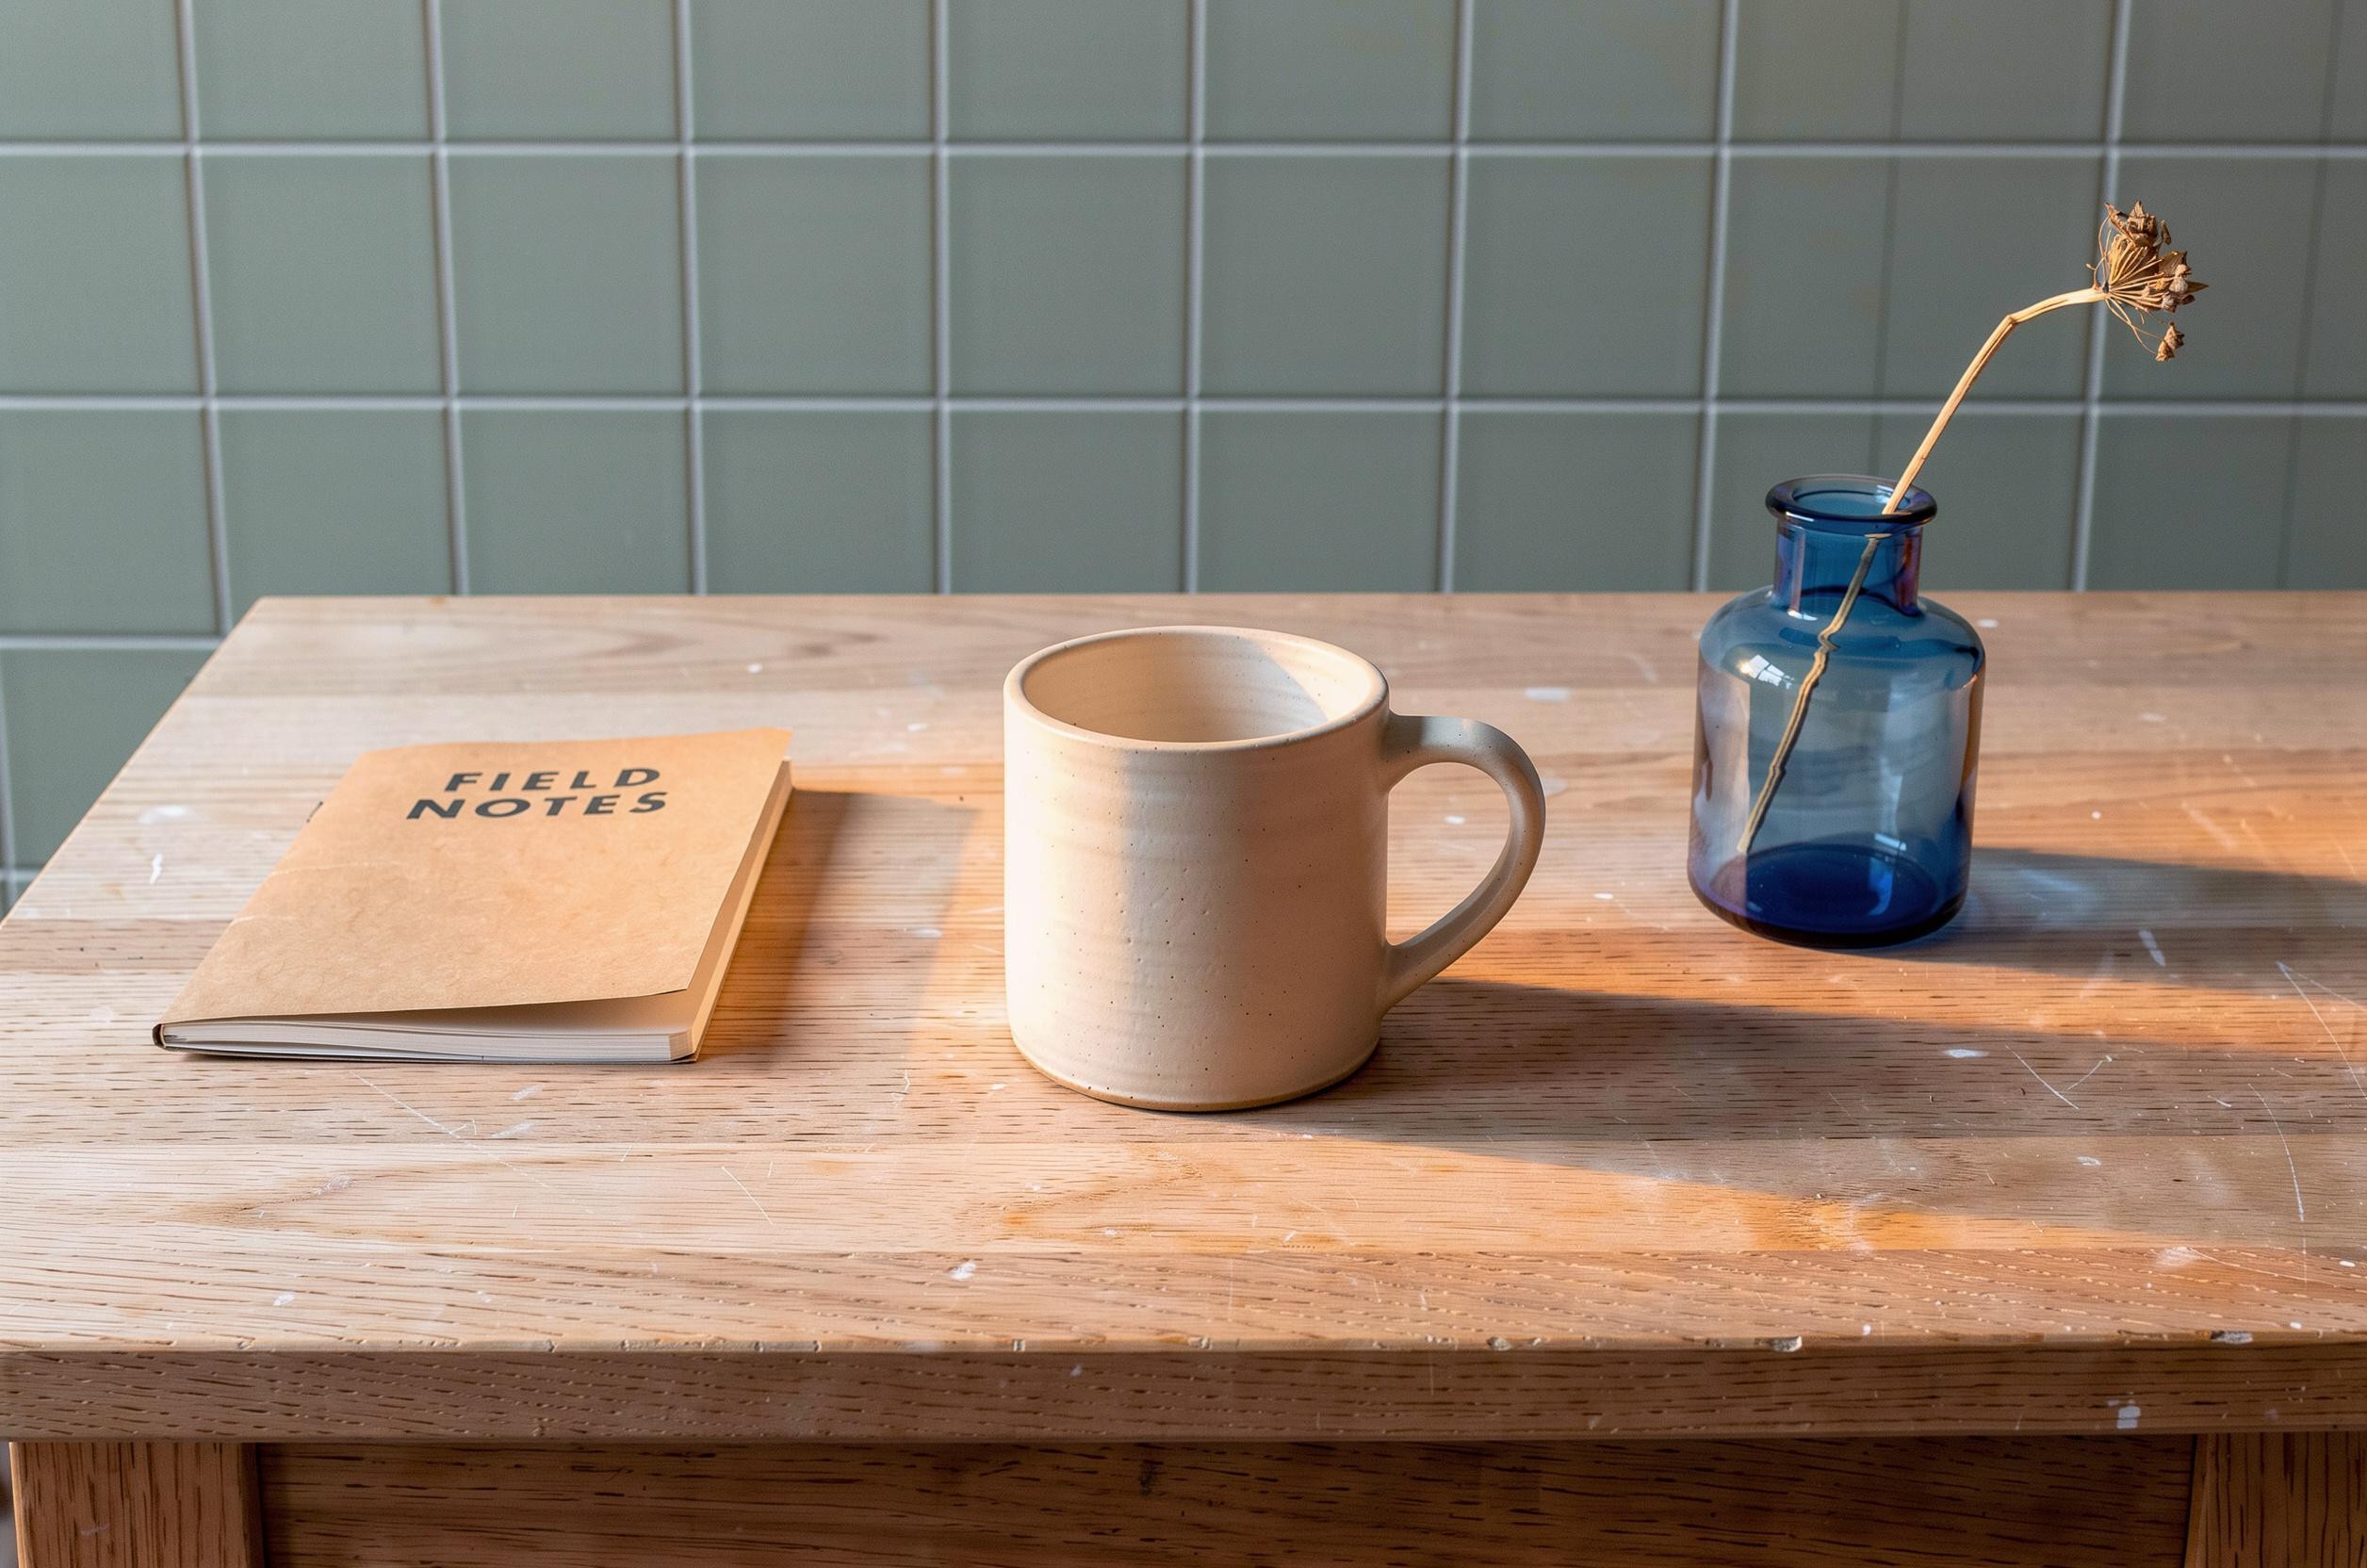
Figure 6. The second step retains the tile wall and adds warm light; the shadow direction still misses the brief.
For step 3, we kept the current light while changing the cup:
Recolor only the ivory ceramic mug, including its handle, to matte terracotta red. Keep its surface texture, shape, handle, size, and position.
Preserve the sage-green tiled wall, the current warm lighting and existing shadows, the pale oak tabletop, the kraft notebook with its "FIELD NOTES" title, the cobalt-blue vase with its dried stem, and the camera framing.
Do not recolor any other object. Do not add or remove anything.
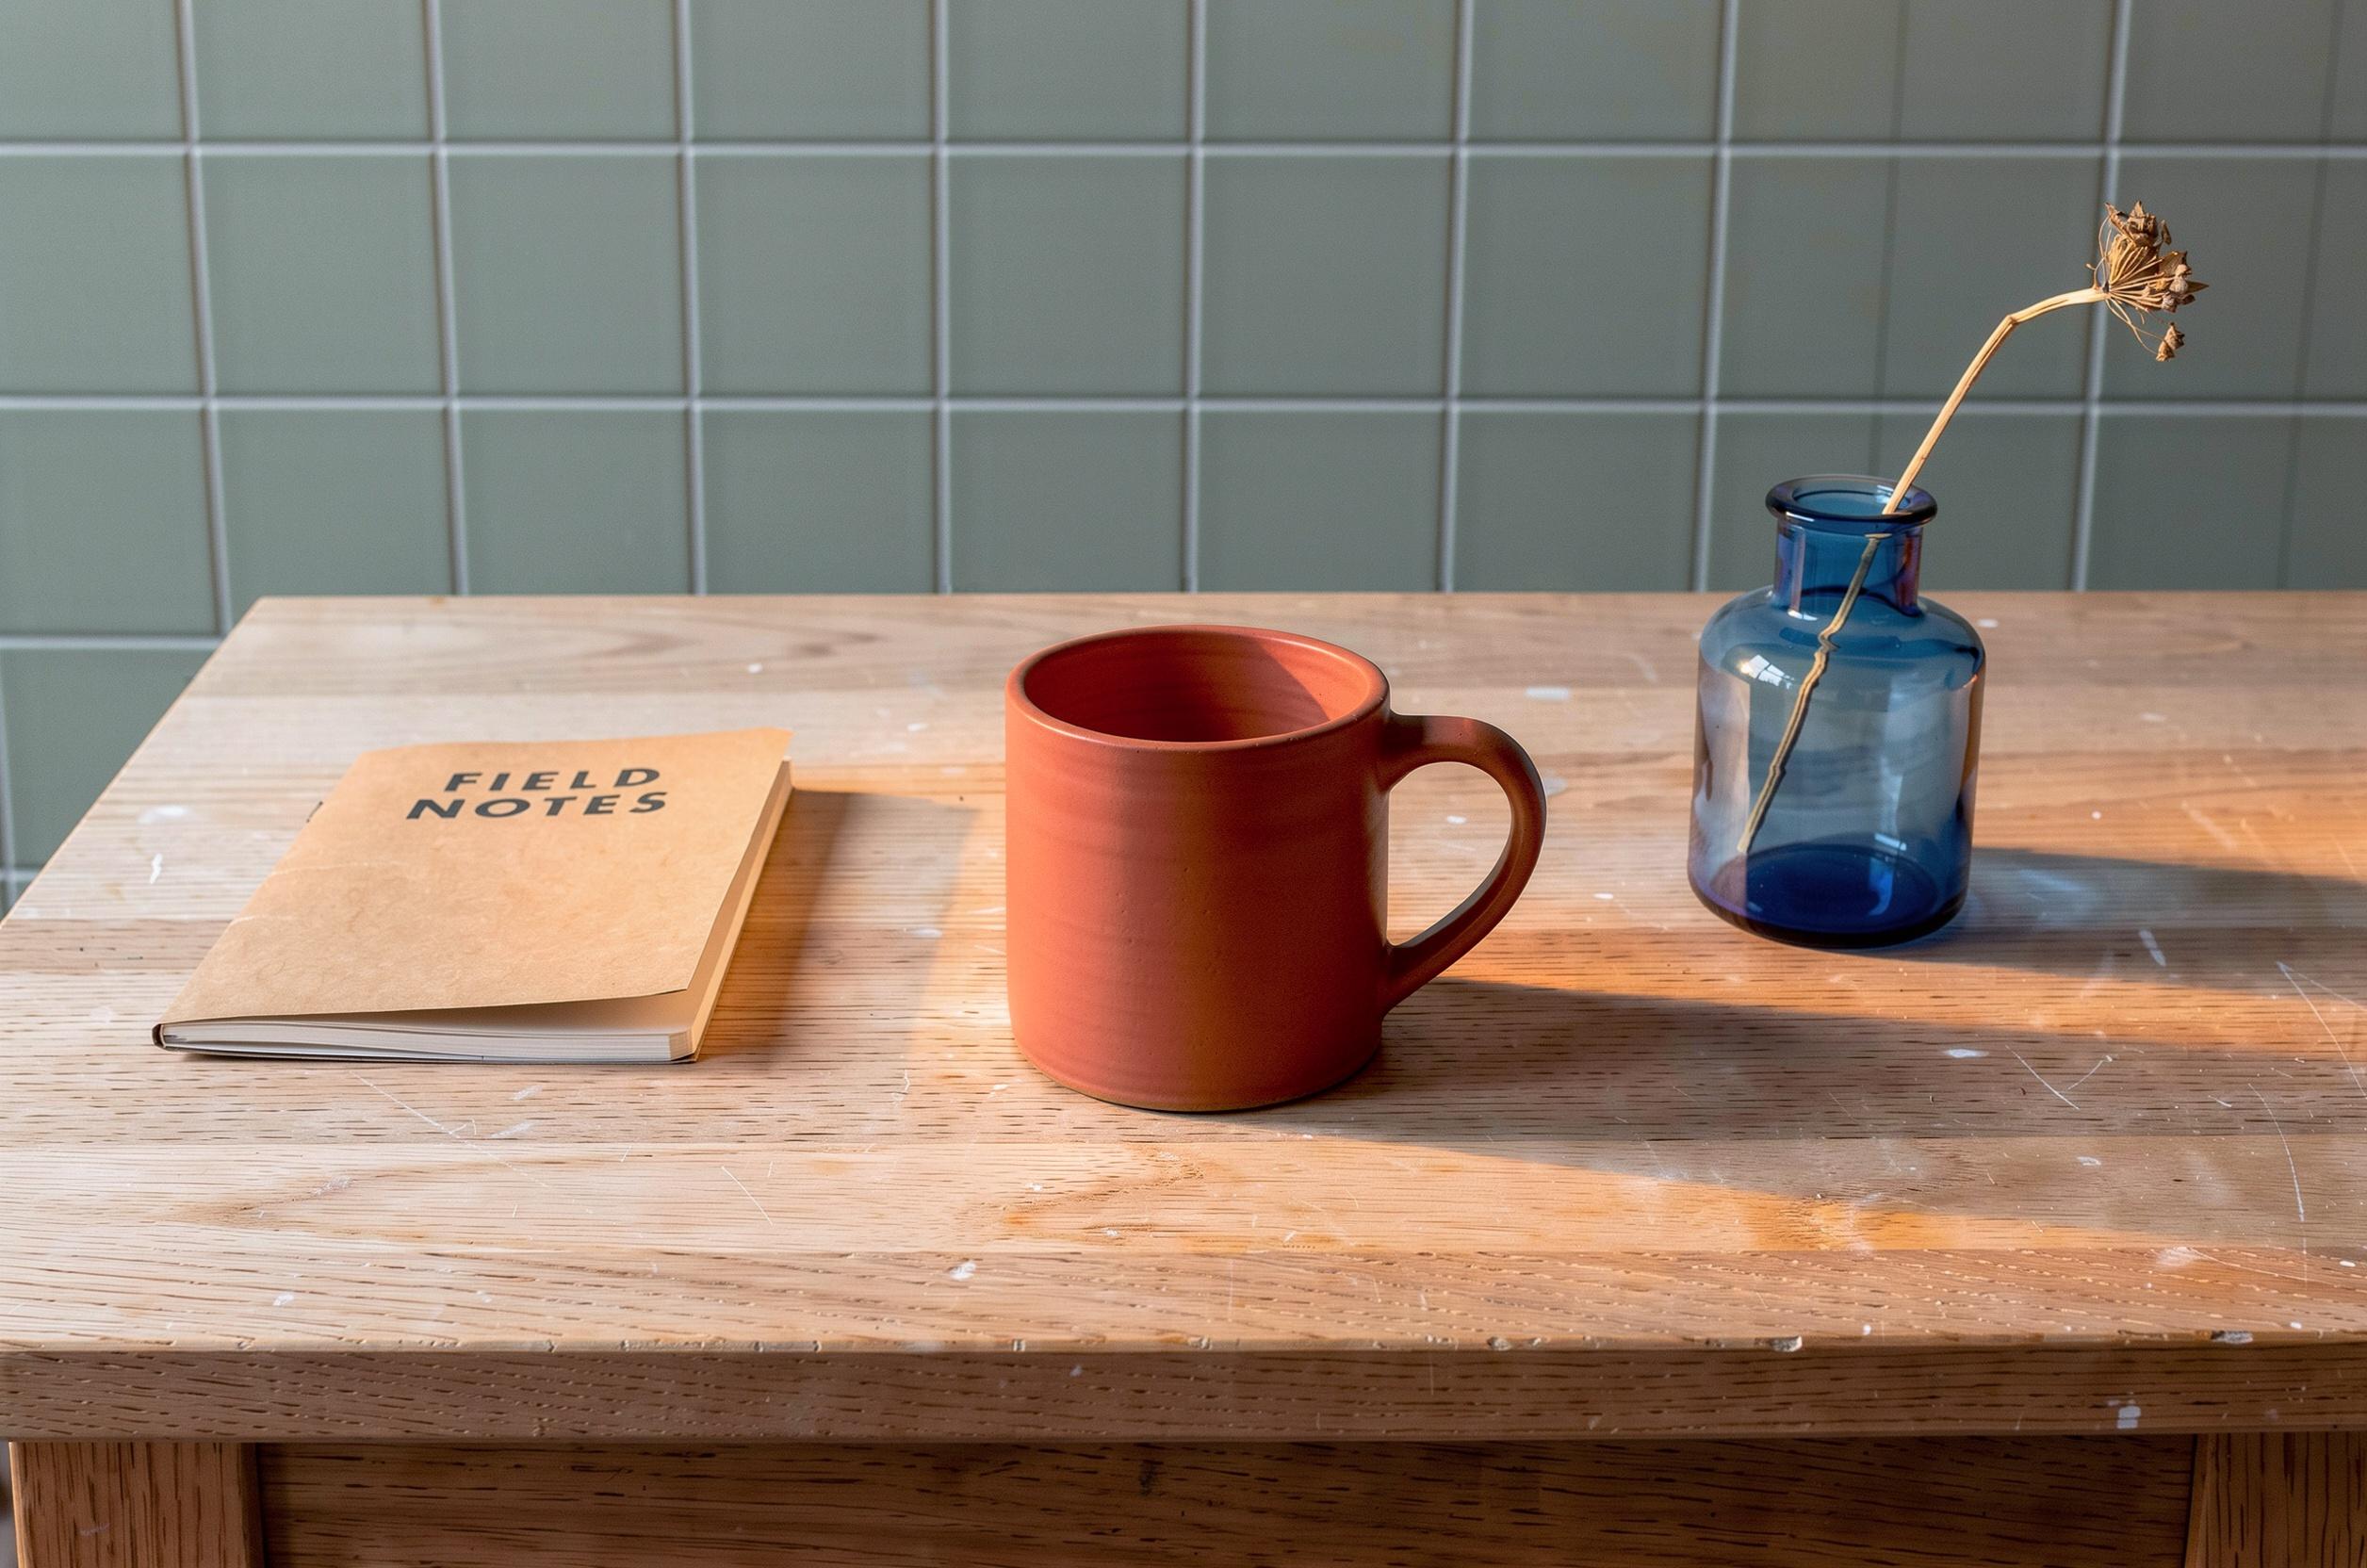
Figure 7. The third step adds the red cup and keeps the green wall and warm treatment from the previous edit.
The third edit inherited the earlier light direction because its instruction asked to preserve the existing shadows. A successful recolor does not repair a previous mismatch. Decide whether to fix that mismatch before you use the image for another step.
When should you start again from the original?
Start again when an intermediate version contains a change you no longer want, or when you need an independent option. Include the complete desired end state in the new instruction; otherwise the original has no reason to contain the green wall or warm light from your other branch.
Desired result | Continue from the latest edit | Start from the original |
|---|---|---|
Green wall and warm light | Connect the green-wall image; ask for warm light | Ask for both the green wall and warm light |
Green wall, warm light and red mug | Connect the warm green-wall image; recolor the mug | Ask for the wall, light and red mug together |
We also made both cumulative versions directly from the original. These were the prompts:
Make these two changes to the original image: replace the light-gray plaster wall with a muted sage-green tiled wall, and change the lighting to warm late-afternoon sunlight entering from the right, with longer soft shadows falling to the left of the objects.
Keep the pale oak tabletop, ivory mug and its handle, kraft notebook with its "FIELD NOTES" title, and cobalt-blue vase with its dried stem.
Preserve the objects' shapes, positions, sizes, materials, and the camera viewpoint. Do not add or remove objects.
Make these three changes to the original image: replace the light-gray plaster wall with a muted sage-green tiled wall; change the lighting to warm late-afternoon sunlight entering from the right, with longer soft shadows falling to the left of the objects; and recolor the ivory ceramic mug, including its handle, to matte terracotta red.
Keep the pale oak tabletop, kraft notebook with its "FIELD NOTES" title, and cobalt-blue vase with its dried stem. Retain the mug's surface texture.
Preserve all objects' shapes, positions, sizes, and the camera viewpoint. Do not add or remove objects.
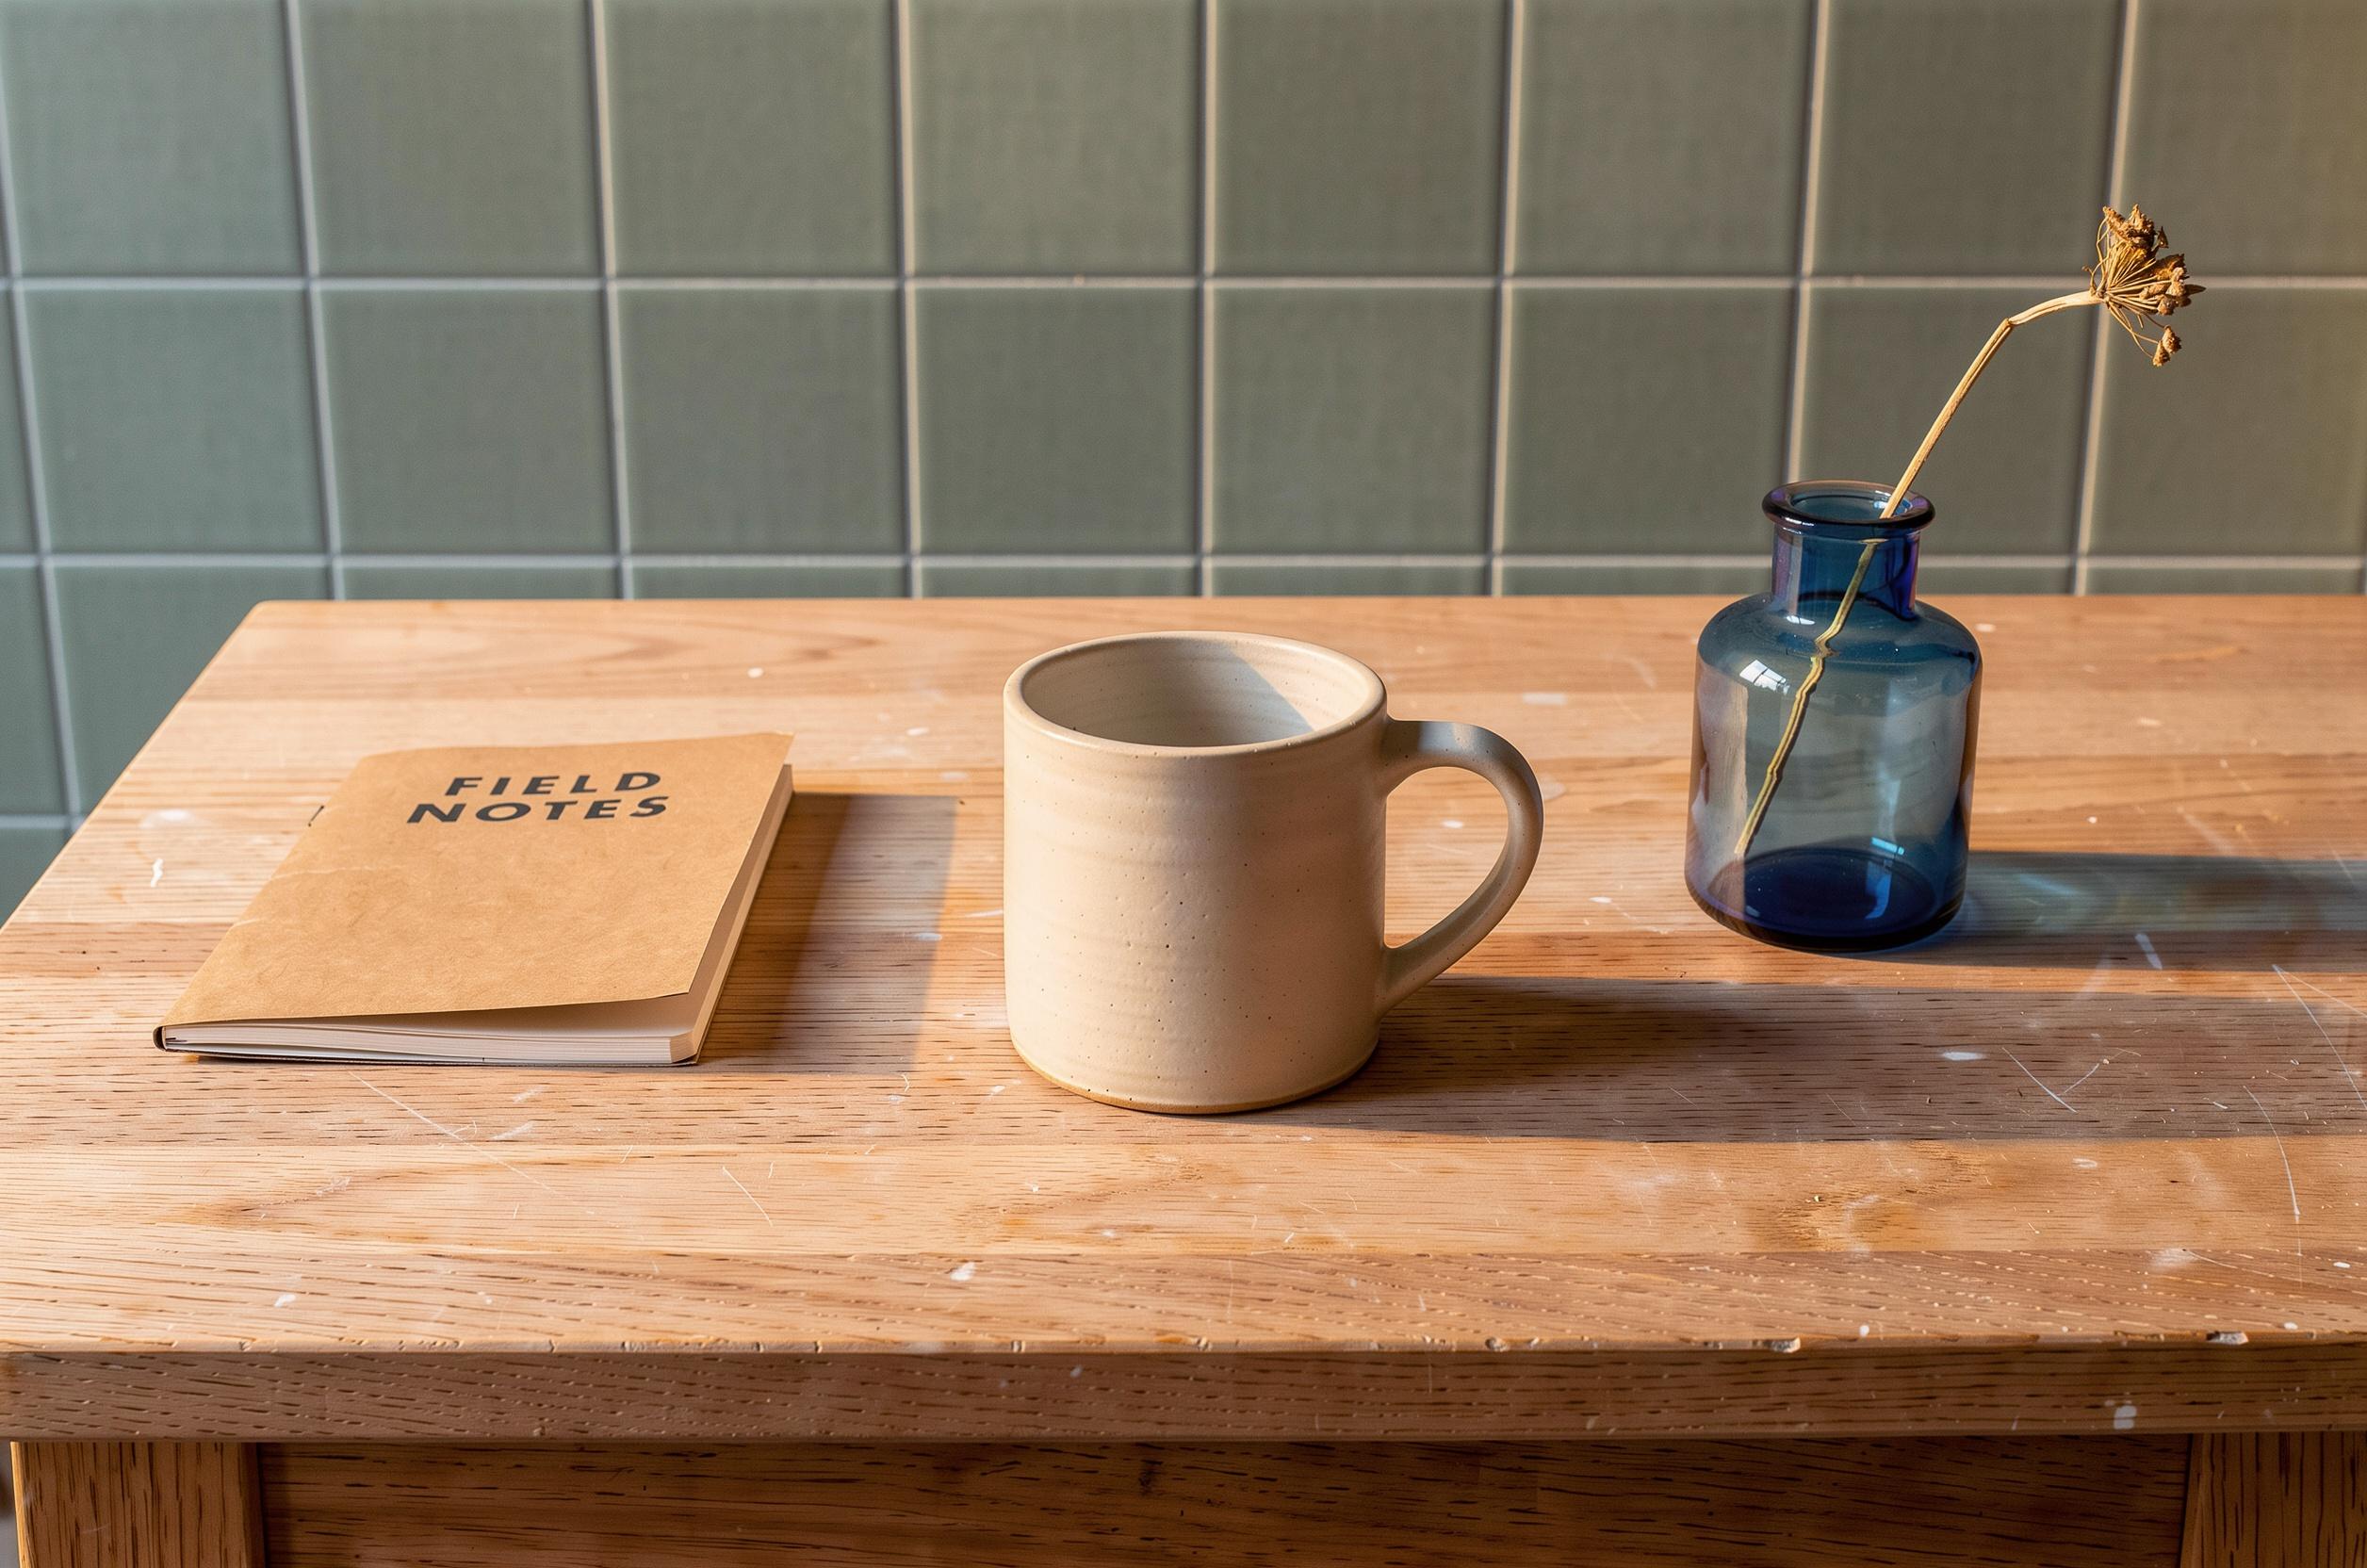
Figure 8. Starting from the original with two changes produces tile and warm light, while keeping the cup ivory.
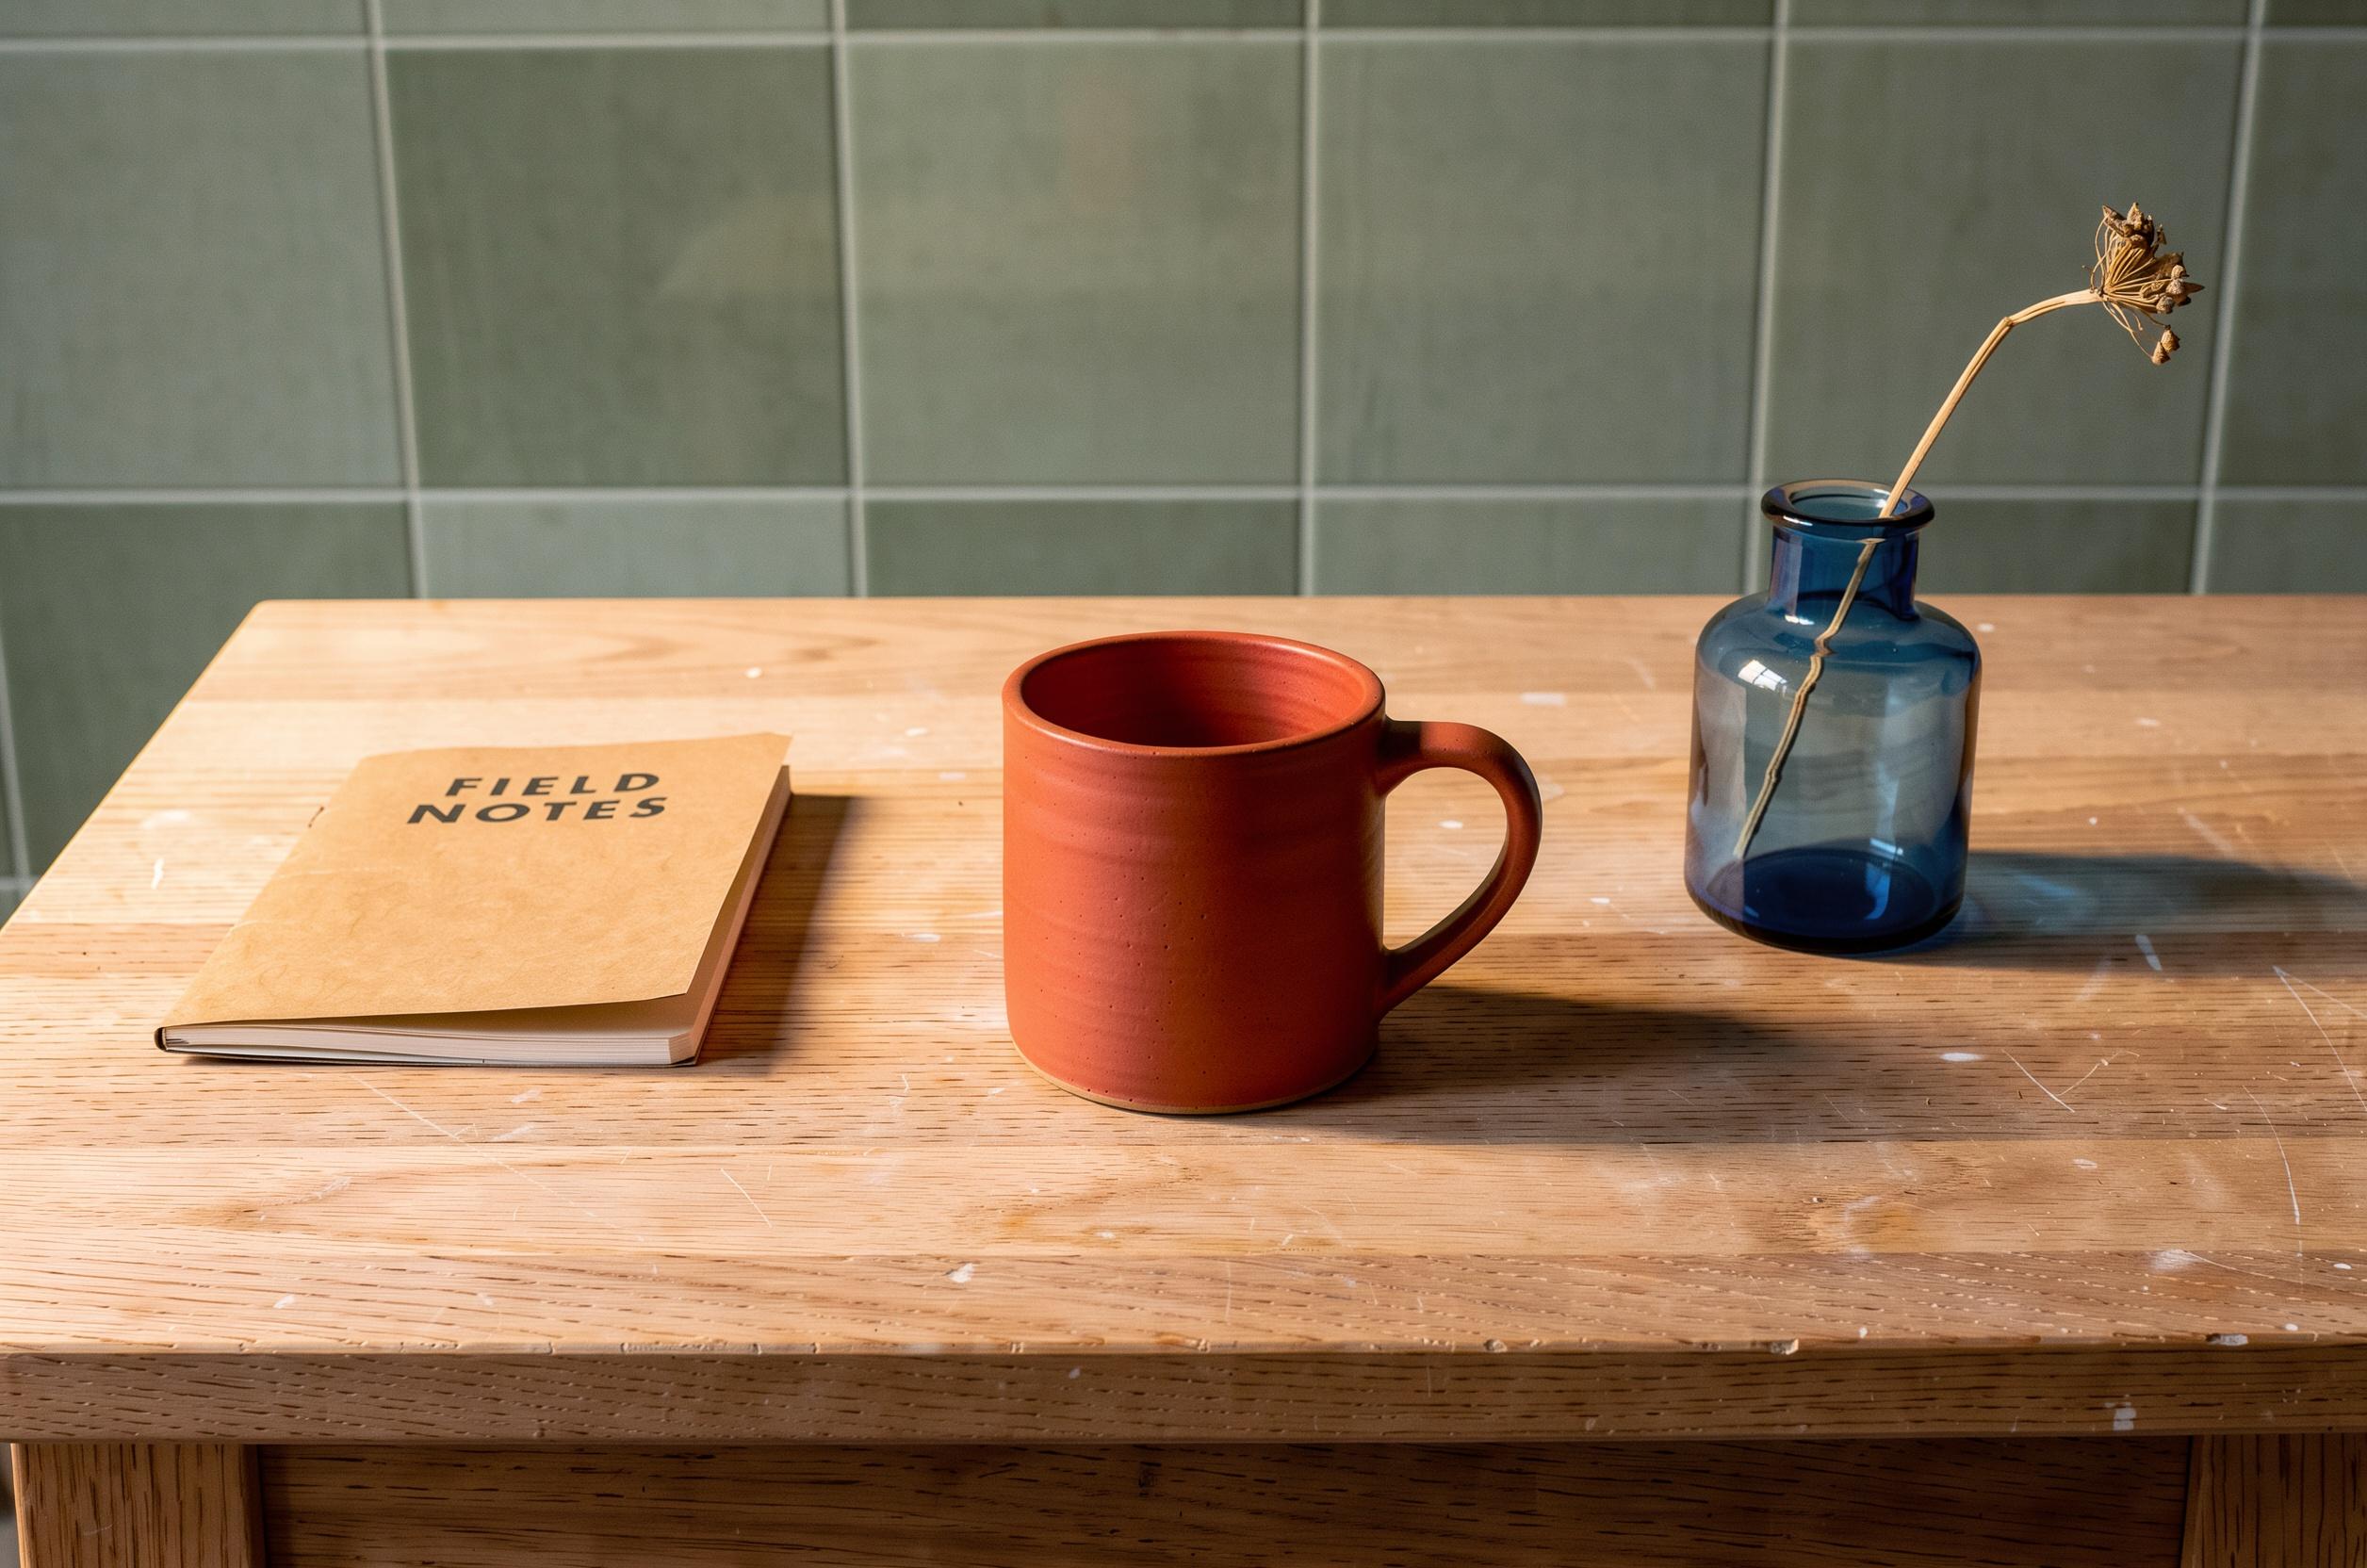
Figure 9. Starting from the original with all three changes produces tile, warm light and a red cup. The requested shadow direction is still absent.
The green tile, warm light and red mug appear in both versions, but the shadows still run the wrong way. Returning to the original helped us build a fresh option; it did not fix that lighting problem. Continue from the version whose details you want to keep, and address the shadows before making another edit.
Fix a contradictory input before rewriting the scene
One branch connected the green-wall edit while the prompt still said to keep the original gray wall. The output returned to gray. That conflict came from the input and wording together, so simply adding stronger preservation language would not identify the intended wall.
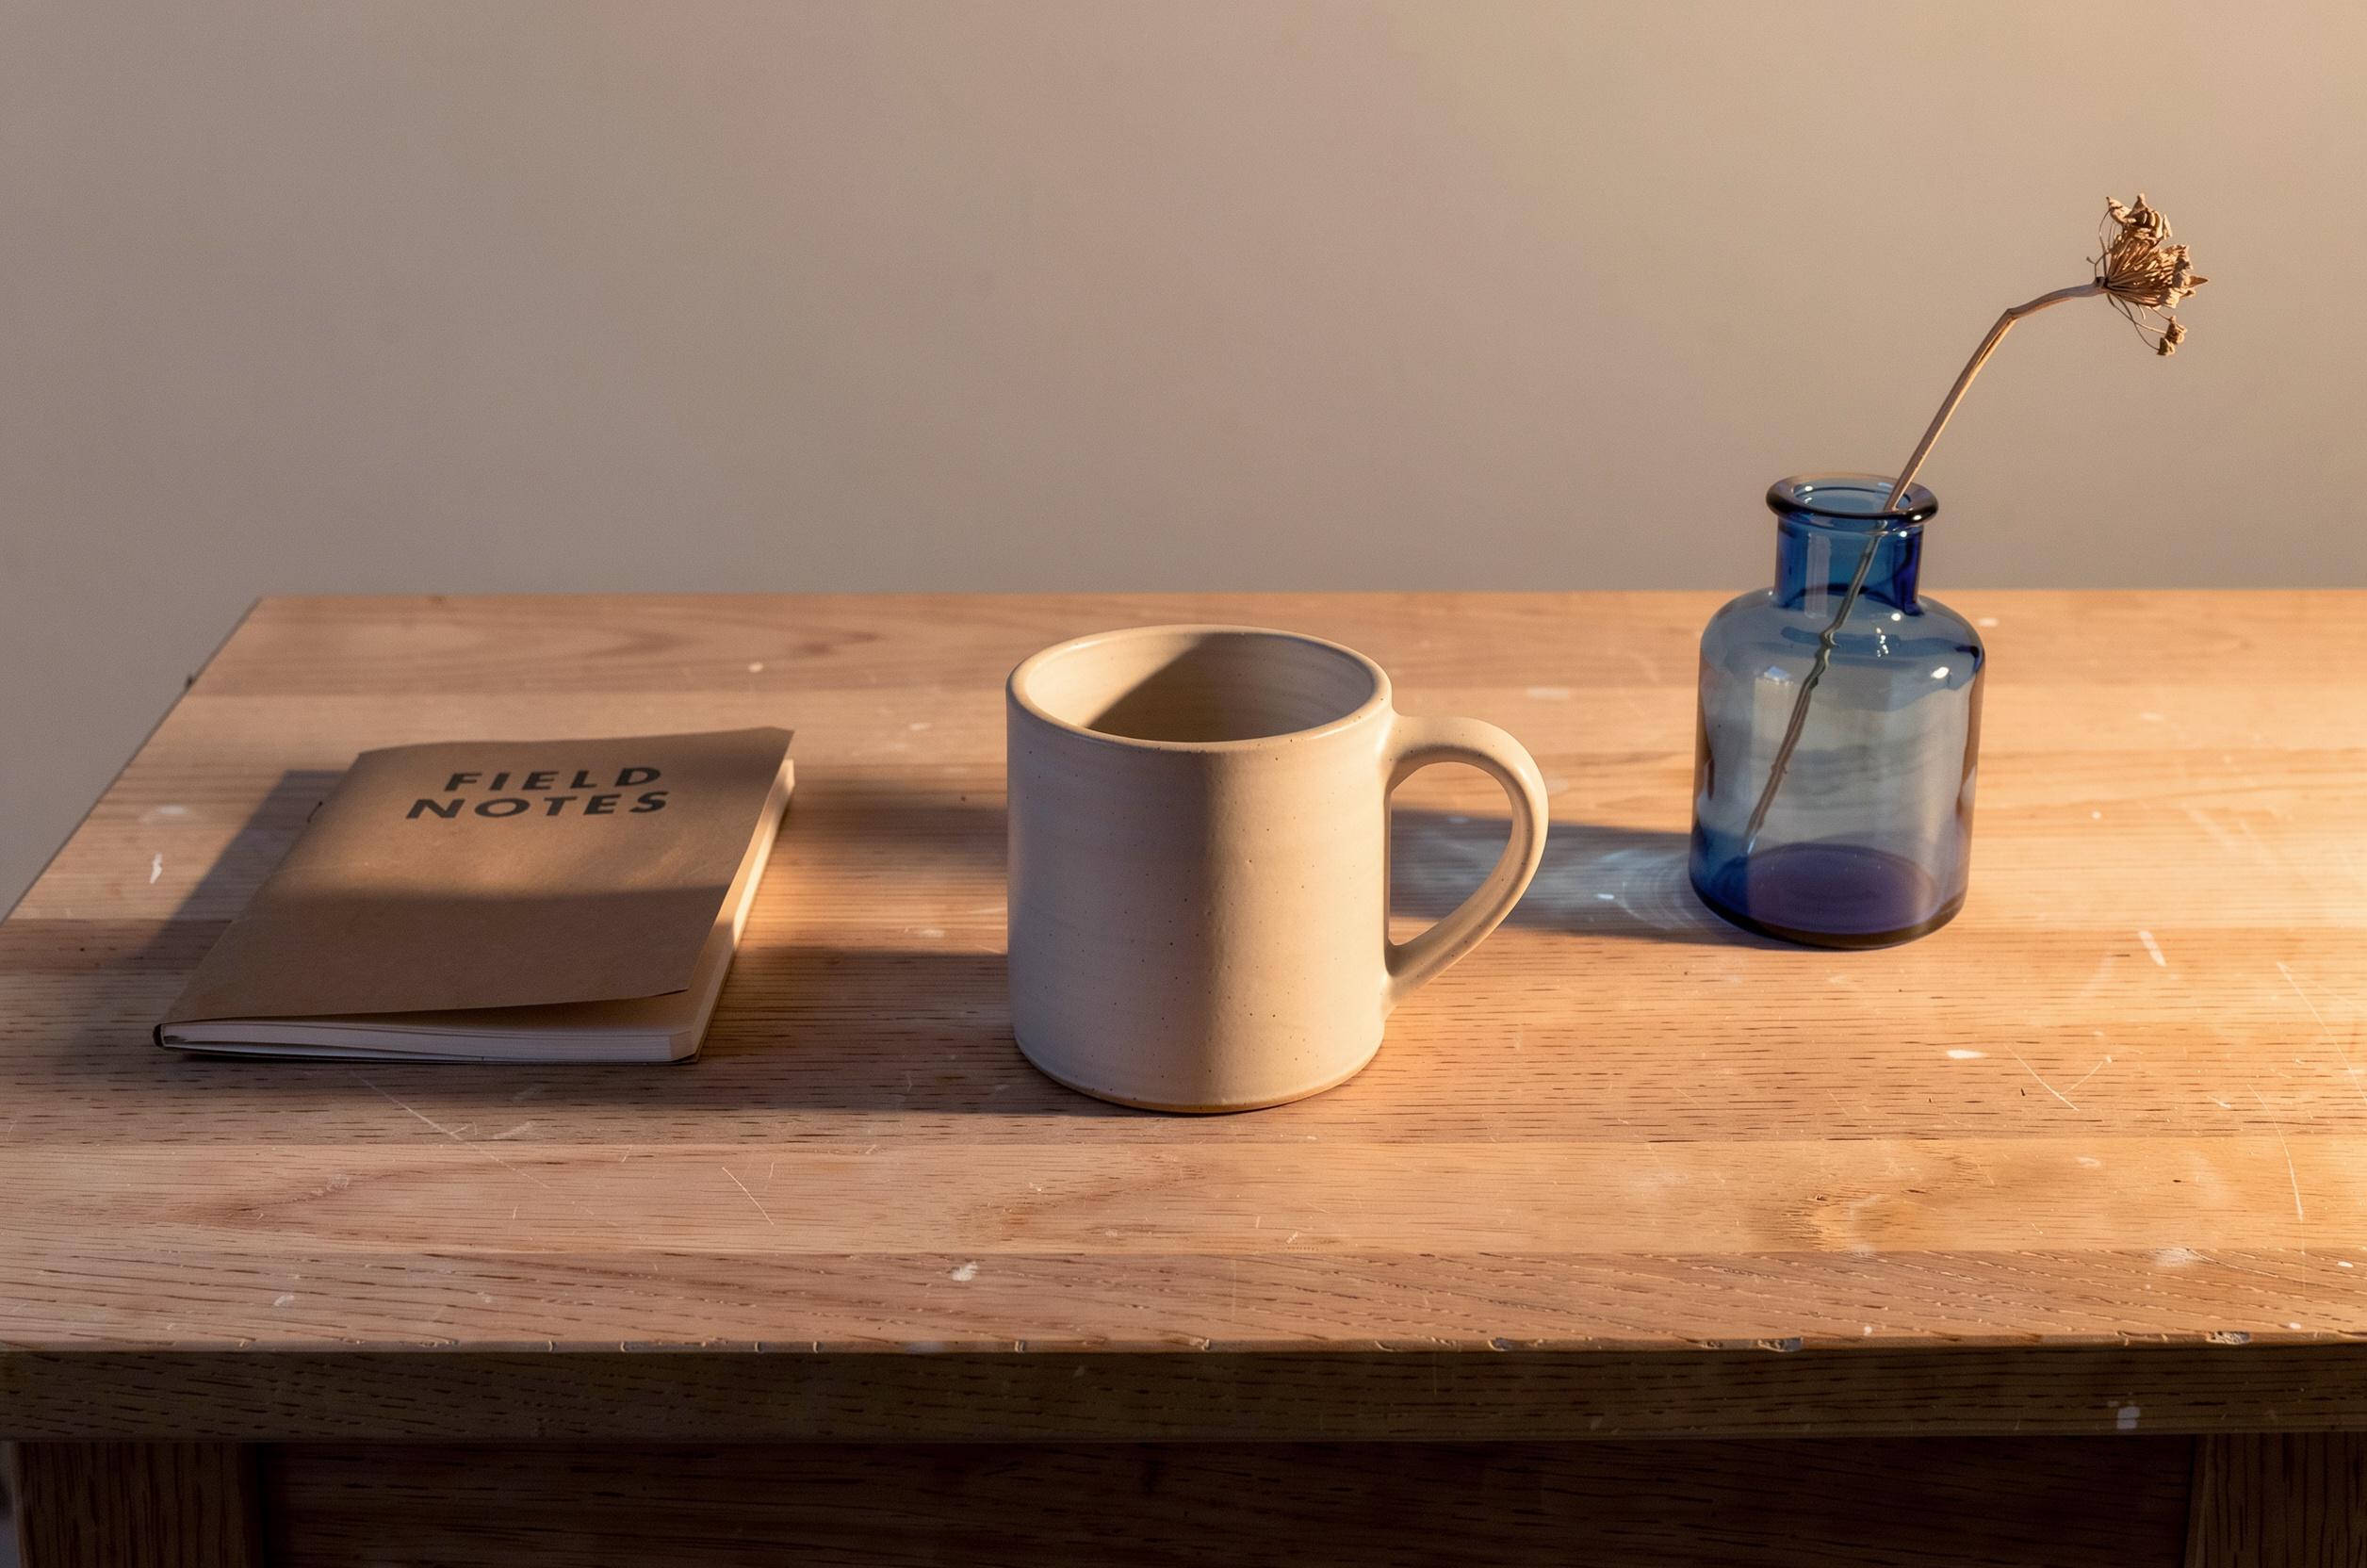
Figure 10. A green-wall input paired with an instruction to keep the original gray wall returned a gray-wall image.
Before another generation, inspect the reference thumbnail, read every “keep” sentence and remove contradictions. Generate, open the full result, compare the target and neighboring details, then download the selected version. Keep the source beside it so a later edit can start from either point.
FAQ
Do I need a mask for these FLUX 3 edits?
For the workflow shown here, connect one reference image and describe the change in text. You can follow these steps without drawing a mask.
Does “keep everything else” preserve every pixel?
Treat it as an instruction, not a guarantee. Inspect the objects, text, texture and framing you need. A recognizable scene can still contain small changes.
Why did the wall disappear in an edit?
Check the connected input and preservation text first. In our contradictory branch, the input showed green tile while the instruction asked to keep gray plaster. Make those agree before trying another version.
Is one edit with several changes better than a chain?
It depends on what you need to preserve and revise. Here, both paths created the broad scene changes and both missed the specified light direction. Use a chain when each accepted change should carry forward; use the original when you want to discard an intermediate decision.
Ready to try it on the canvas?
Open Astorie and fan your prompt across every frontier model in one workflow.