

How to Remove Flicker from Video: Causes and AI Limits

To remove flicker from video, first identify what is changing. Overall brightness pulses call for a different treatment from moving bands or a cloth pattern that shifts between frames. Watch the affected range, compare the source with the export and use the table below to choose where to start.
A brightness adjustment can steady the light while leaving a changing texture untouched. We illustrate that difference with two deliberately altered copies of a tabletop clip: one has brightness pulses, and the other has those pulses plus a moving patch of cloth. The repairs use local numerical processing; the source clip was generated in Astorie.
Remove flicker from video by identifying what changes
Watch the clip at normal speed, then step through a short affected range. Compare a static neutral area with a detailed surface. If both brighten and darken together while their edges stay fixed, start with an exposure diagnosis. If a texture crawls while the wall remains steady, a global brightness correction will not address the main defect.
Symptom | Working diagnosis | First action |
|---|---|---|
Most of the frame pulses lighter and darker | Exposure or illumination variation | Test brightness normalization on a duplicate |
Bands move through recorded footage | Interaction of lighting and camera readout or shutter | Check capture settings; test a suitable banding repair |
Cloth, skin or lettering changes locally | Temporal texture or structure instability | Inspect the affected region; repair or replace that range |
Edges shimmer only after export or scaling | Resampling, compression or fine-detail issue | Compare source and export at native size |
Brightness and texture both vary | Mixed defects | Treat and evaluate them separately |
Treat the table as a starting diagnosis. You may need the original capture settings or export history to explain a recorded defect. A pulsing lamp inside a generated scene does not tell you that a physical LED or camera shutter caused it.
Keep capture issues separate from AI-generated instability
For recorded fluorescent or LED lighting, consult your camera’s flicker troubleshooting guidance. Panasonic’s examples describe shutter and Flicker Decrease options for particular models. Check which controls your camera provides before reshooting.
If you can reshoot recorded footage, test the actual camera and lights together. For a generated shot, inspect the image changes directly: camera capture settings cannot repair a pattern that is being redrawn between frames.
For existing footage, first decide whether the affected range is needed. Retain usable material, compare the defect at matching times and choose a narrowly scoped treatment. Another generation may create different content as well as changing the defect; review it as a replacement candidate.
Compare brightness repair with a changing cloth pattern
Our source is a white pitcher on blue-and-white checkered cloth, generated with Seedance 2.5, Draft, Omni, 16:9, 720p and 5s. We used a broadly stable source so the added brightness and cloth changes would be easy to separate.

Figure 1. The starting clip uses Seedance 2.5, Draft, Omni, 16:9, 720p and 5s. The comparison defects are added afterward.
The original tabletop clip, before the added brightness and cloth changes.
We added global exposure variation to one copy. A second copy received the same variation plus a small horizontal shift in part of the cloth. Because both start from the same frames, you can compare how a brightness-only treatment affects each problem.
Try a brightness-only treatment
1 Keep the source and define the usable range
Work on a copy and keep the original timing. Choose a short interval with a clear defect so you can compare the same moment before and after treatment.
These visual examples keep the source at 1280 × 720 and 24 fps for about five seconds. The processed comparisons contain no audio; keep your approved soundtrack for the final edit.
2 Pick a stable area for measurement
For a locked-off shot, choose a neutral area that should remain steady, away from moving objects, reflections and clipped highlights. A wall patch works in this example. If the camera moves, track the same surface rather than measuring whichever content enters a fixed rectangle.
Keep the reference patch consistent across the affected interval. An intentional change in scene light should not be flattened simply because the brightness value changes.
3 Estimate brightness in a consistent working space
For our local processing, we measured the wall’s average luminance in linear light using an sRGB transfer assumption. We then used the shot’s median wall luminance as the brightness target. That calculation steadies the exposure without asking a model to recreate the shot.
The adjustment applies one gain to each frame: target wall brightness divided by that frame’s wall brightness. If you use a deflicker treatment in your editing workflow, compare the corrected wall as well as highlights and moving subjects before applying it to the whole shot.
FFmpeg’s deflicker documentation describes a luminance-based filter for brightness variation. Our comparison uses the wall-based calculation above. Both address brightness; a pattern that changes position needs a different repair.
4 Compare matched frames and the full moving range
The normalized version keeps the wall much closer to the original brightness. Compare the full moving interval too: a treatment should reduce the pulse without introducing pumping, clipped highlights or smeared motion.
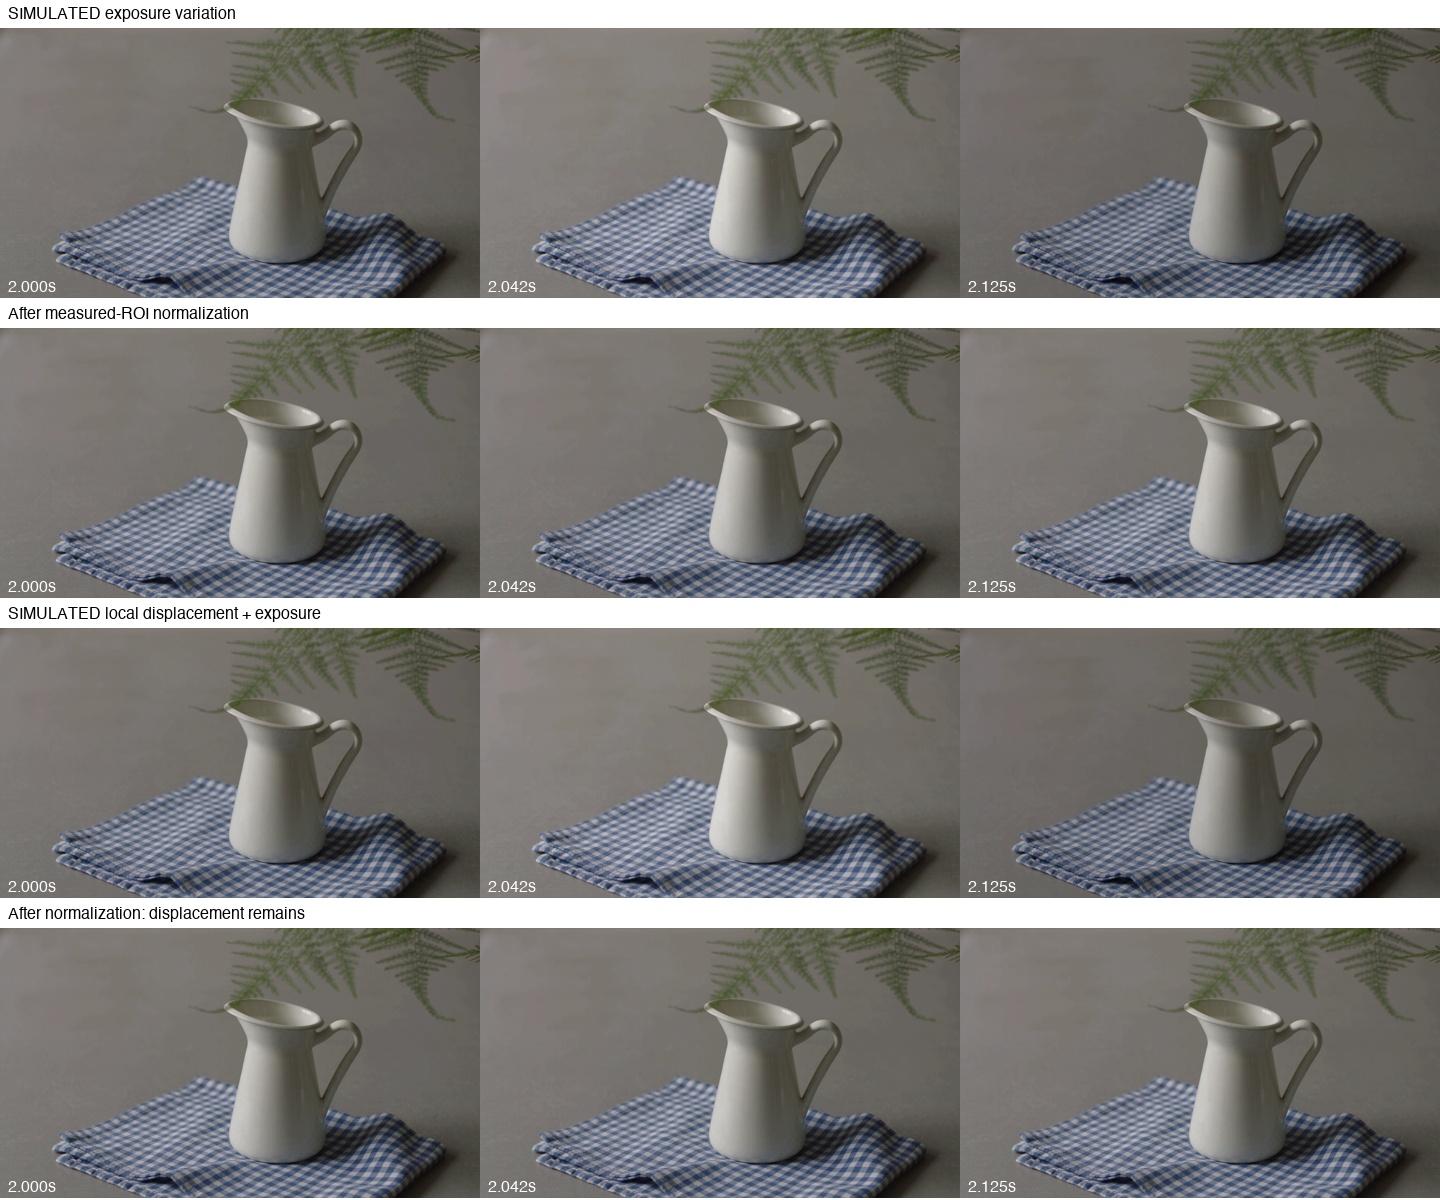
Figure 2. The four versions separate exposure pulses from cloth movement. Brightness normalization steadies the wall while the shifted cloth pattern remains.
Added global exposure pulses on the original source. This visual comparison has no audio.
Wall-based brightness normalization of the exposure-pulse example. This visual comparison has no audio.
Version | Wall luminance variation, CV |
|---|---|
Original supplied source | 0.128% |
Constructed exposure variation | 14.275% |
After measured-region normalization | 0.150% |
CV expresses variation relative to the average brightness. Here it measures the same wall patch, where lower variation is useful. It says nothing about whether the cloth, face or lettering elsewhere in a shot holds its shape.
5 Export and recheck the encoded result
Keep the source dimensions and frame rate unless the delivery brief requires a change. Reopen the export and inspect the corrected area, highlights, shadows and frame boundaries. Watch it at normal speed for pumping or smearing. Restore or retain the required audio and listen to the final master.
If the repaired wall looks steady, check the rest of the frame before accepting the treatment. A good local measurement can miss clipped highlights or a changing texture elsewhere.
Why the same brightness repair leaves unstable texture
In the second example, we deliberately shifted a small patch of cloth by up to six pixels while adding the same exposure pulses. This makes the limit of a brightness adjustment visible: the cloth can brighten correctly while its pattern still moves.
After normalization, wall CV falls from 14.271% to 0.149%, but the displaced checker pattern remains. Global gain changes brightness; it does not put the cloth pixels back in their original positions.
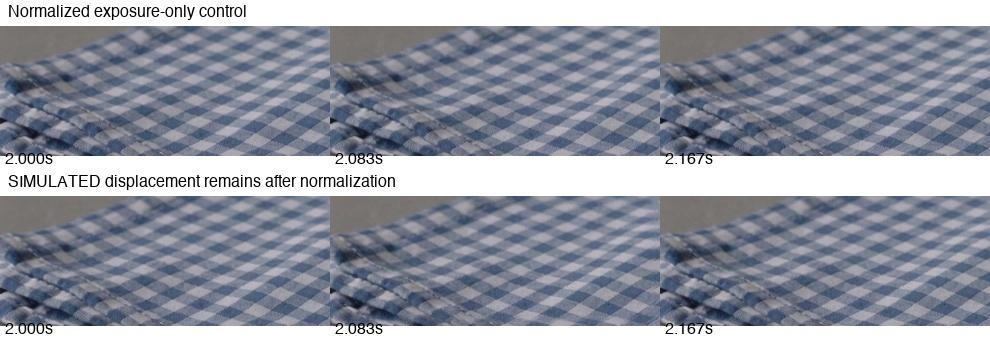
Figure 3. Closer views of the deliberately displaced cloth region after brightness normalization. Global exposure correction does not restore the moved pattern.
Added cloth movement and exposure pulses on the same source. This visual comparison has no audio.
Brightness normalized while the constructed cloth displacement remains. Audio intentionally omitted.
For a real shot with unstable fabric or lettering, first see whether a shorter usable range solves the edit. Otherwise, repair or replace the affected region or shot. If you generate a replacement, describe the surface that should stay steady and check that the new performance still fits the scene.
Choose the next treatment by what remains wrong. Brightness correction has done its job when the exposure pulse is reduced; it cannot move the displaced checks back into place.
Finish the underlying repair before upscaling
Upscaling adds output pixels; it does not establish which changing cloth pattern or letter shape was intended. Interpolation adds intermediate frames and may spread an existing error. Use either only after the underlying shot is acceptable, then repeat video quality control on the new export. If the remaining need is delivery resolution, follow the separate upscale-to-4K workflow.
Frequently asked questions
Can exposure correction remove every kind of video flicker
No. It can help brightness variation when a stable reference exists. Changing textures, geometry, moving bands and clipped information need a different diagnosis and possibly a different repair.
Does a stable wall mean an AI shot is temporally stable
No. A local measurement can miss a changing face, label or fabric region. Inspect the important objects and motion separately.
Should I regenerate a clip that is already stable
No. Keep a usable source. Apply processing only when you can identify a defect and judge whether the treatment improves it.
Ready to try it on the canvas?
Open Astorie and fan your prompt across every frontier model in one workflow.